
“We want to use the hub as our customer management system, but we don’t want to set up invoicing first. Can’t we just add customers directly to the Hub?”
Good news, now you can! We listened to your feedback and realized that yes, you should not go through all the Hullabaloo to set up a line -invoicing connection to add a client to the hub.
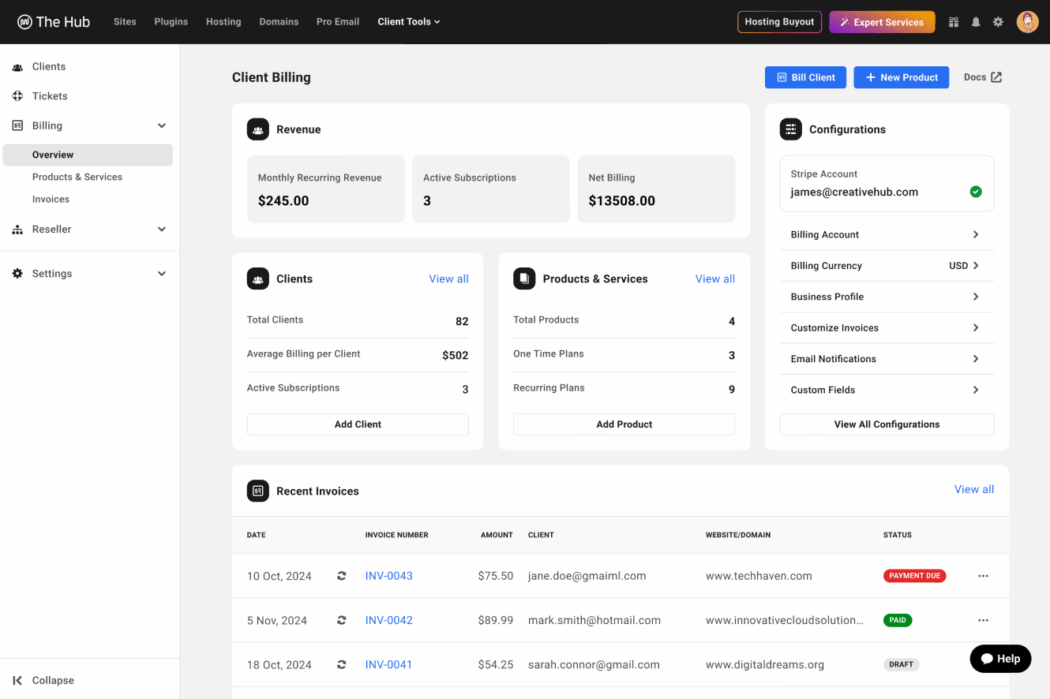
Customers and invoicing therefore officially separate and will be on its own positions! We have given the UX a makeover over and now the hub is your ultimate central dashboard to keep all your customers in one place.
Add customers, link to websites, domains or pro-emails or give them access to your white-labeled portal (or not!). It’s all up to you.
This is what we have changed:
Access to all client tools without invoicing customers via our system
We get it. You do not necessarily want to use the invoicing of the customer to keep track of customer records or to offer portal access. These functions have therefore undergone a conscious decoupling and now they are fortunately separated.
Now you can use the hub as your CRM, immediately from the bat. Of course you can still use the billing function to invoice your customers from the hub when you need it.
How to use it:
- Open the hub and go to client tools → clients
- Click Add the client and enter name and e -mail in
- The profile is made and ready to link products or to invite it to the portal
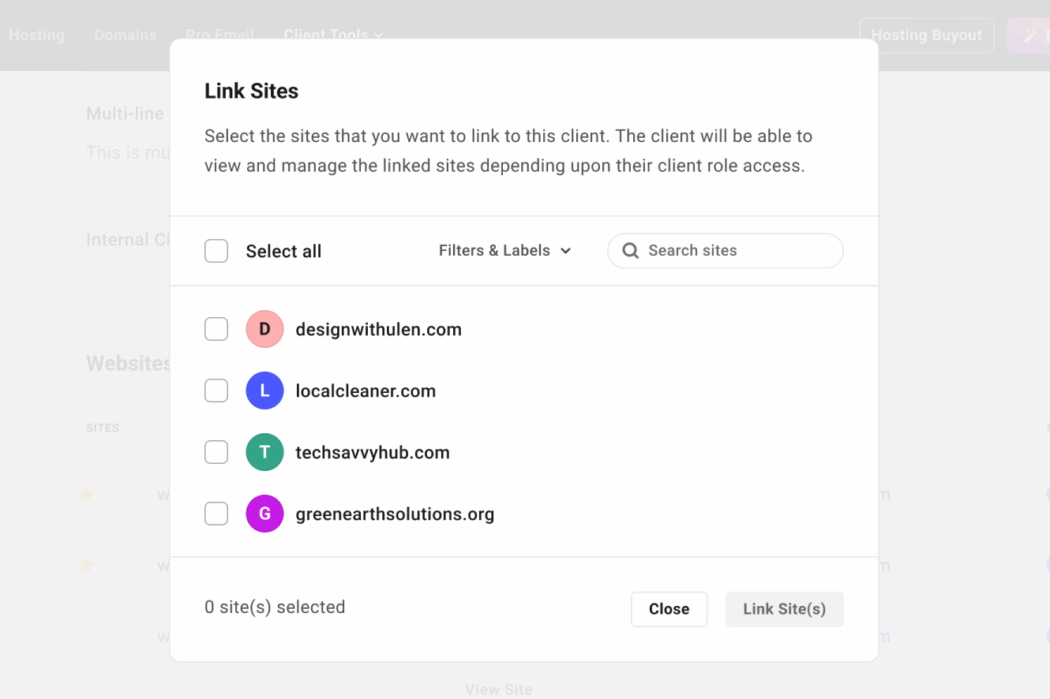
Link products directly via a client profile
Do you have problems discharging which websites, domains and pro-mail accounts are linked to which customer?
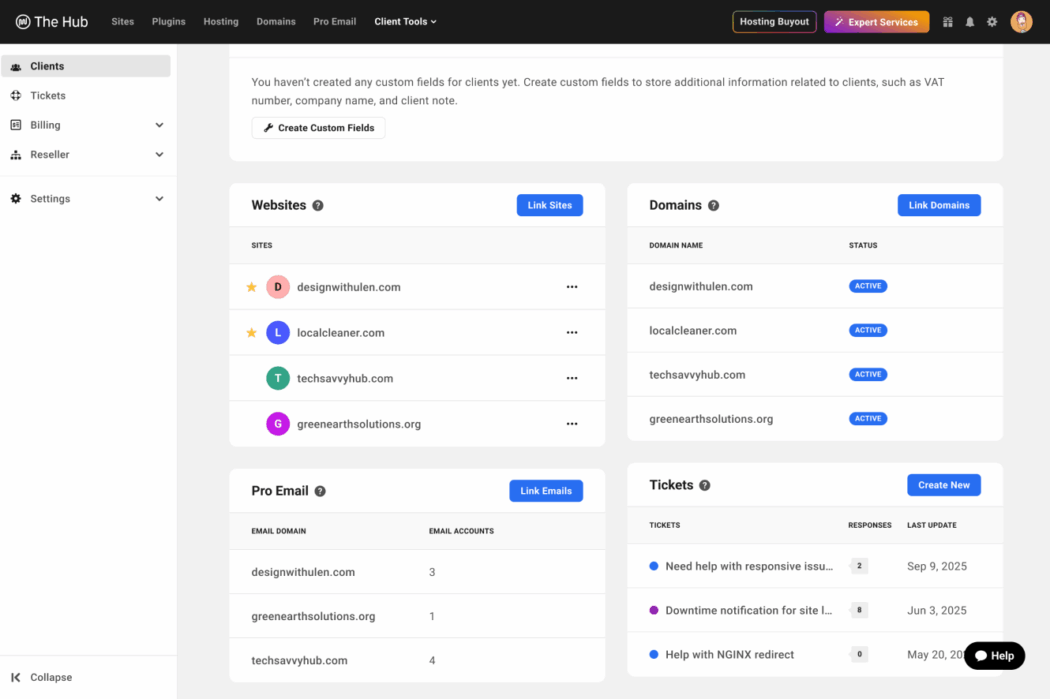
Each client profile now contains product widgets with which you can link websites, domains and pro -mail accounts to that client with a few clicks. Linking works both sides, so product pages also show the assigned client.
This gives you an immediate overview of what a customer possesses and makes management faster by reducing cross -reference and duplicate work.
How to use it:
- Open a client profile
- Select the sites, domains or professional e -mailwidget
- Choose the items you want to link
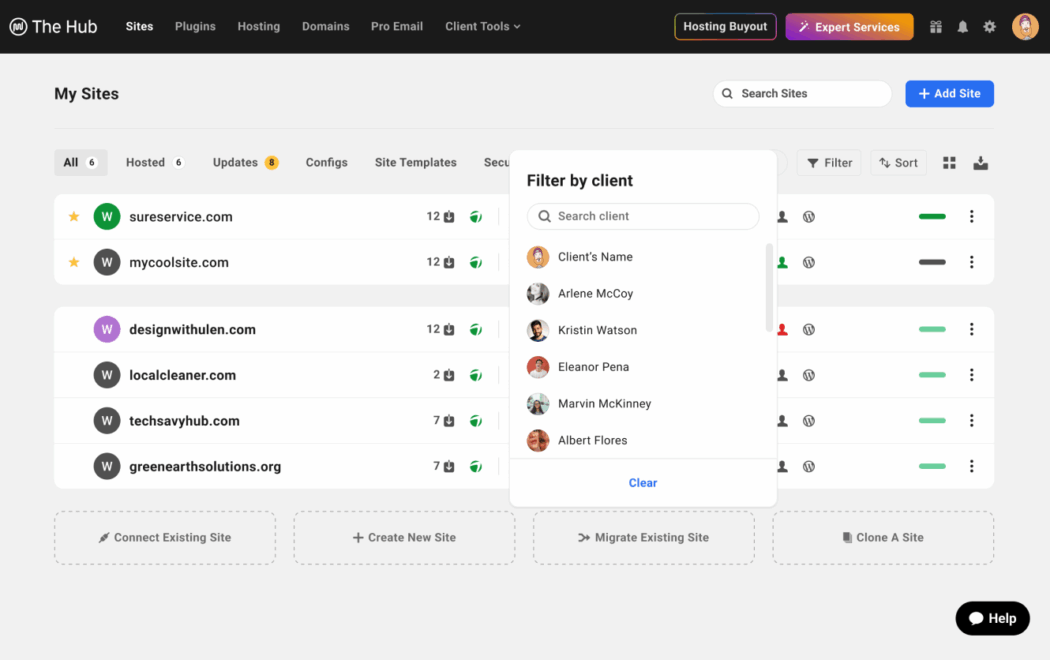
Search and sort customers with powerful filters
Do you have a lot of customers? Wow … look at you! Nice problem to have, isn’t it? 😉
To make large client portfolios more manageable, we have added powerful client filters in sites, domains and professional E -Mailla lists. Select a client and immediately view their linked assets.
Filters also work in addition to labels and sort controls.
How to use it:
- Open sites, domains or professional e -mail
- Use the client filter to select a client
- Apply extra labels to refine results
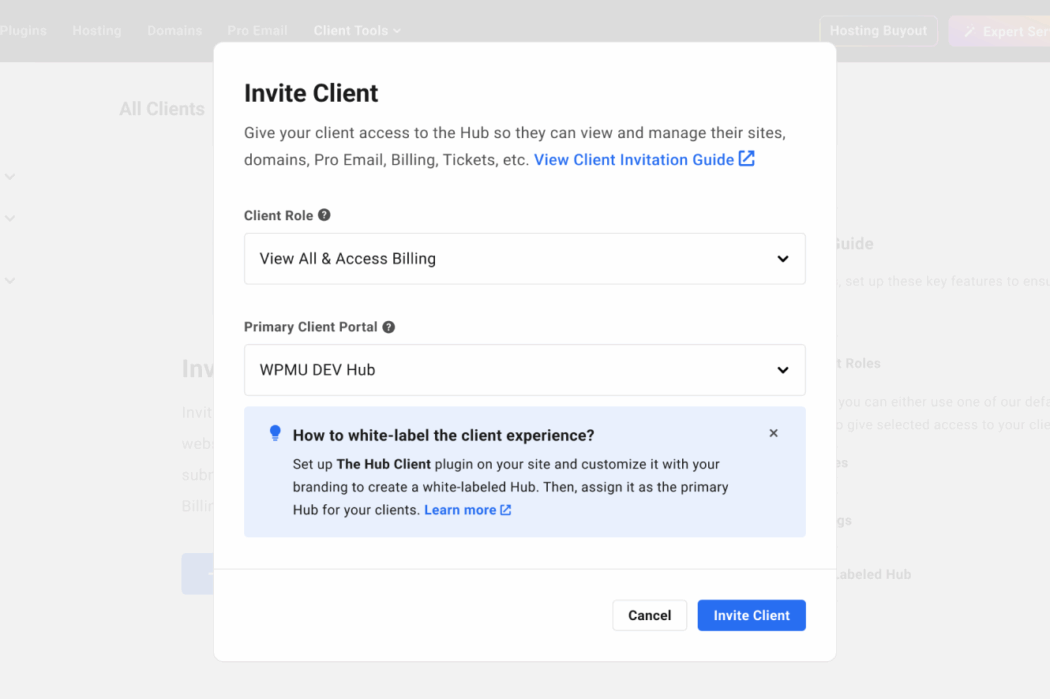
Client Portal Invitations and Witlabel Workflow
You can now invite clients to the white labeled portal directly from their profile without any billing configuration. This makes onboarding smoother and lets you offer site access or support without first making invoices.
In other words, you can immediately look like an absolute pro.
HUB settings also contain clearer guidelines for white label, so that resellers can quickly notice the portal.
How to use it:
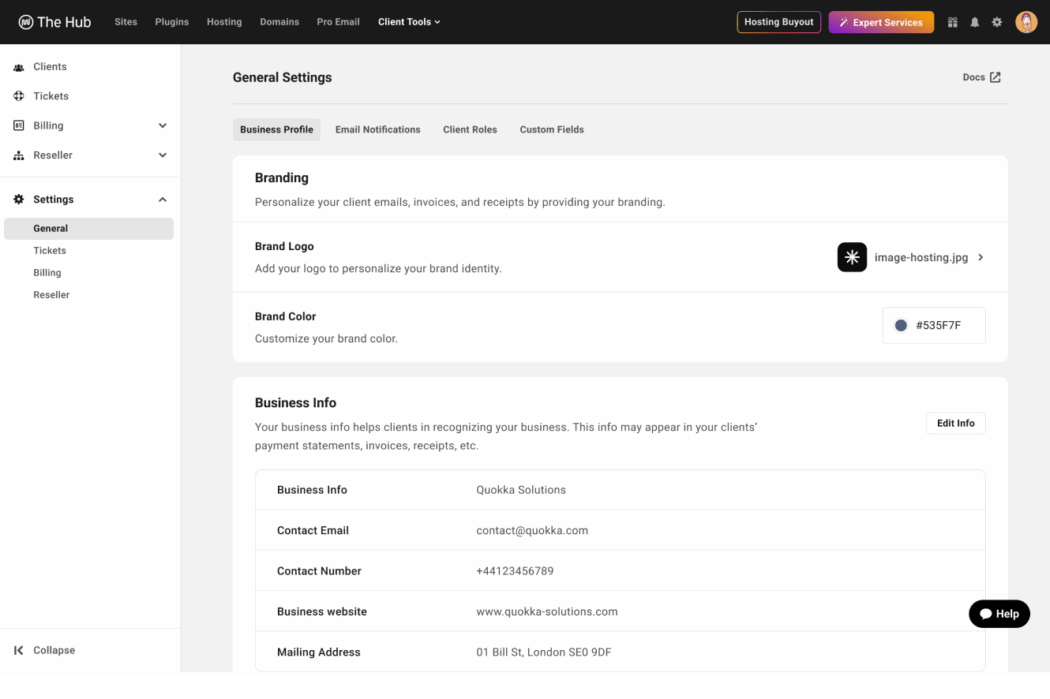
- Configure branding in client tools → Settings
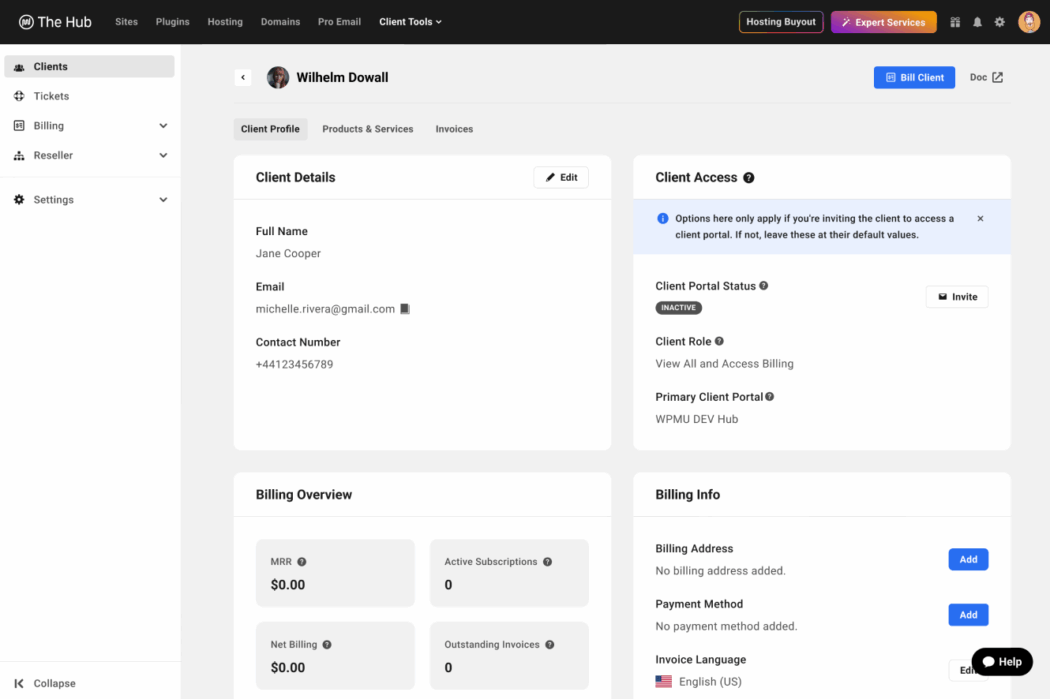
- Open a client profile
- Select the Clienttrol and Primary Client Portal
- Click Invite
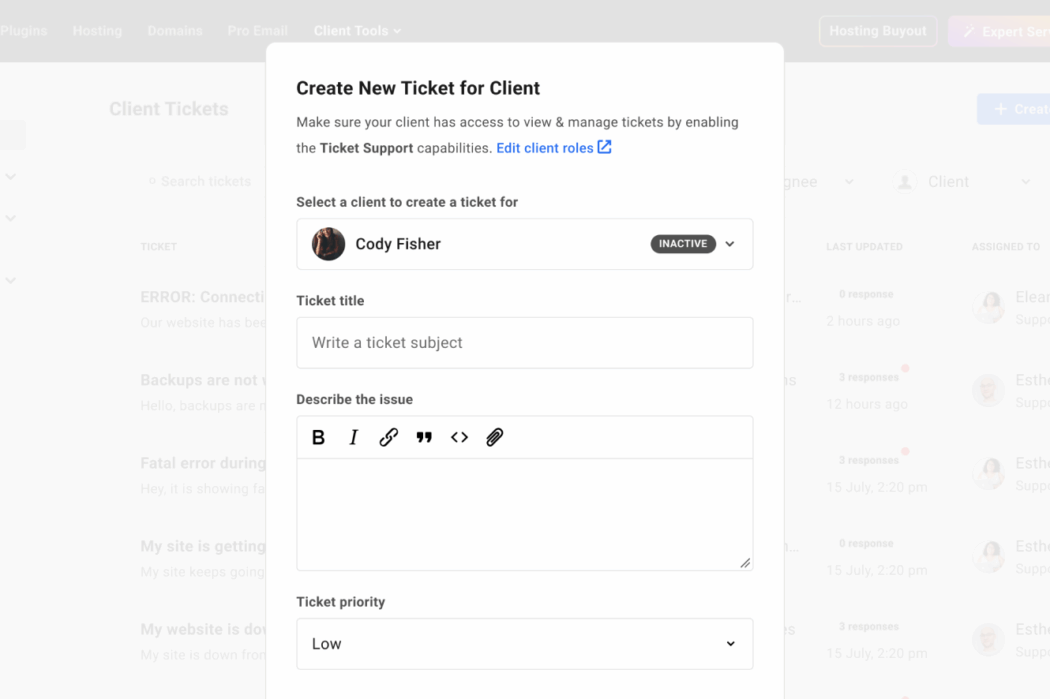
Use tickets without invoicing the customer
Tickets, our job support function, makes it easier for you to help your customers when they need your dev skills to save the day.
Premium Plan users can now use tickets without first setting the customer’s invoicing. You can easily add customers, make tickets on their behalf or give them portal access so that they can make tickets themselves.
The ticket workflow remains the same otherwise.
Centralized navigation and settings for client tools
We have also done a major renovation on the UX of this part of the hub, so let’s follow a tour of what is new:
- Navigation and onboarding are now super simple and lightning fast.
- All client -related functions are now grouped under a menu Single Client Tools, rather than under the invoicing of the client. (Is logical, right?)
- Branding settings, custom fields, customer rules, reseller and ticket preferences are consolidated in one place for simpler installation and onboarding.
How to use it:
- Open client tools in the main navigation
- Visit settings to configure branding, reports, client rules and custom fields
Widgets from client profile and product views
We have transformed customer profiles into hip dashboards that give you a complete picture of every customer. Widgets can display counts of the site, domain summaries, pro -e -mail accounts, recent invoices, adapted fields and notes, with fast actions for management.
How to use it:
- Open a client profile
- View the widgets and use fast links to manage sites, domains or e -mail accounts directly
Restored customer roles and permissions
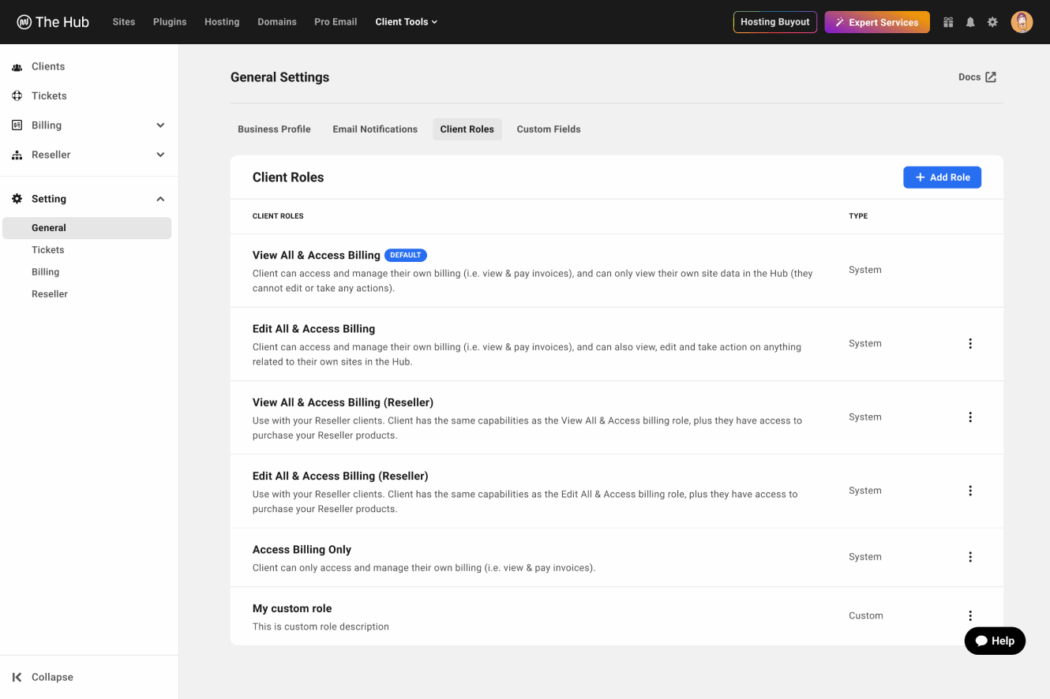
Dealing with your customer roles and permissions is also a brand new experience, and that is a lot of Easier to determine exactly who can do what.
You can now:
- Add Roll descriptions
- Double custom rolls
- Reduction groups collapse and expand
- Set a standard role for a faster assignment
This makes it easy to standardize onboarding, automate client handling and to follow important characteristics, such as invoicing IDs, contract data or technical contacts. You can build reusable templates for different client types and then duplicate and adjust if necessary. Efficiency for victory, right?
How to use it:
- Open Client Tools → Settings → Client Trolls
- Make a new role or duplicate an existing one
- Add a description and save
- Assign roles directly to a client profile
And finally, a renewed look for the invoicing of the customer
Now that the customer’s invoicing is free to be his own thing, we have also given it a glow-up!
We have improved the user interface for the invoicing overview and the invoices to match the new Widget -Layout and make invoicing even easier. Otherwise, the invoicing process itself remains the same.
A more complete client tub
Like an overly needy ex need To be together, they simply approached the use of old days.
Now that we have them free, they can do much more themselves.
With customers who are now completely on its own, the HUB is now your all-in-one site and customer management system. You can follow customers, link their assets, manage permissions, offer support and invite them to a brand portal, all without binding them to invoicing or using individual software.
This is to have more freedom to run your company in a way that works for you!
Let us know what you think in the comments below!
Visit the hub now to add your customers
#Add #customers #hub #billing #institution #required