
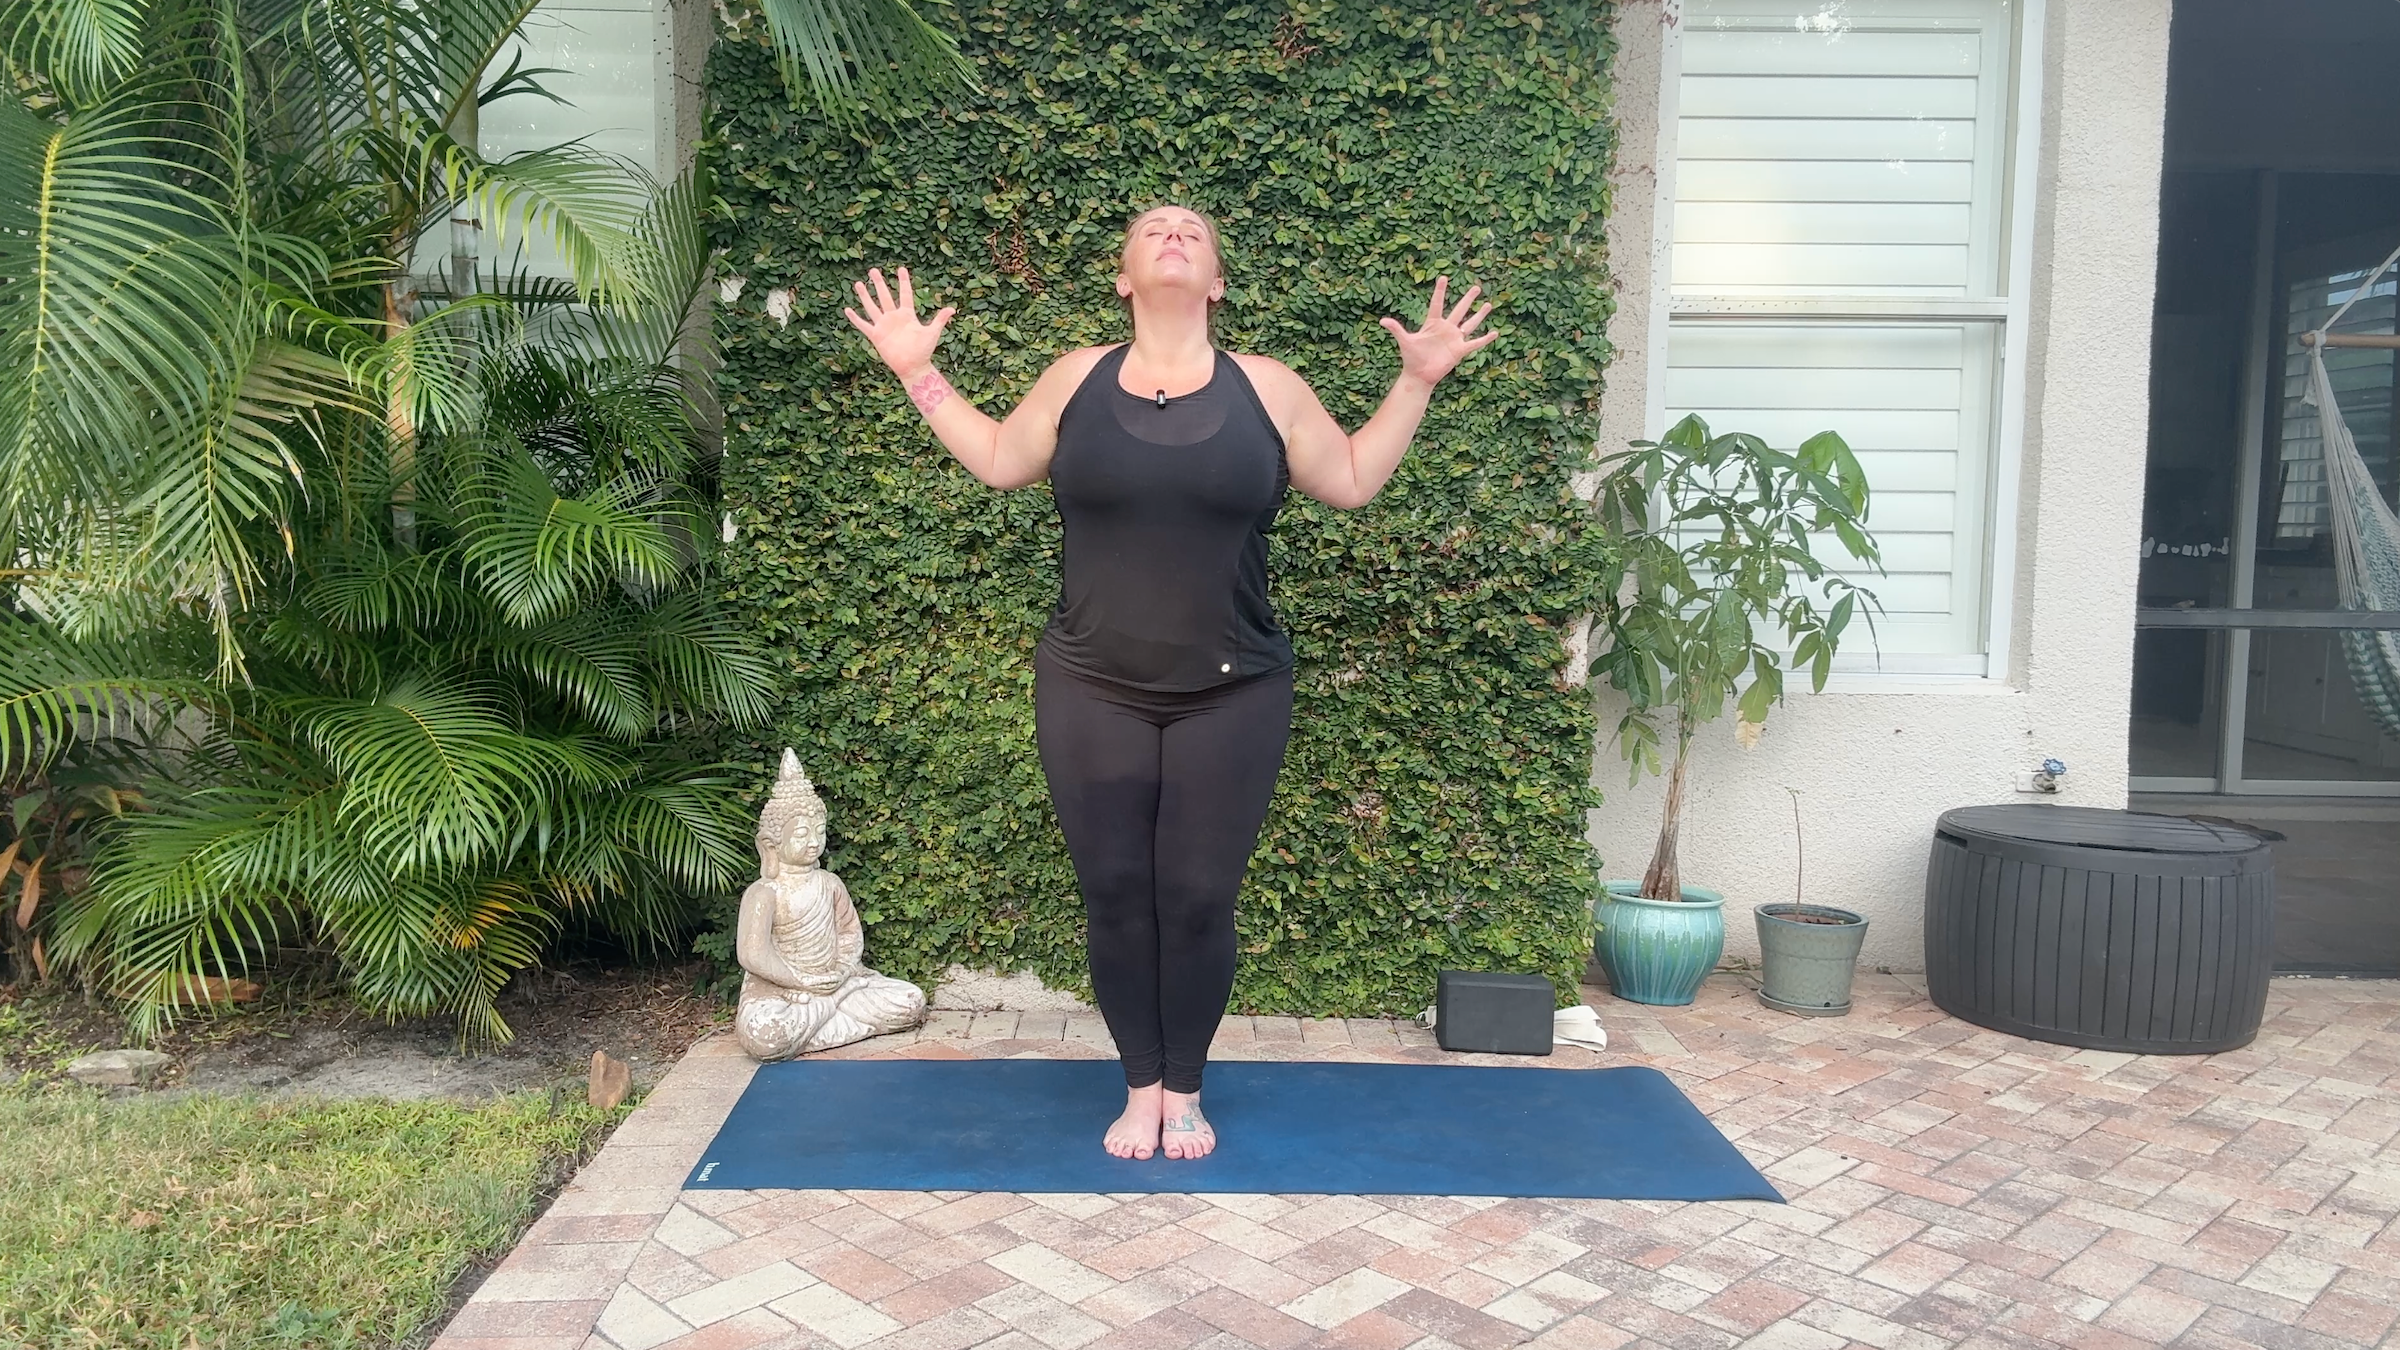
Strong arms, stable mind.
(Photo: fizkes | Getty)
Published on October 14, 2025 5:33 am
Arm strength exercises mean so much more than handstands and tight triceps. They are about cultivating stability in any pose, exercise or life situation that involves your arms, from grounding through your palms in Downward Facing Dog to the control required in Chaturanga.
As your strength grows, so does your ability to support yourself, balancing effort with ease, stability with mobility. The following arm strength exercises can be incorporated into your yoga practice or after a workout to improve the strength and stability of your arms with little extra time. Each pose challenges you dynamically and asks you to explore not only alignment, but also awareness and patience.
10 minute arm strength exercises
Building arm strength through yoga isn’t just about exercise. It’s about cultivating stability, trust and balance. Here’s how.
1. Chaturanga Pushups
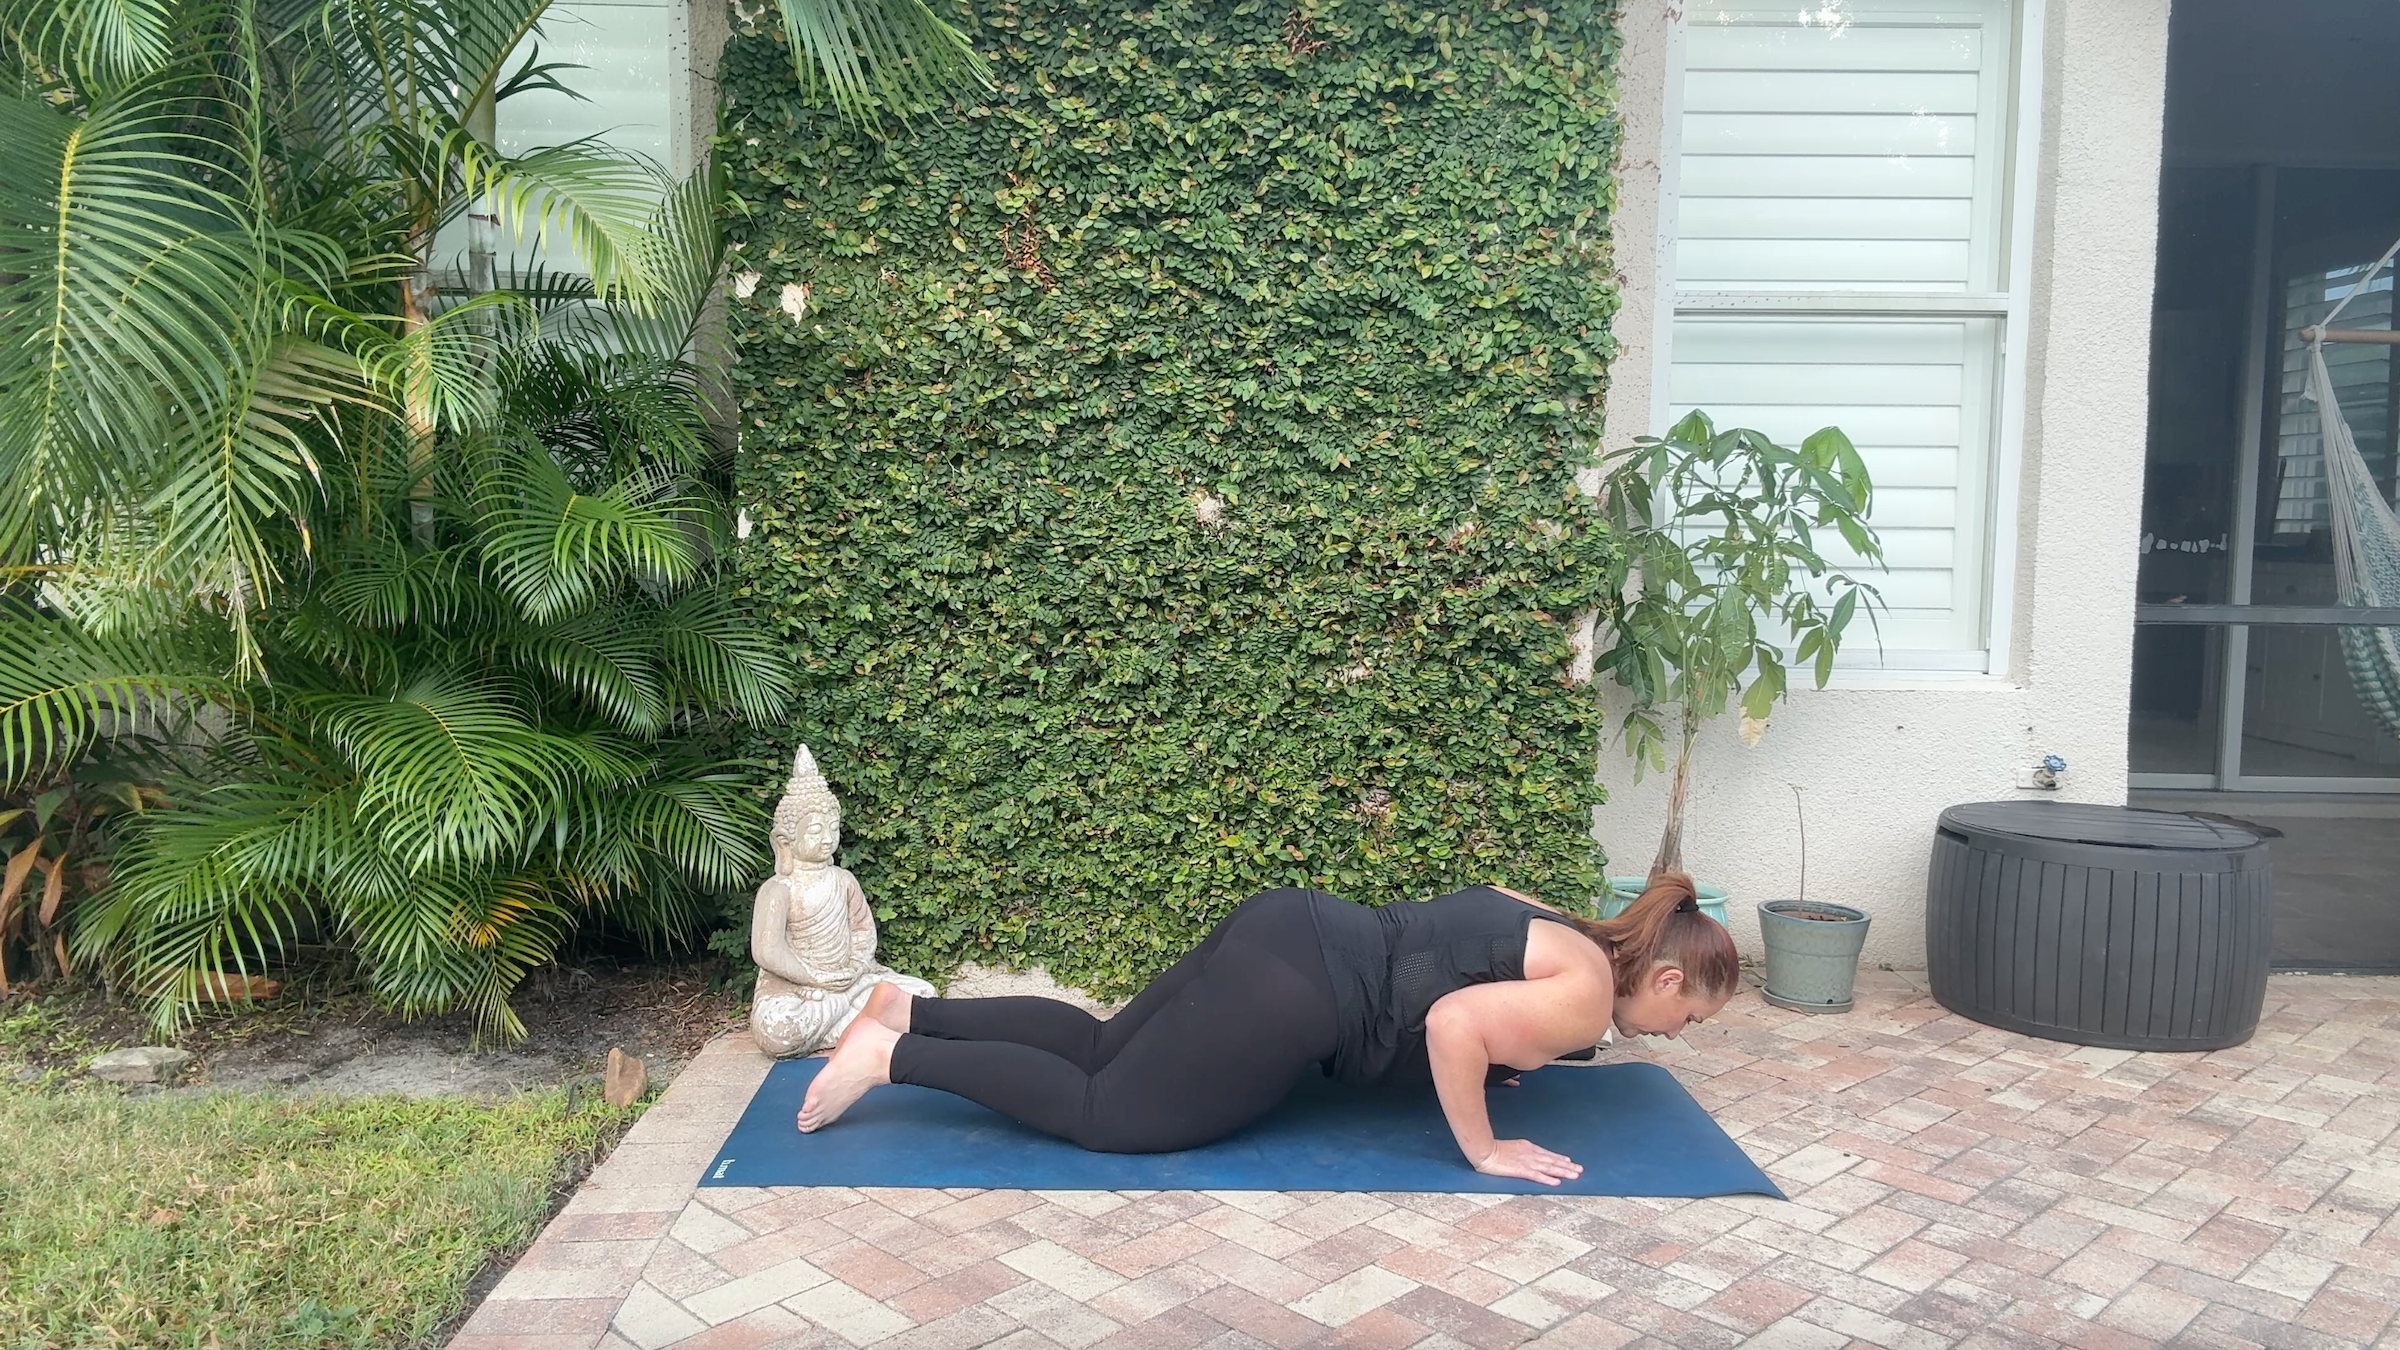
Chaturanga is one of the most complex poses in yoga and requires awareness. Good alignment of the shoulders, mobility in the wrists and strong involvement of the biceps and triceps are necessary to practice it safely and powerfully.
How:
1. From hands and knees or Plank Pose, place your shoulders over your wrists and press down firmly through your palms into the mat.
2. Slowly move your body forward until your shoulders are almost above your middle fingers.
3. Slowly bend your elbows, keeping your upper arms close to, but not necessarily touching, your side body.
4. You don’t have to drop very far to feel the triceps engage, but if your exploration drops further, remember to stop when your elbows reach your ribcage. You can use a yoga block under the sternum to remind yourself not to fall too low.
5. Press up again to the tabletop or plank and repeat 5-10 times for Chaturanga Push-Ups. Take your time.
2. Side plank
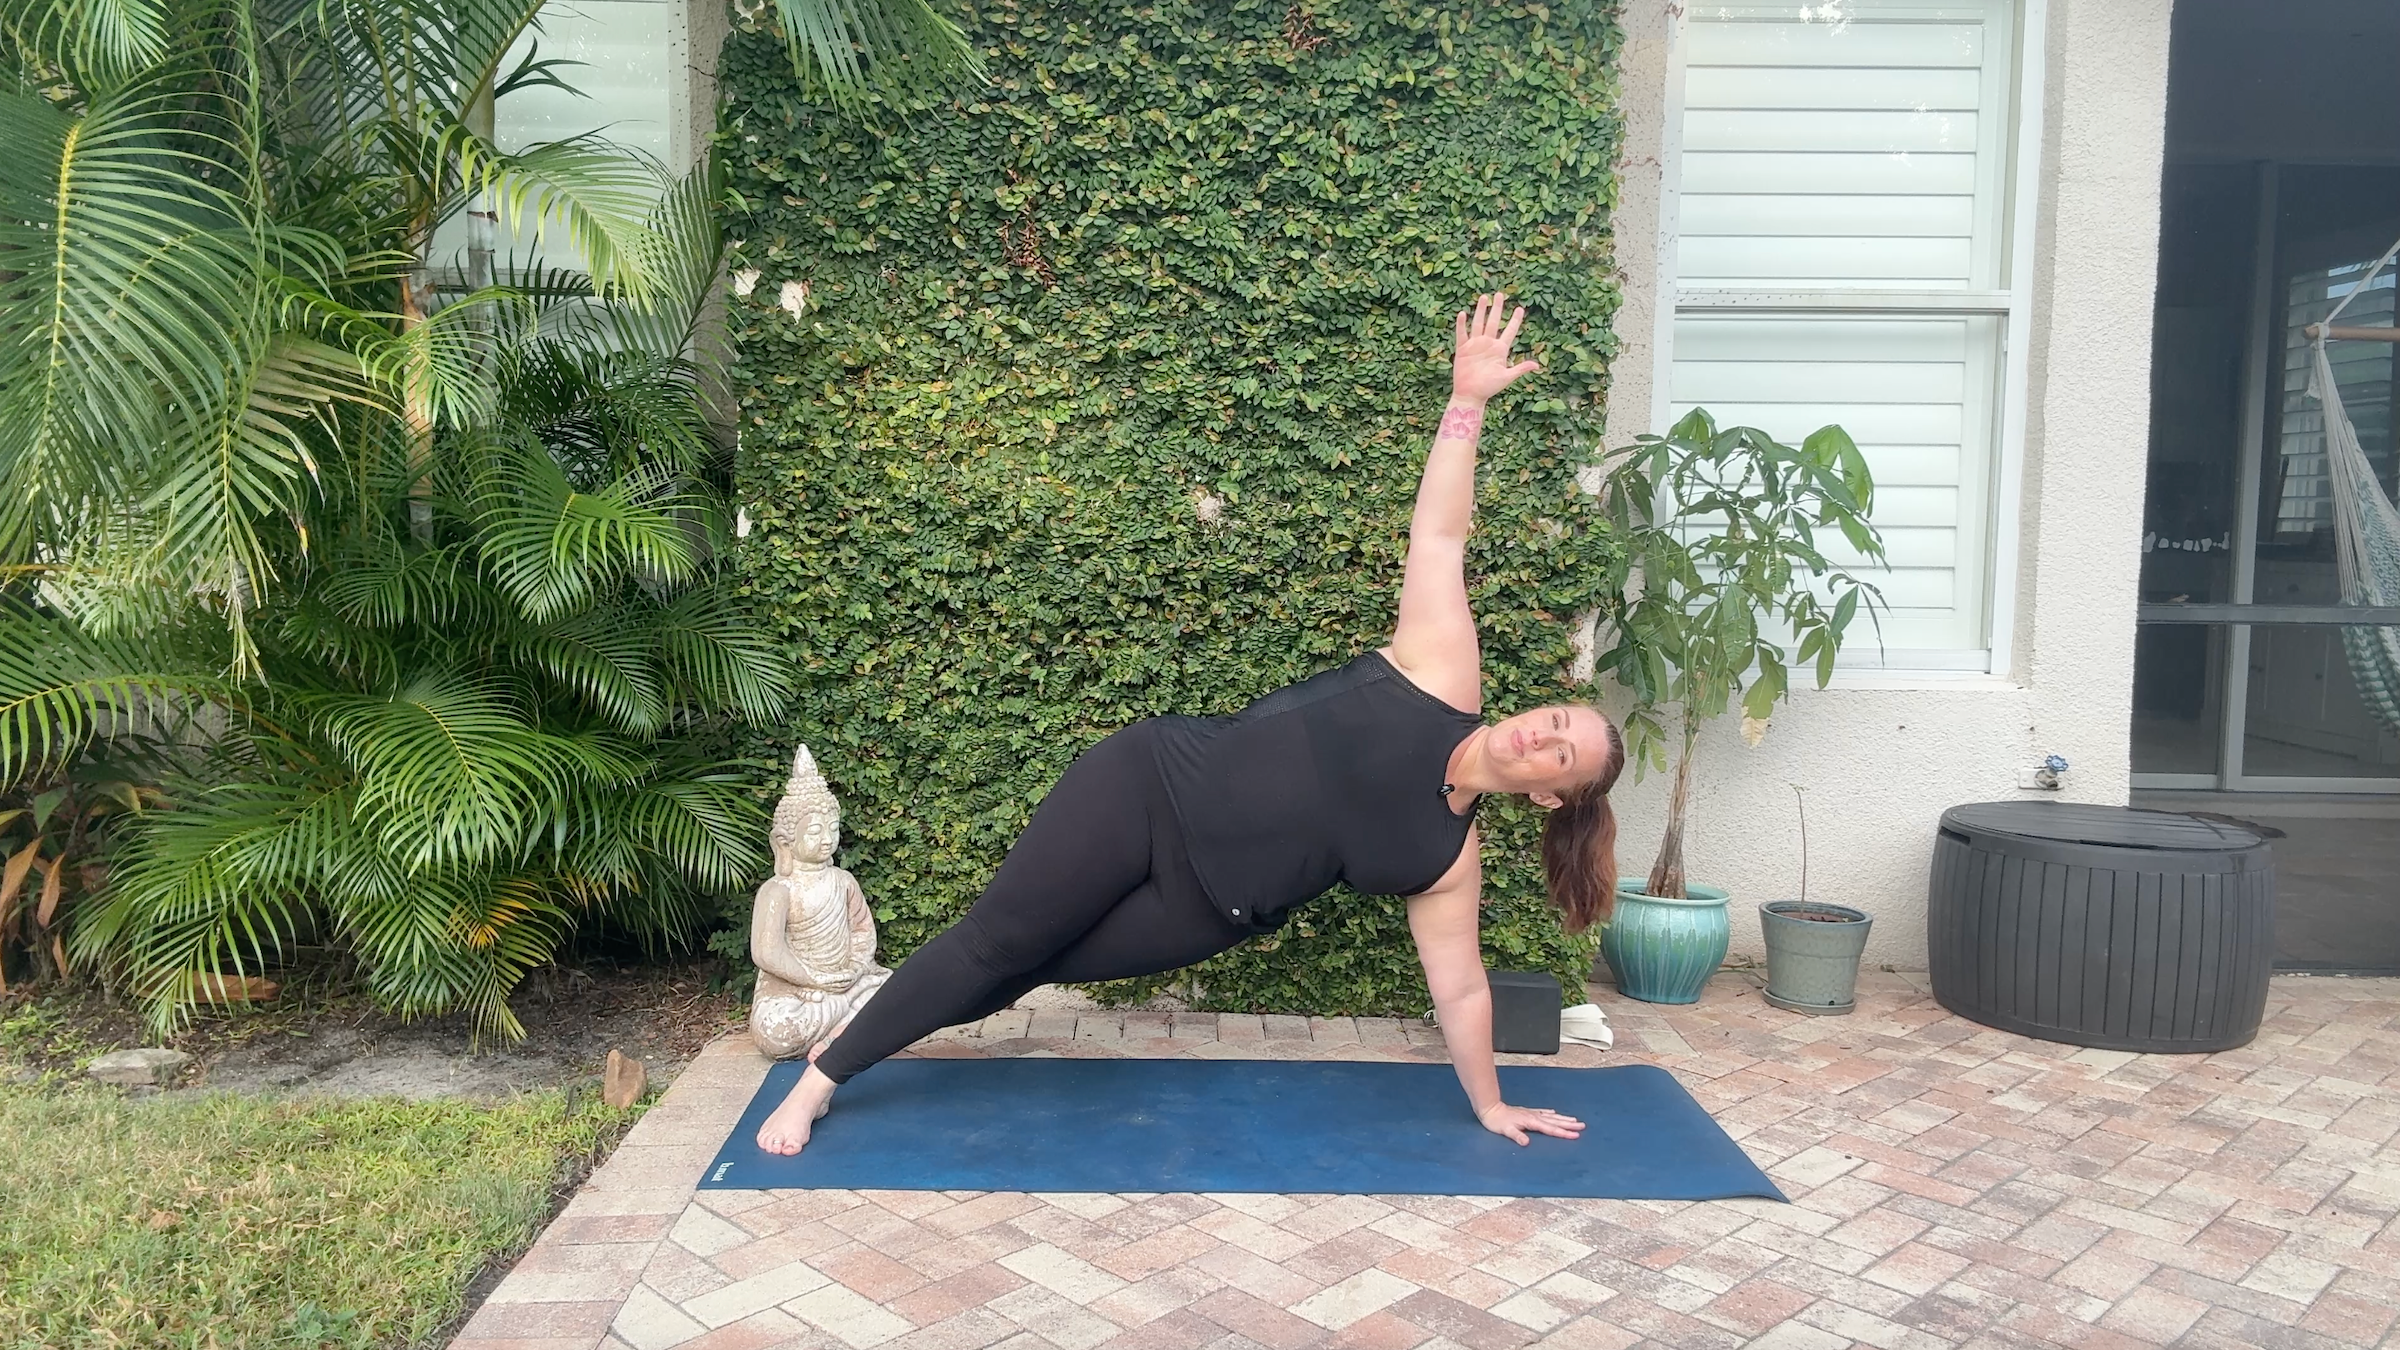
The triceps, serratus anterior, and triceps muscles are all strengthened in Side Plank, allowing you to work your arms one at a time.
How:
1. Face the long end of your mat with the bottom knee down and the top leg extended. Another option is to extend both legs into a full side plank.
2. Place your bottom hand directly under your shoulder and reach your top arm toward the sky.
3. Squeeze your bottom hand to contract the triceps, serratus, and latissimus muscles.
4. Lift your hips slightly up and down 5-10 times.
Another option:
1. Start in a Half Slide Plank with your bottom knee on the mat and your thigh straight.
2. Exhale and press down with the bottom hand, making contact with the side body as you lift your bottom knee off the mat. Look down.
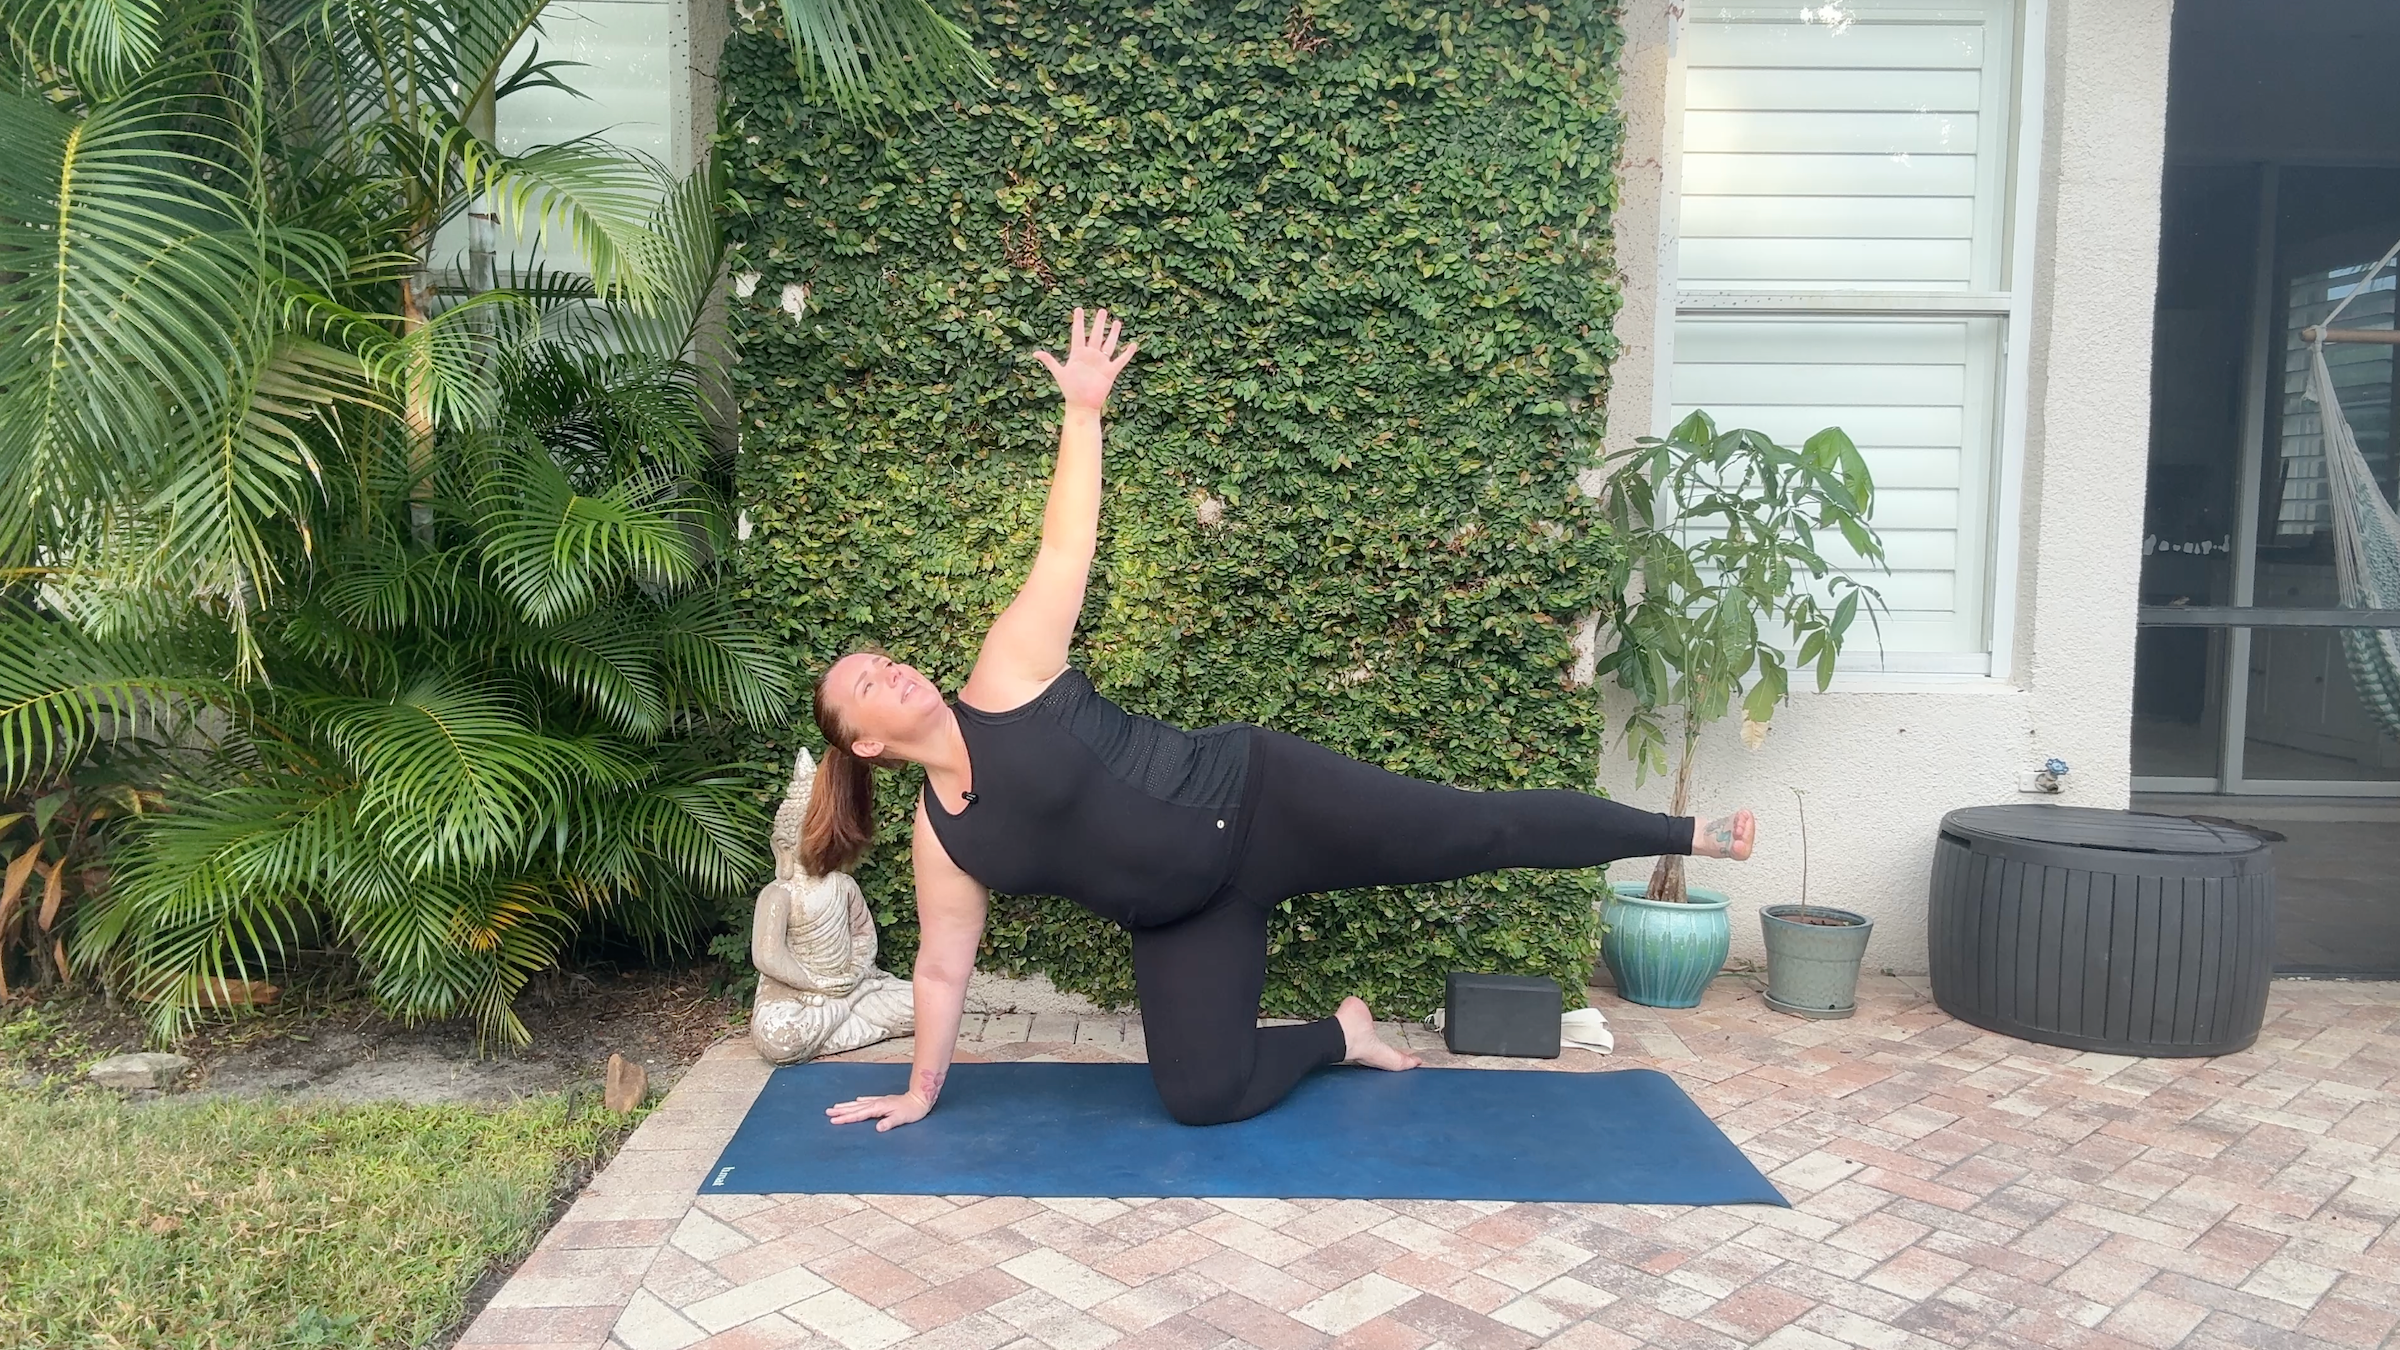
3. Inhale and drop the knee back to the mat as you lift the top straight leg toward the sky and look up.
4, Repeat 5-10 times.
3. Reverse Tabletop Dips
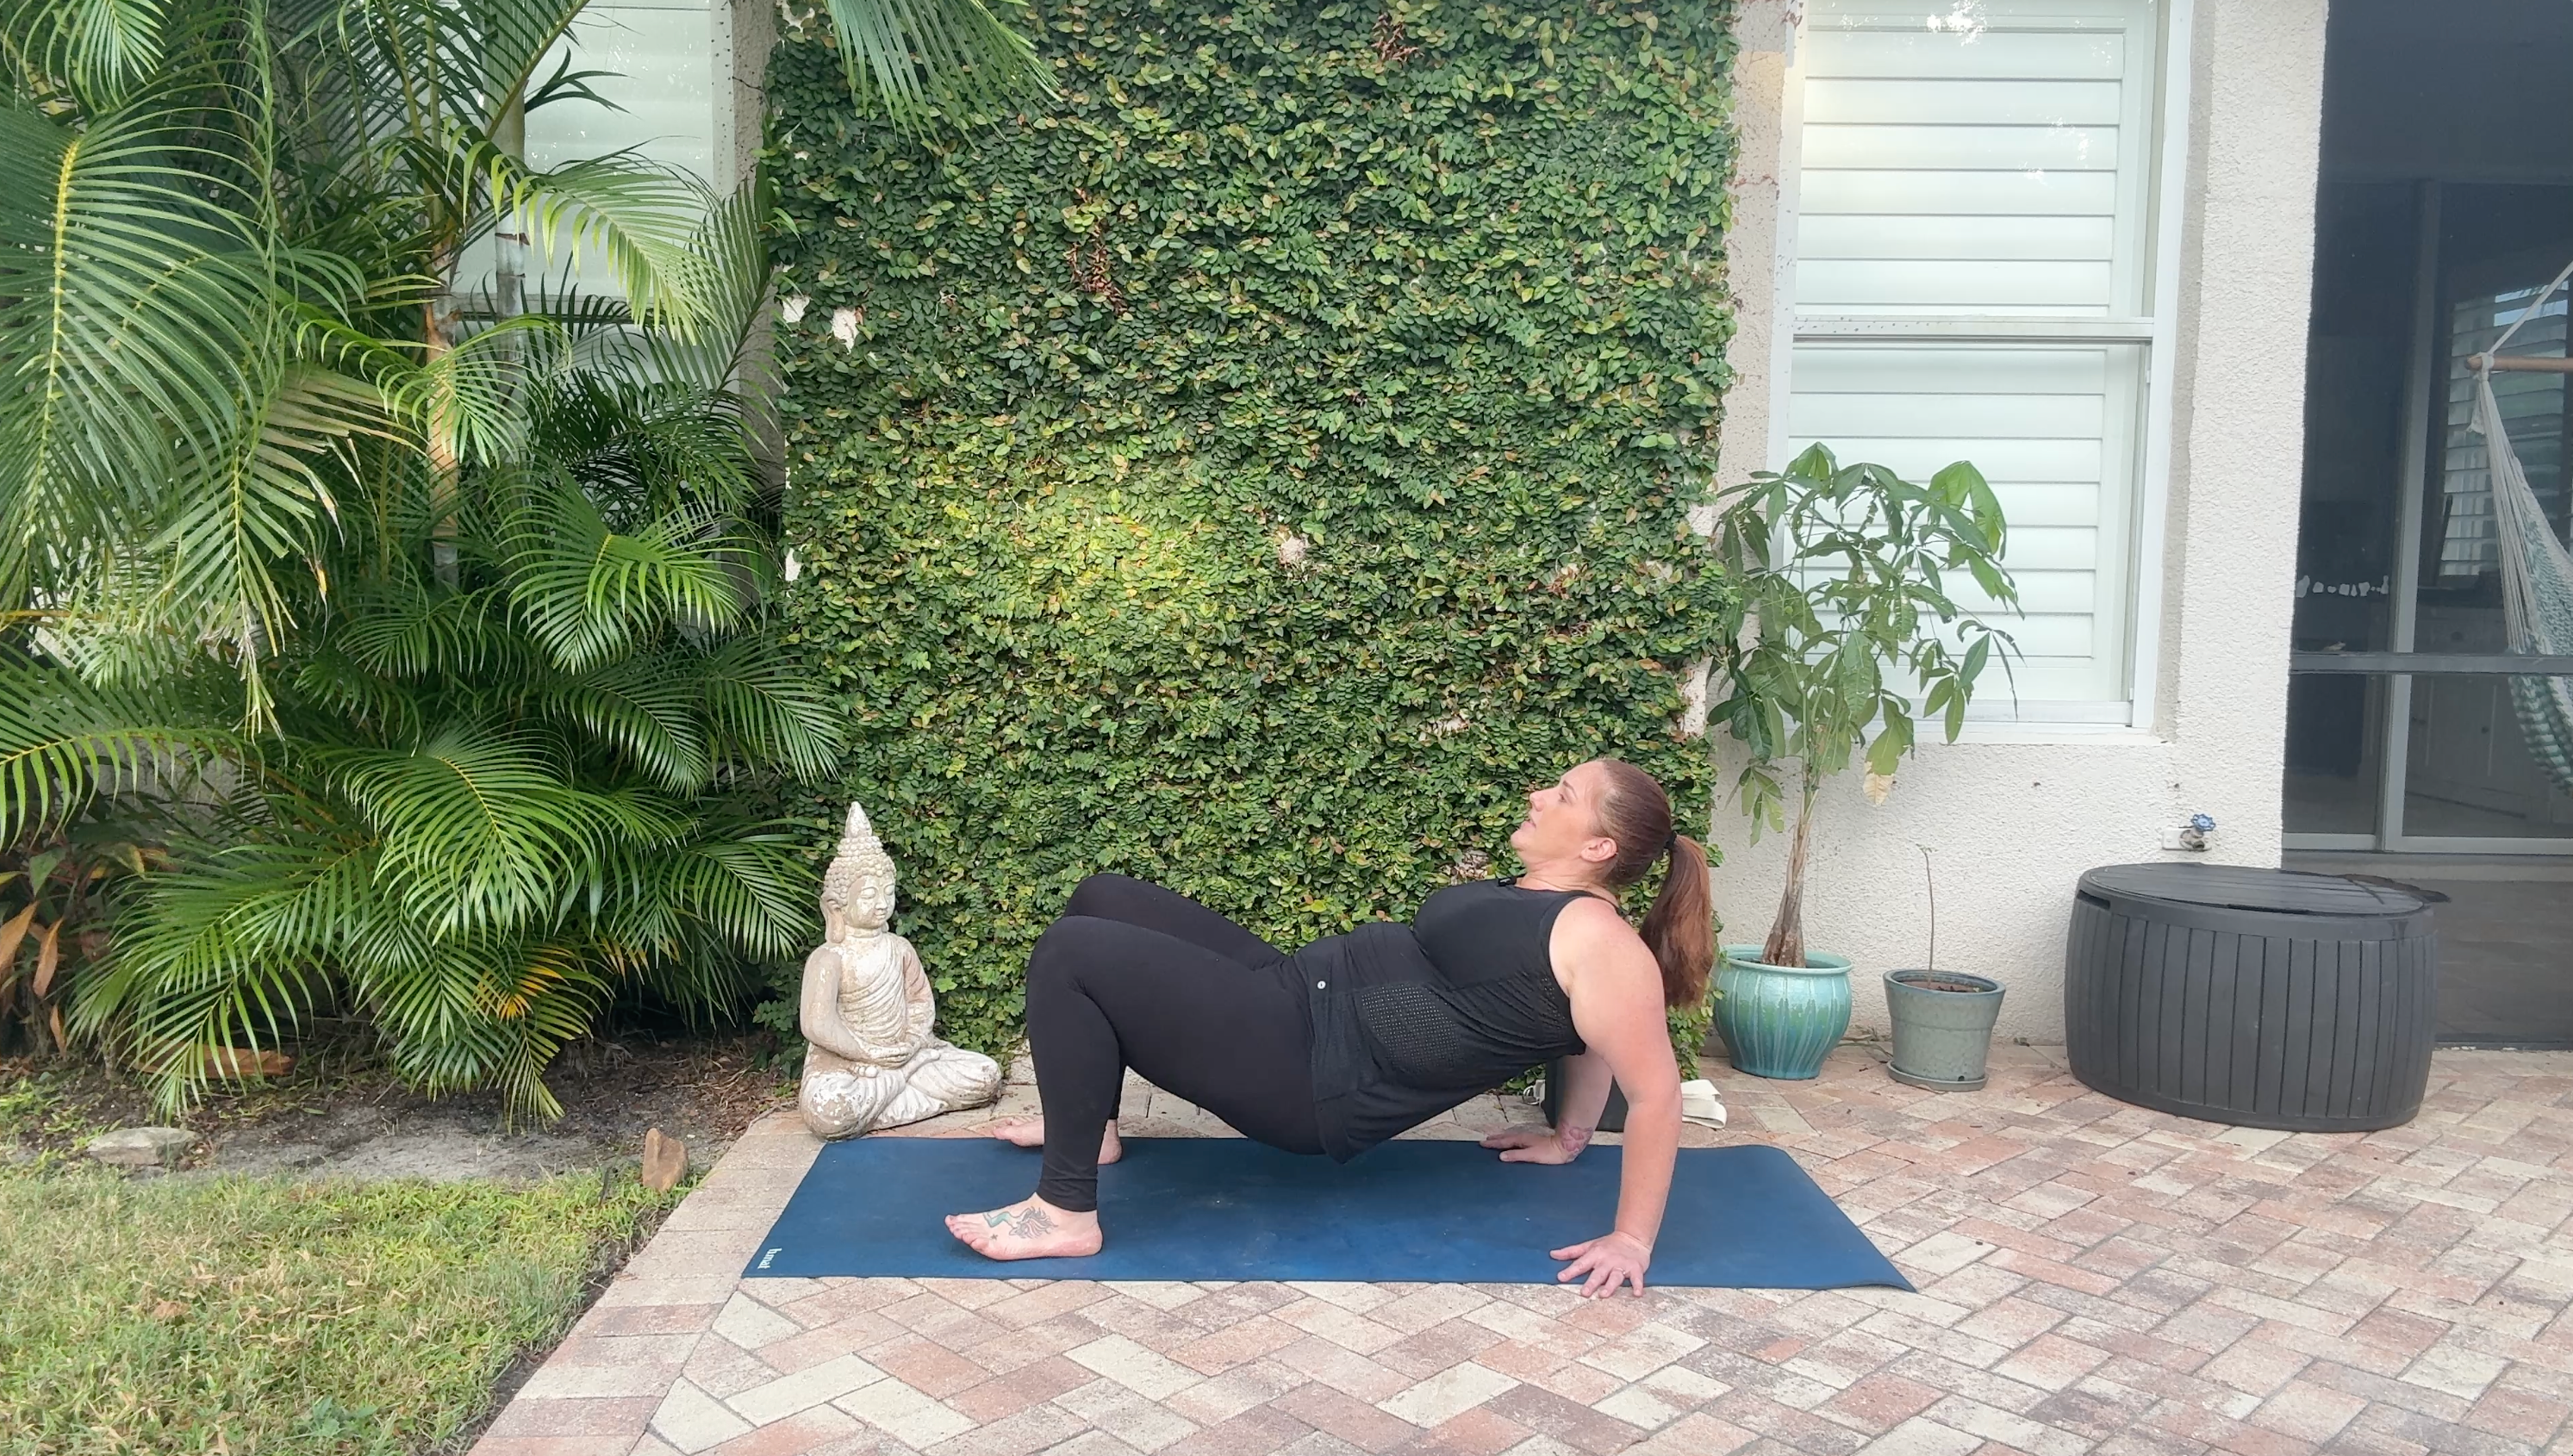
In a world where much of our time is focused on the future, this pose activates the entire posterior line of the body, creating balance and harmony. It opens the chest muscles, stretches the front of the shoulders and strengthens the triceps and biceps.
How:
1. Sit on your mat with your knees bent and your hands behind you on the mat, with your fingers pointing toward your hips or slightly outward toward the front corners of your mat.
2. Squeeze your hands and feet as you squeeze the glutes and lift your hips toward the sky in an inverted tabletop position.
3. Exhale and bend your elbows slightly toward the mat.
4. Inhale and straighten your arms, lifting them back up onto a strong tabletop.
5. Repeat 5-10 times.
4. Downward Facing Dog
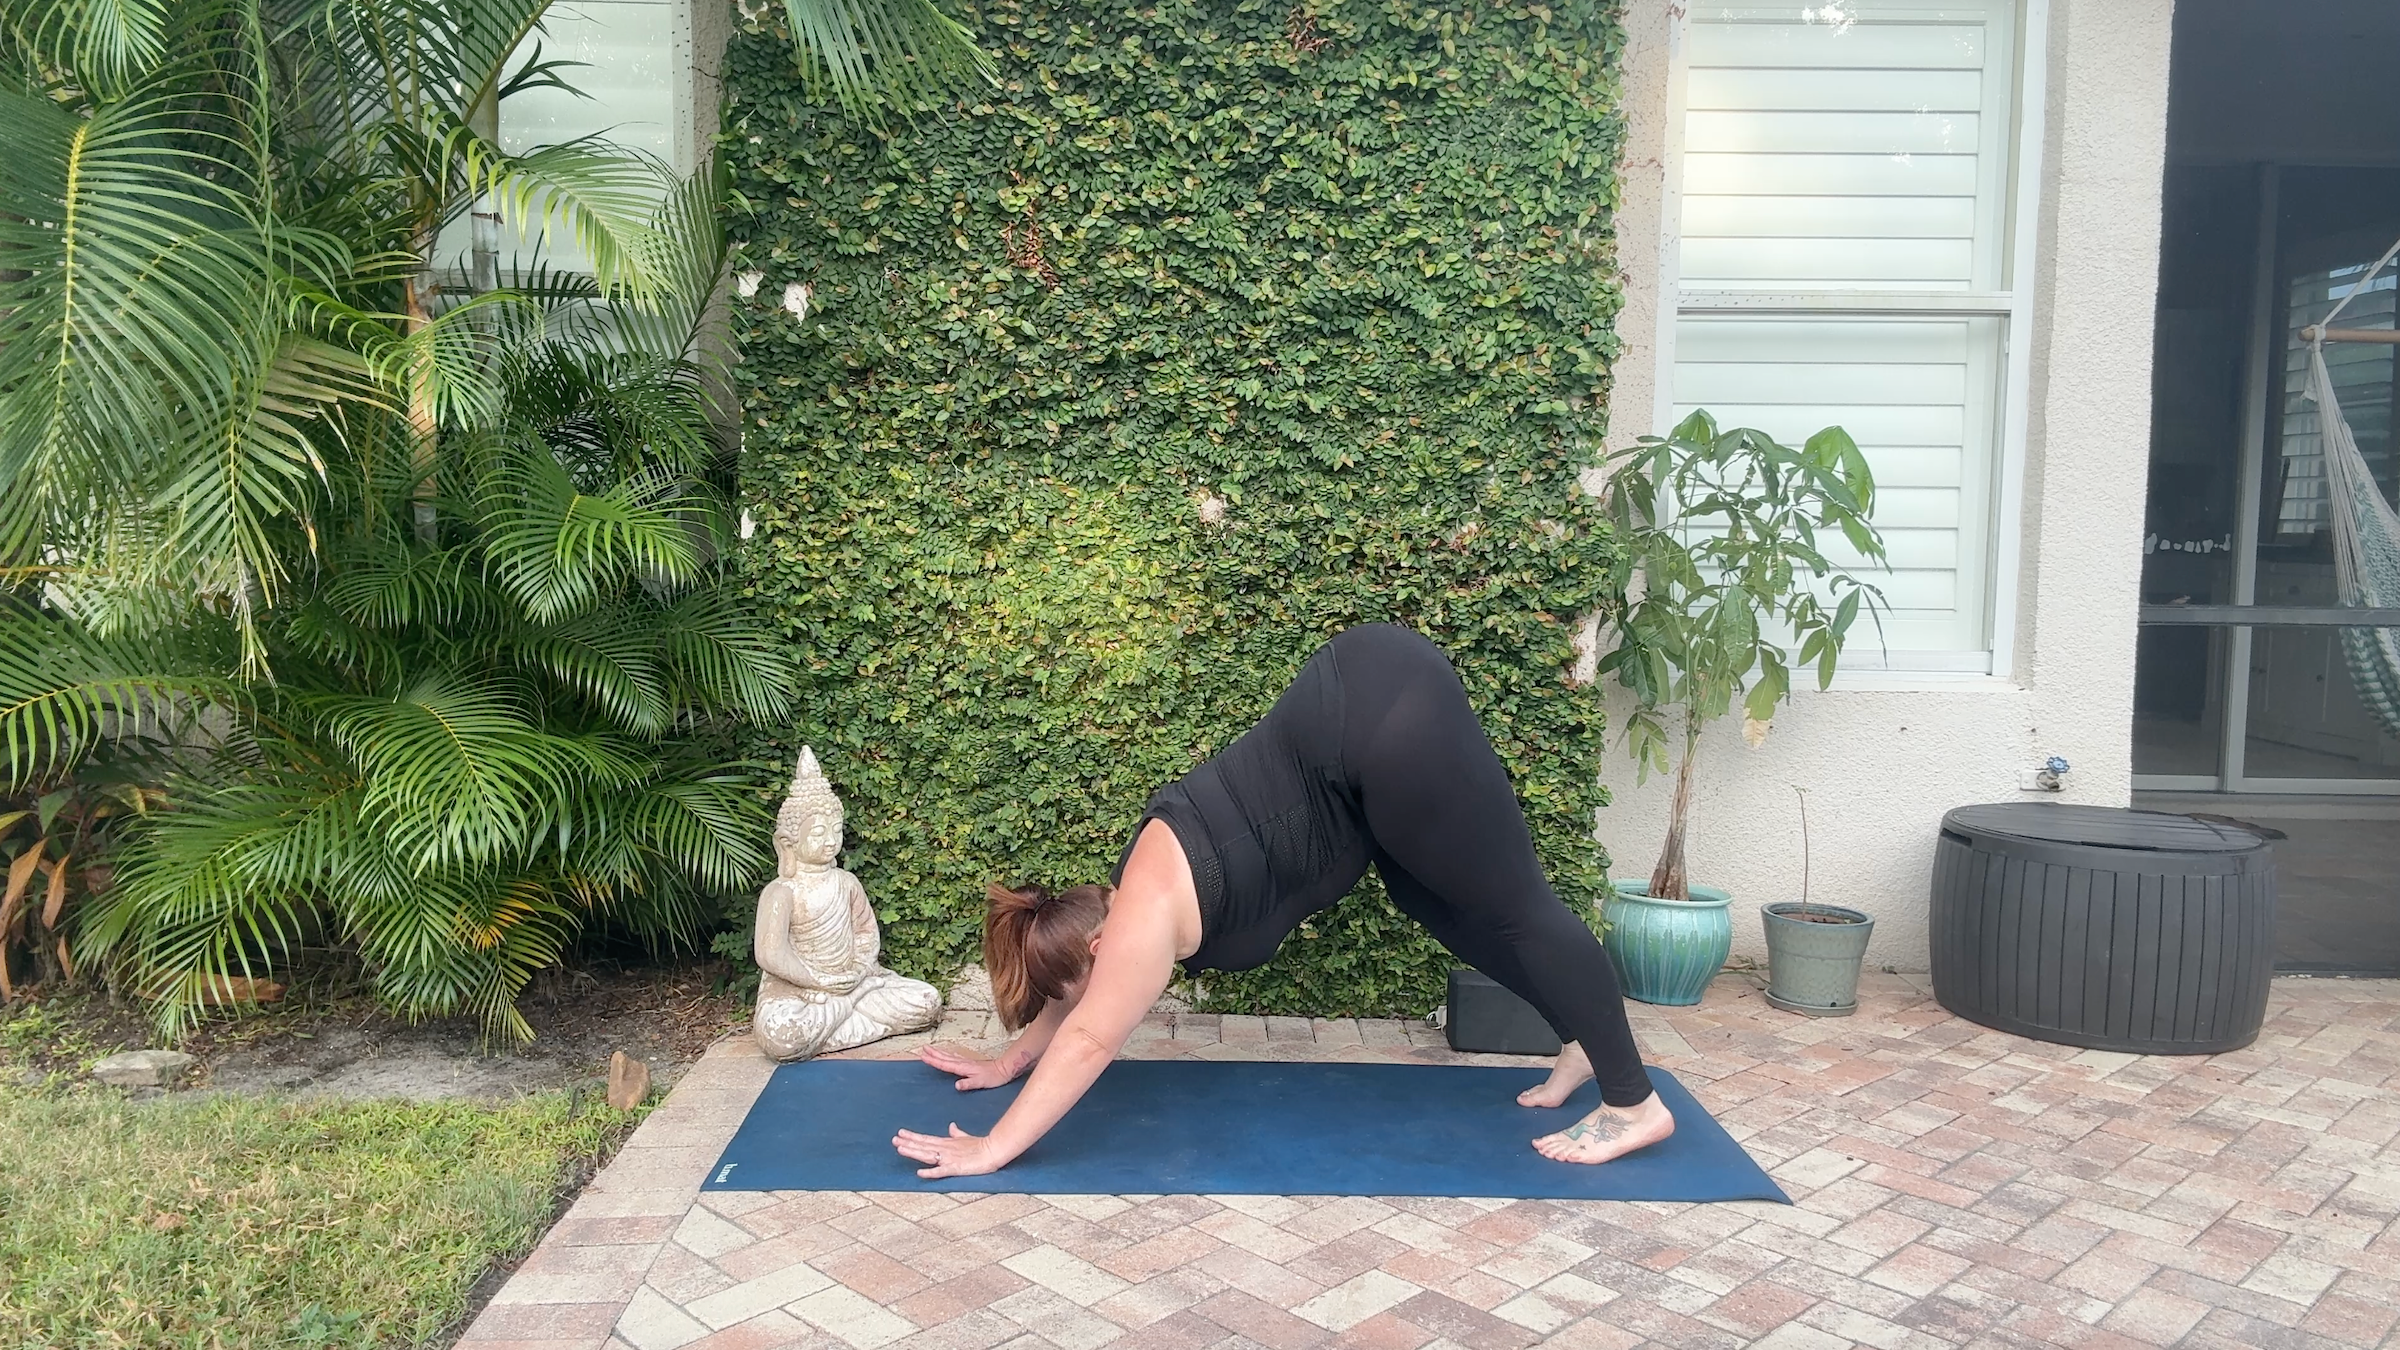
One of the most iconic yoga poses, Downward Facing Dog, balances stability and flexibility. When practiced intentionally, this pose strengthens the arms and shoulders while decompressing the spine and opening the backs of the legs.
How:
1. Get on your hands and knees on the mat.
2. Exhale as you straighten your legs and reach your hips toward the sky.
3. Press your hands and feet into the mat, as if you could stretch your mat longer in both directions. Actively press your hands into the mat, spread your fingers and press down as you pull your shoulder blades away from your ears and reach your sit bones toward the sky.
4. Hold for 3-5 breaths.
5. Chair position Forearm squeeze
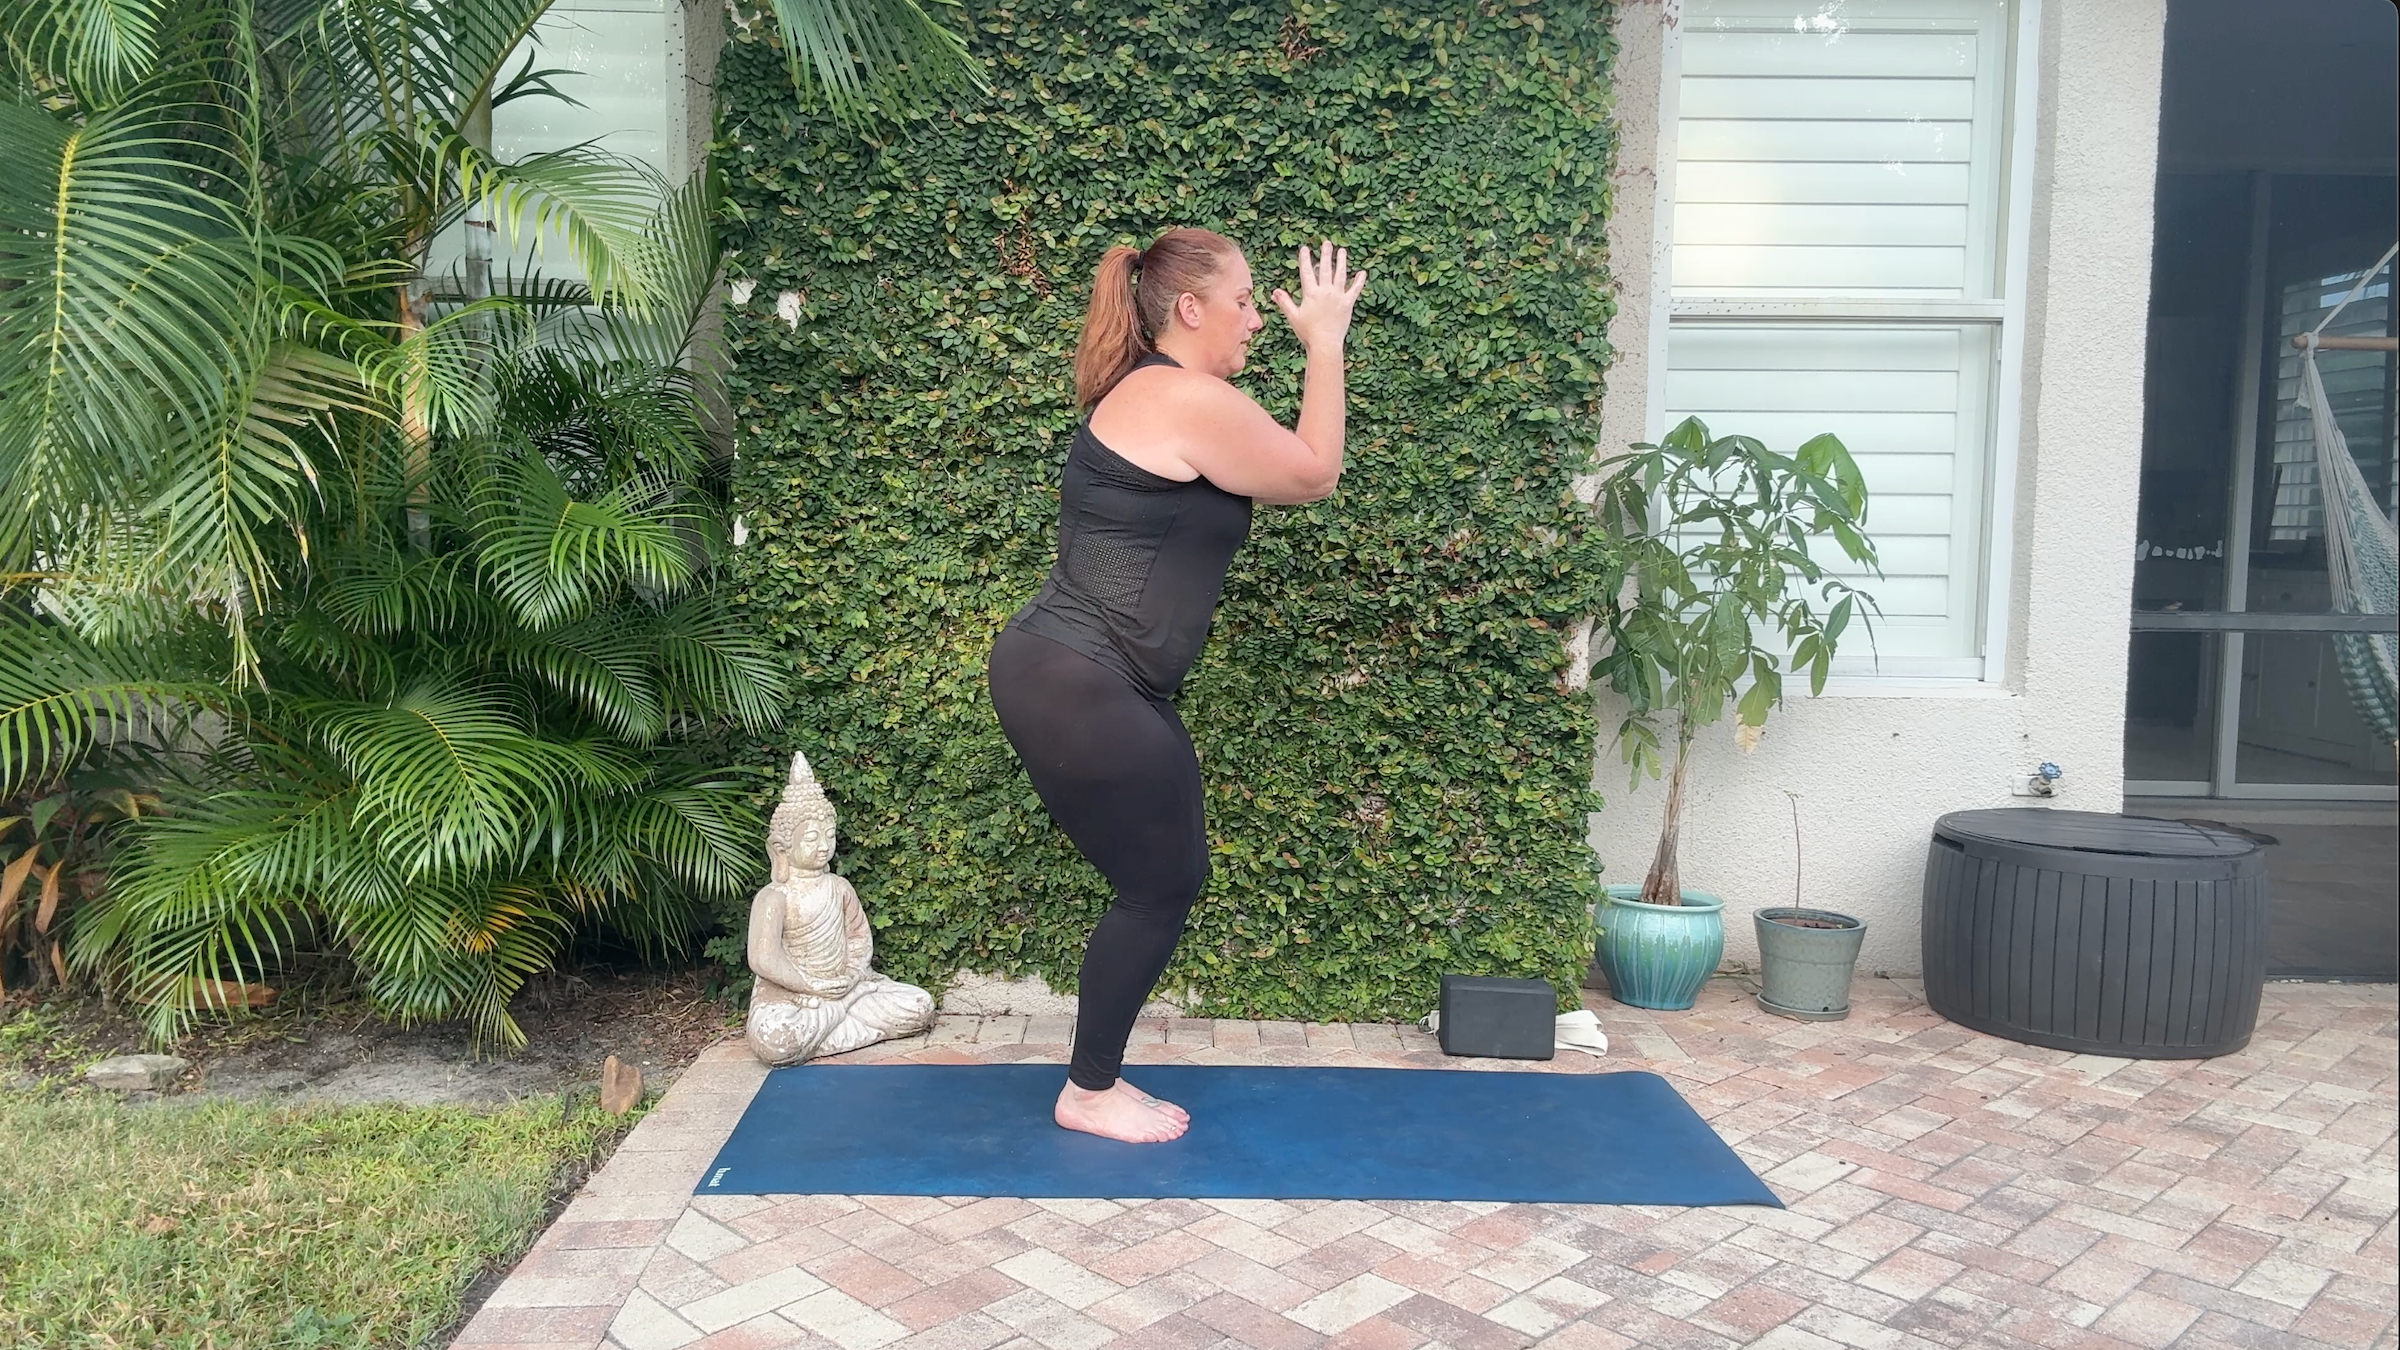
Chair Pose builds heat in the legs, glutes and core, and incorporating forearm squeezes builds strength in the pecs and biceps muscles while stretching the upper back and shoulders.
How:
1. Stand on your mat with feet together and big toes together.
2. Move your hips back and down into chair pose, lowering your weight into your heels and squeezing your thighs firmly.
3. Bring your arms in front of your face, bend your elbows 90 degrees and bring your forearms and palms together to touch. Press together firmly.
4. Inhale as you lift your elbows a few inches toward the sky, keeping your forearms straight up and down.
5. Exhale as you lower your elbows back to the starting position in front of the chest.
6. Repeat 5-10 times.
Another option:
1. Bring your palms back together.
2. On an inhale, open your arms in a cactus shape as you squeeze your shoulder blades, widen your chest, and lift your chin.
3. Exhale and bring your palms back together in front of your face, squeezing your forearms and elbows.
4. Repeat 5-10 times.
6. Warrior 2
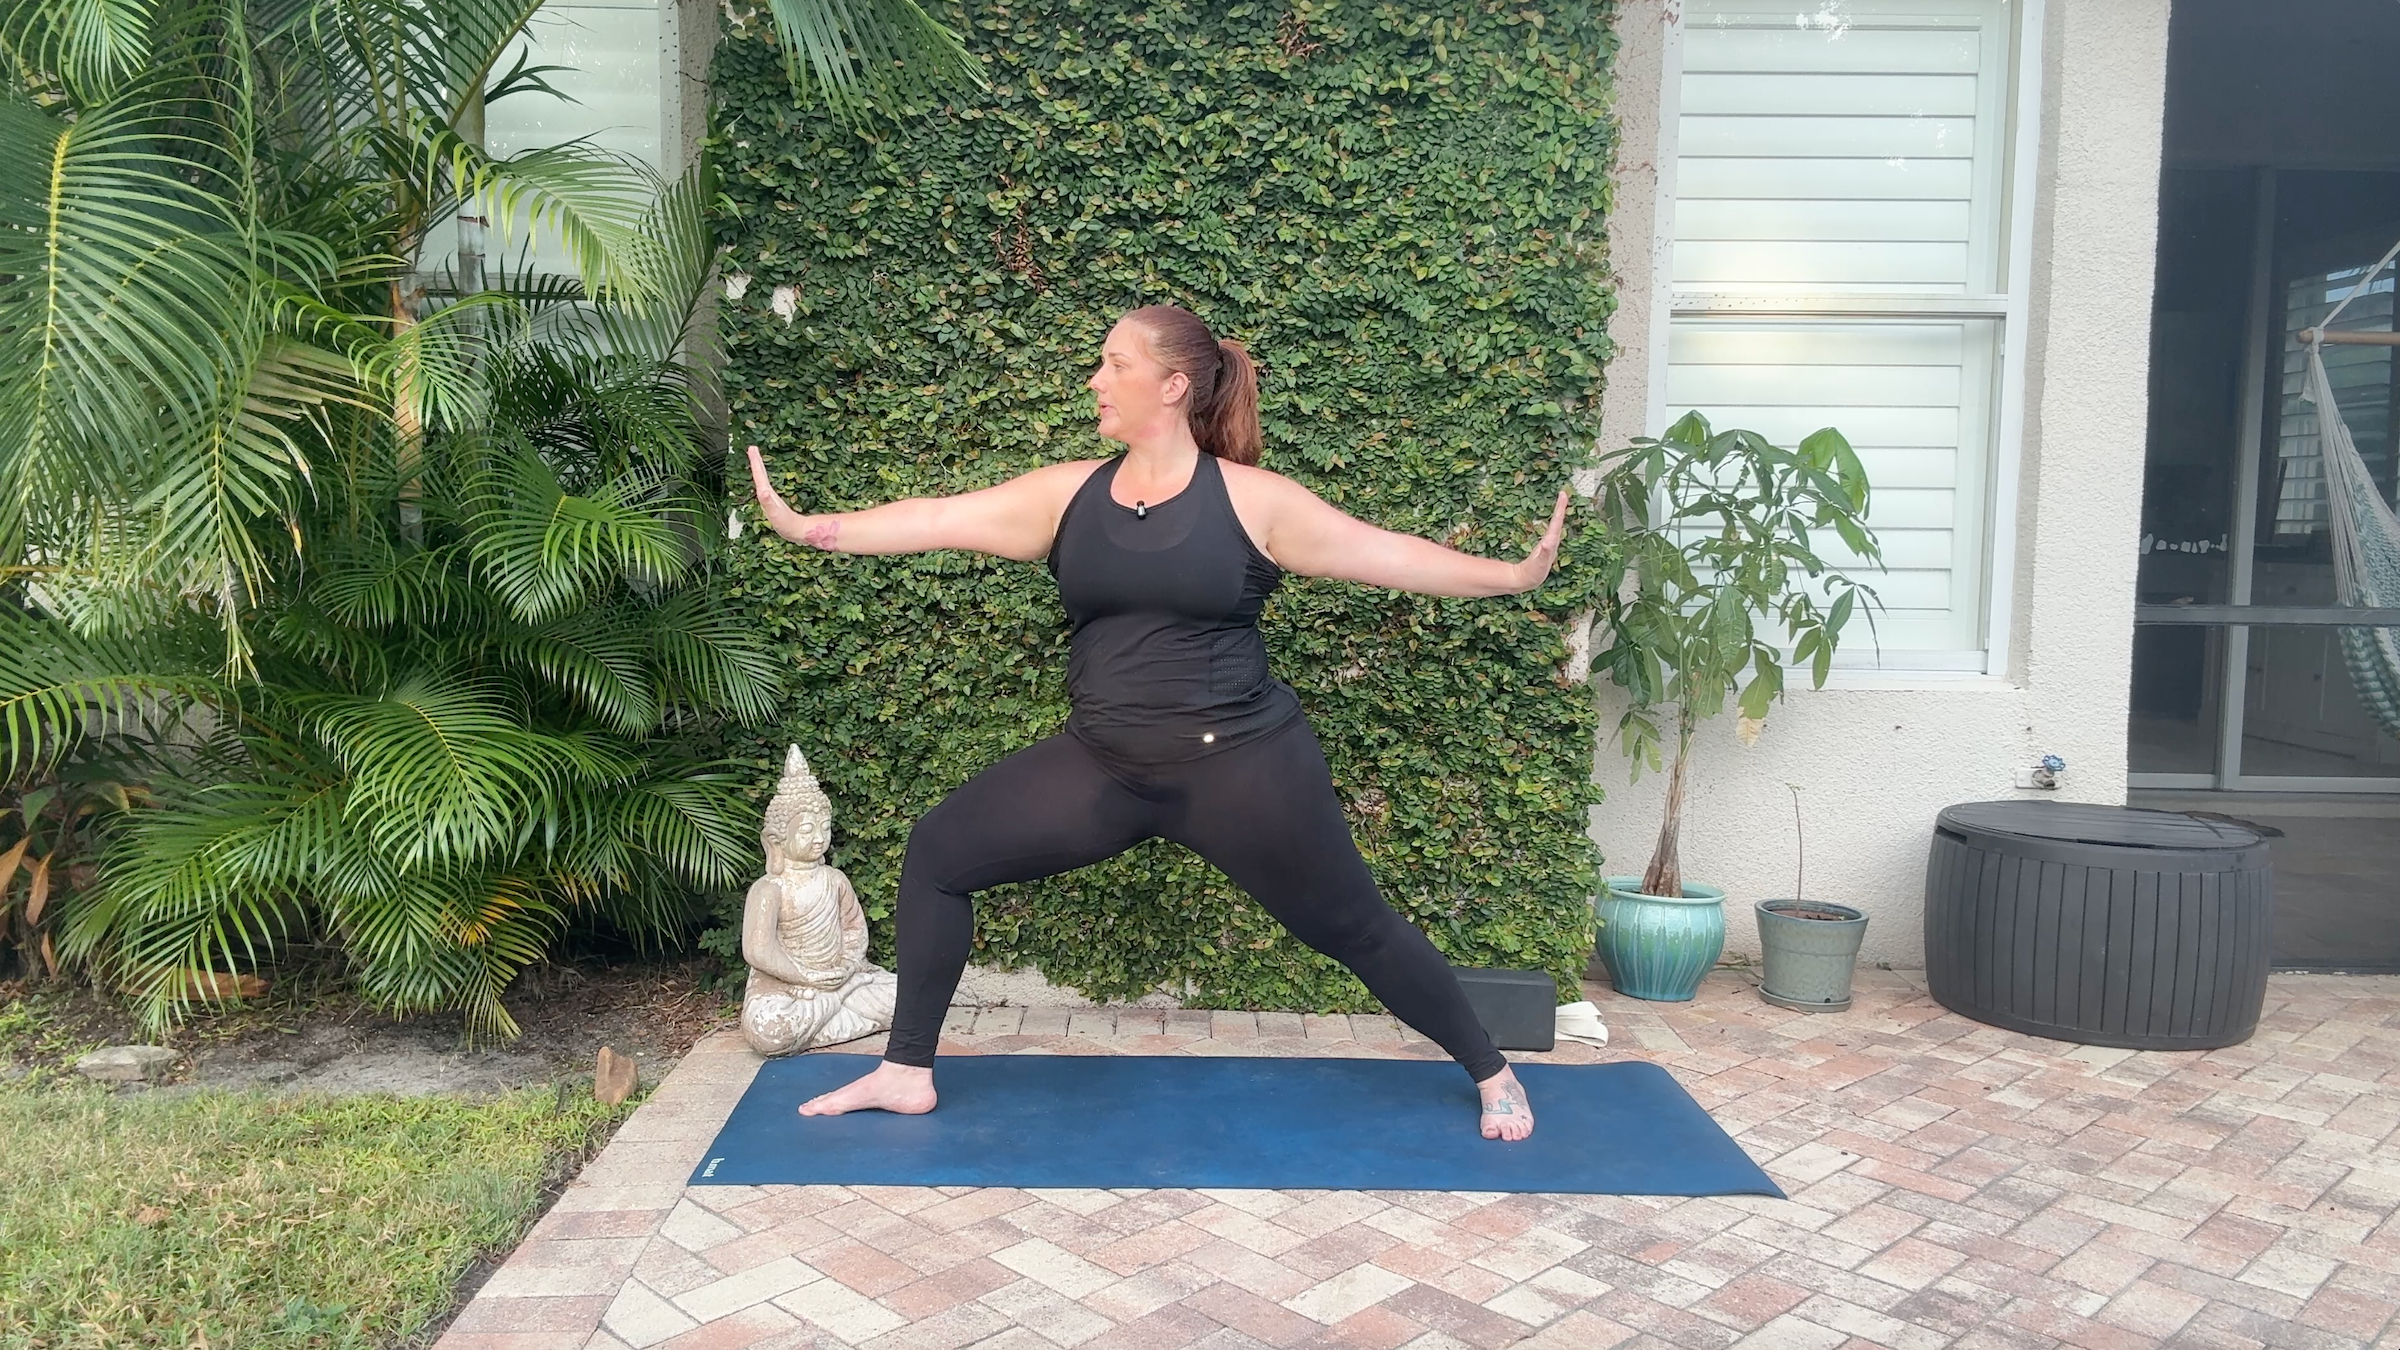
If you find yourself dodging in Warrior 2, you’re not alone. To get back into your body and calm your mind, you need to involve your arms.
How:
1. From Warrior 2, float your arms towards the sky.
2. Bring your hands back to shoulder height and parallel to the mat, bend your wrists by pulling the backs of your hands toward you and push through your palms, as if you were pushing the walls away from you.
3. Inhale and raise your arms back up to the sky.
4. Repeat 5-10 times.
Another option:
1. Start with your arms in traditional Warrior 2, extended and parallel to the ground.

2. Keep your palms flat toward the mat and begin rotating your arms in small circles. Keep your shoulder blades still so that all movement occurs in your arms. Keep the circles slow and small.
3. Twist 5-10 times and then reverse.
4. For an extra challenge for your body and brain, try rotating each arm in the opposite direction.
7. Standing forward flexion arm extension
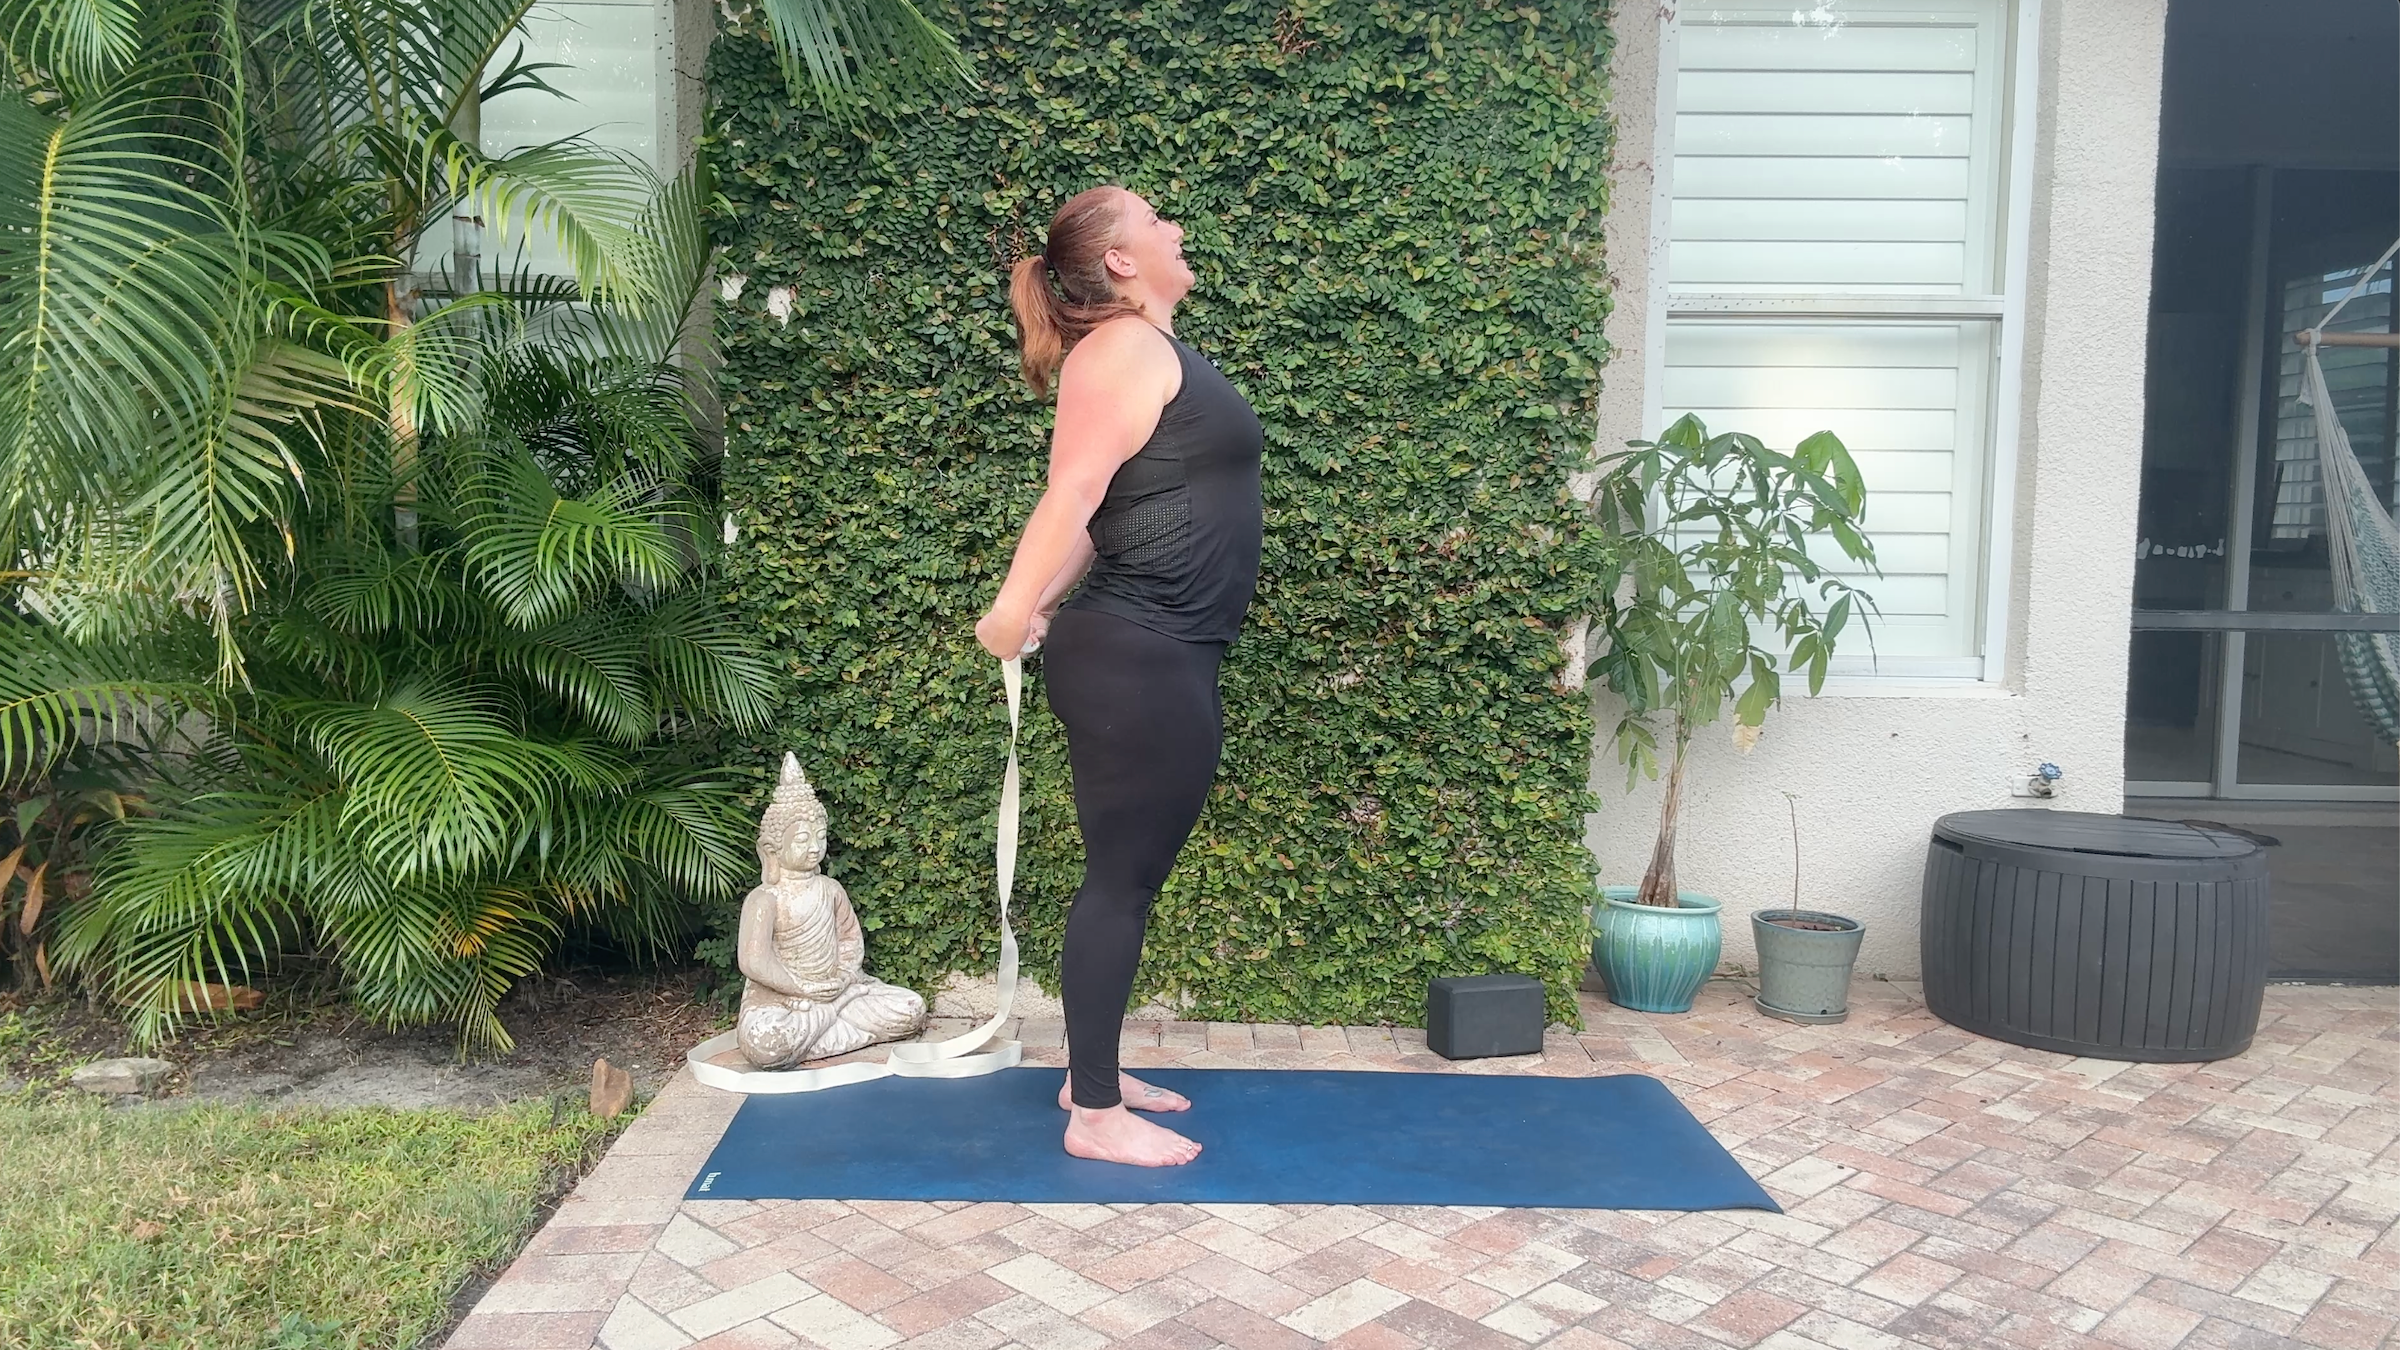
Stretching your arms after strengthening them can help restore balance, lengthen tight muscles and support healthy mobility.
How:
1. From a standing position, fold your hands behind your back or hold a yoga strap or towel.
2. Reach your arms behind you and spread them across your chest.
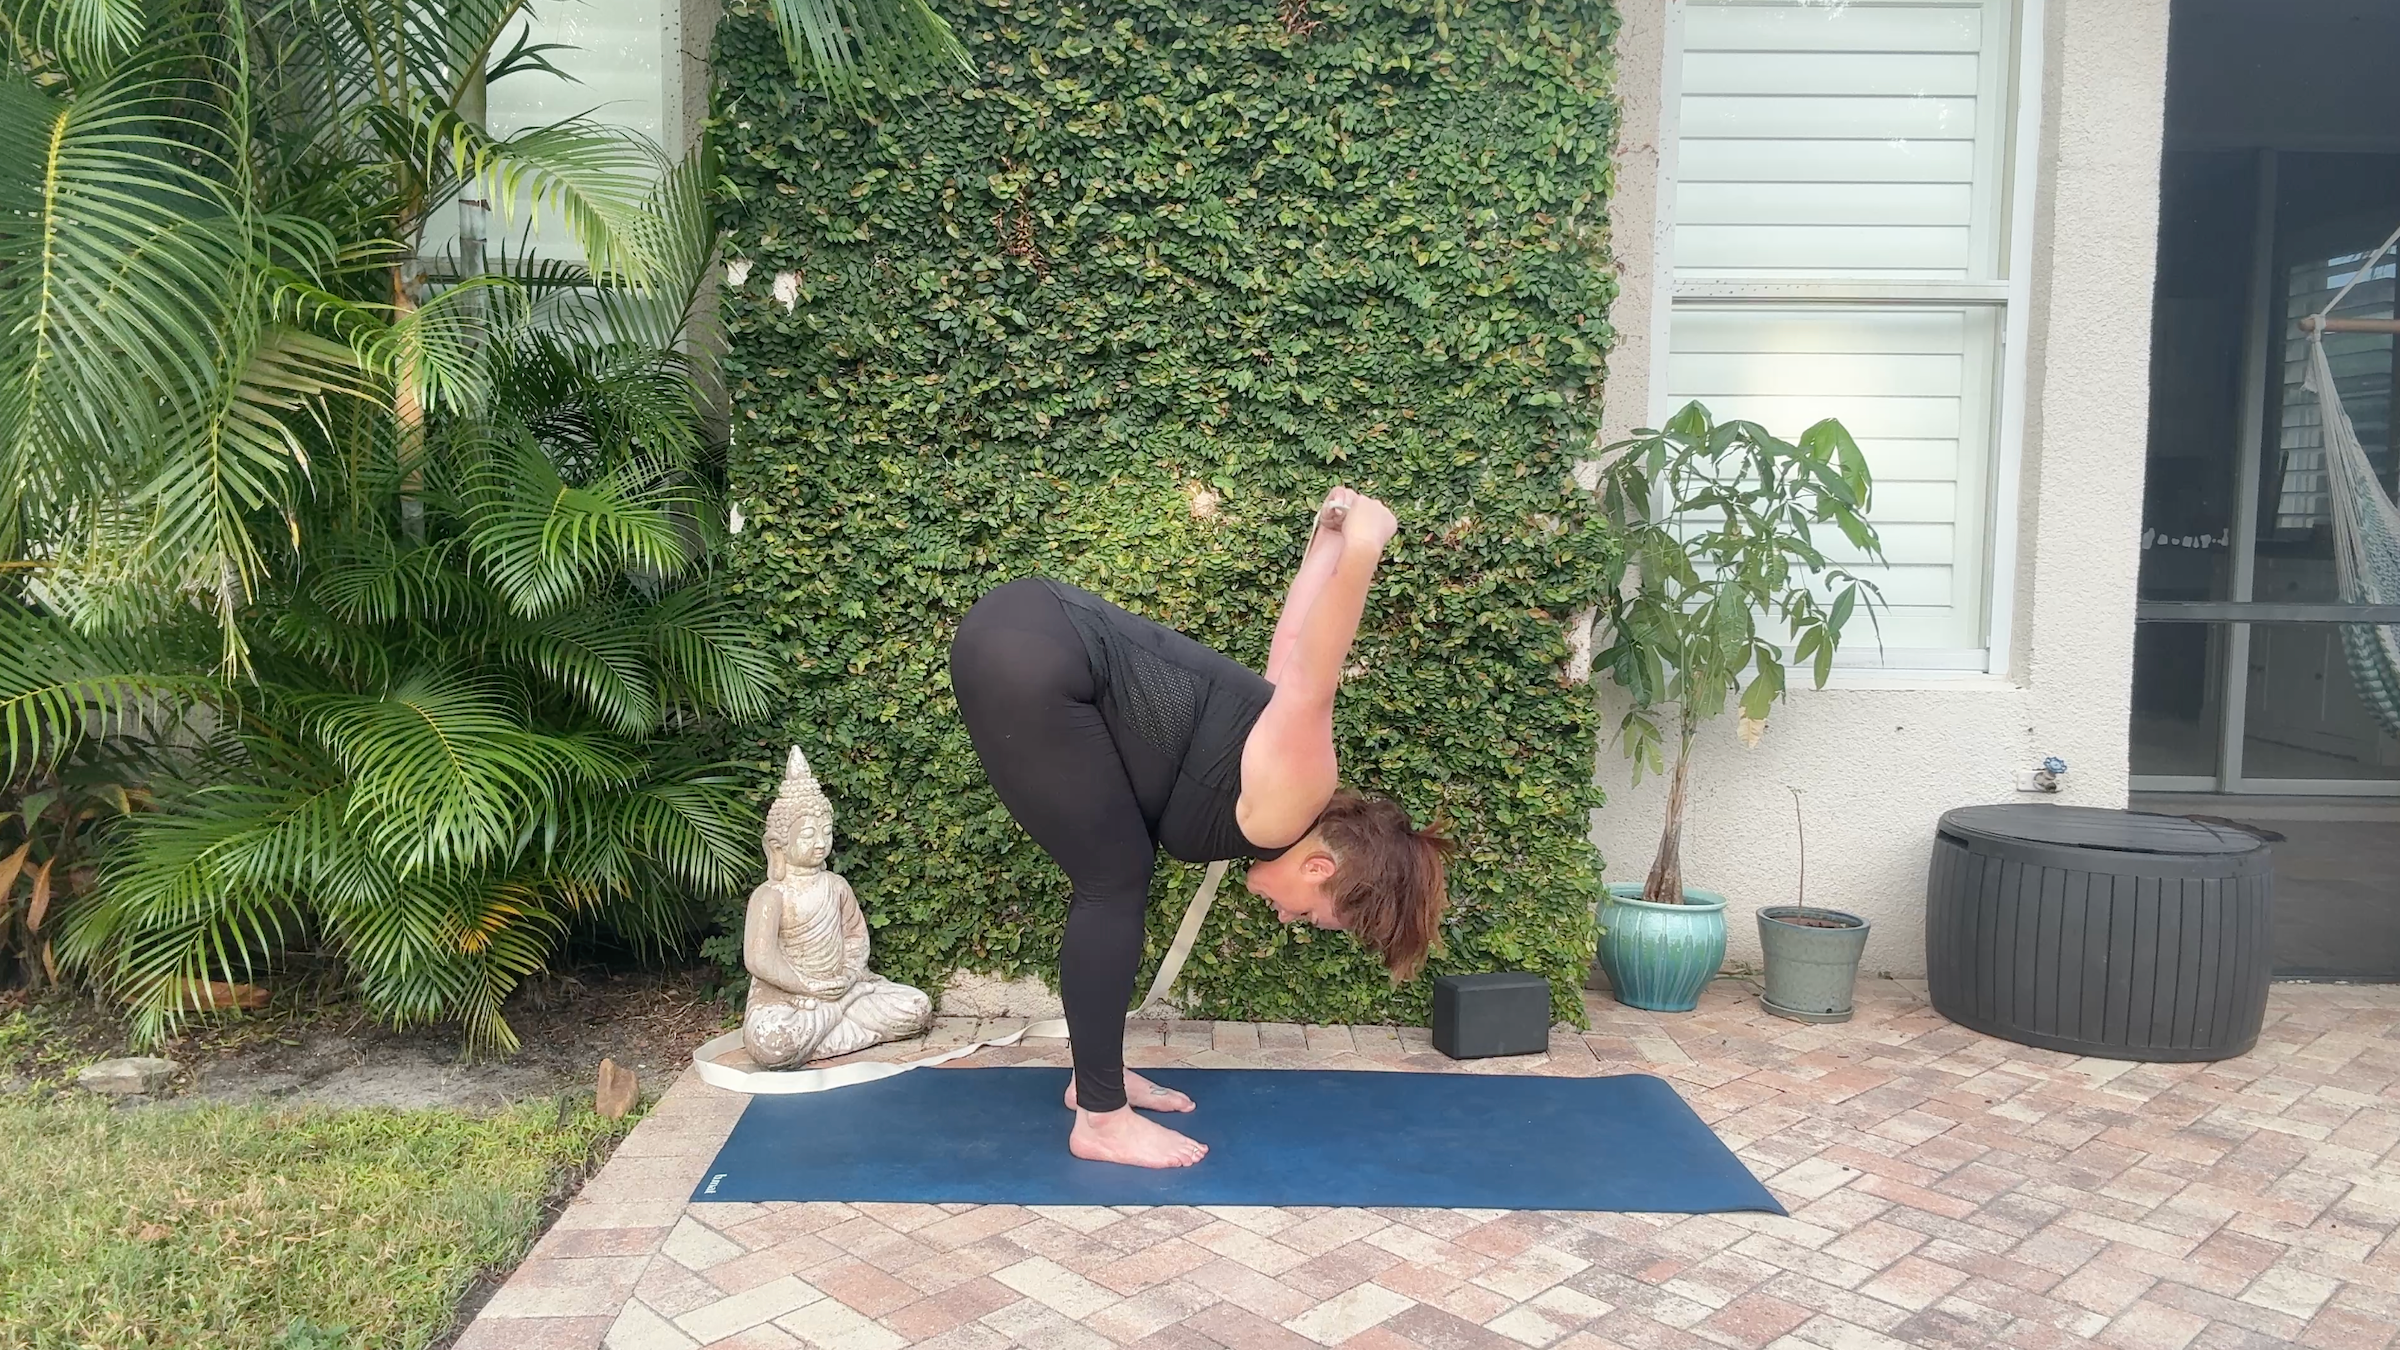
3. Exhale as you slowly bend forward, slightly bending your knees as your arms reach behind you or above your head.
4. Inhale as you slowly roll back upright and pull your arms down and behind you toward the mat.
5. Repeat 3-5 times.
#minutes #arm #strength #exercise