
Divi 5’s Lottie module lets you attach motion to the scroll, so visitors can control how the animation plays as they scroll across the page. This makes sections feel interactive and works well for timelines, hero banners, or sales campaigns where you want to emphasize a message with movement.
In this tutorial, we’ll show you how to set up a scroll-based Lottie animation in Divi 5 and share some examples that you can customize to your own designs.
What is the Lottie module in Divi 5?
Lottie is an open-source animation format developed by Airbnb that renders vector animations in real time using JSON. Instead of exporting animations as heavy videos or pixelated GIFs, you can use JSON files that stay sharp at any size, load quickly, and scale smoothly across devices.
The Lottie Module in Divi 5 allows you to integrate these animations directly into your layouts.
Subscribe to our YouTube channel
To get started, simply add the Lottie module and upload a JSON file, or paste the URL of the Lottie file. Then decide how and when the animation will play. This includes options for autoplay, looping, hover triggers, and scroll-based playback. You can even combine with Divi’s Interactions to mirror mouse movements, add presets, and more.
Because Lotties are resolution independent, they scale perfectly on both mobile and desktop devices. They’re also flexible, meaning you can place them in a hero header, combine them with body copy, or even use them as background elements behind text.
Divi 5’s Lottie module makes it easy to add more engagement and interaction to your designs, helping visitors notice key details and stay connected to the story you’re telling.
Learn all about Divi 5’s Lottie module
How it works
To use the Lottie module in Divi 5, you need to keep two things in mind:
- You have the Lottie JSON file of the animation you want to use.
- You can upload JSON files to your WordPress site without any problems.
If you can design your own Lottie files that would be great. But if you can’t, don’t worry about it. There are many free platforms such as LottieFiles, where you can find animations for your website.
Simply search for your animation and Download it.
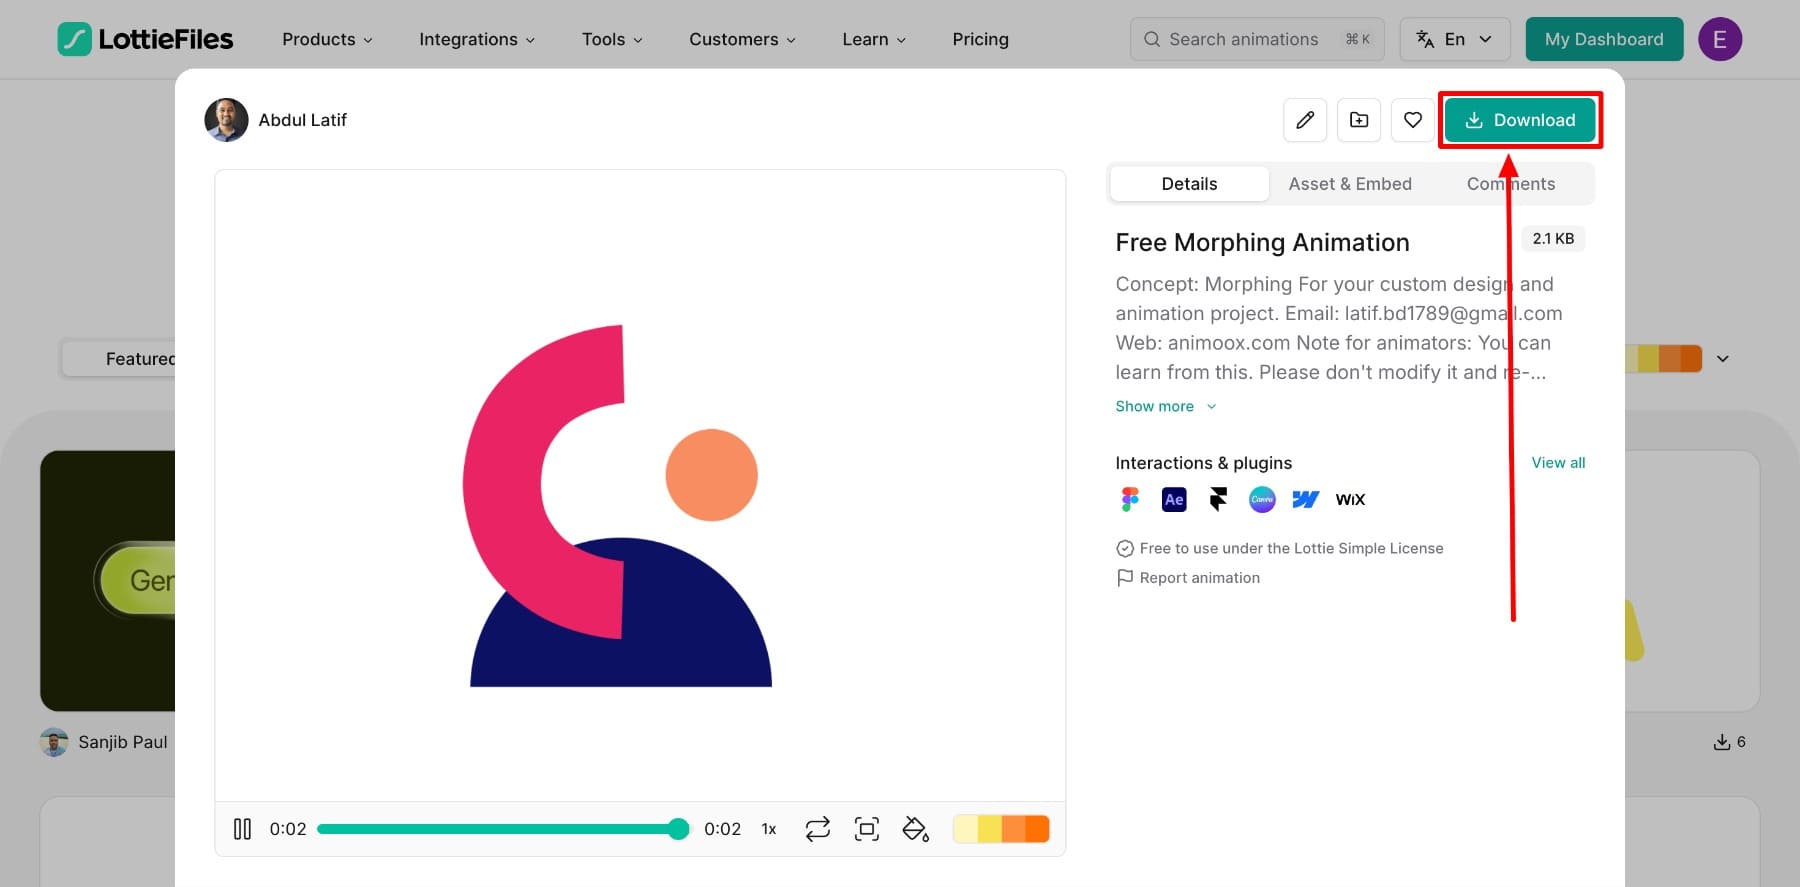
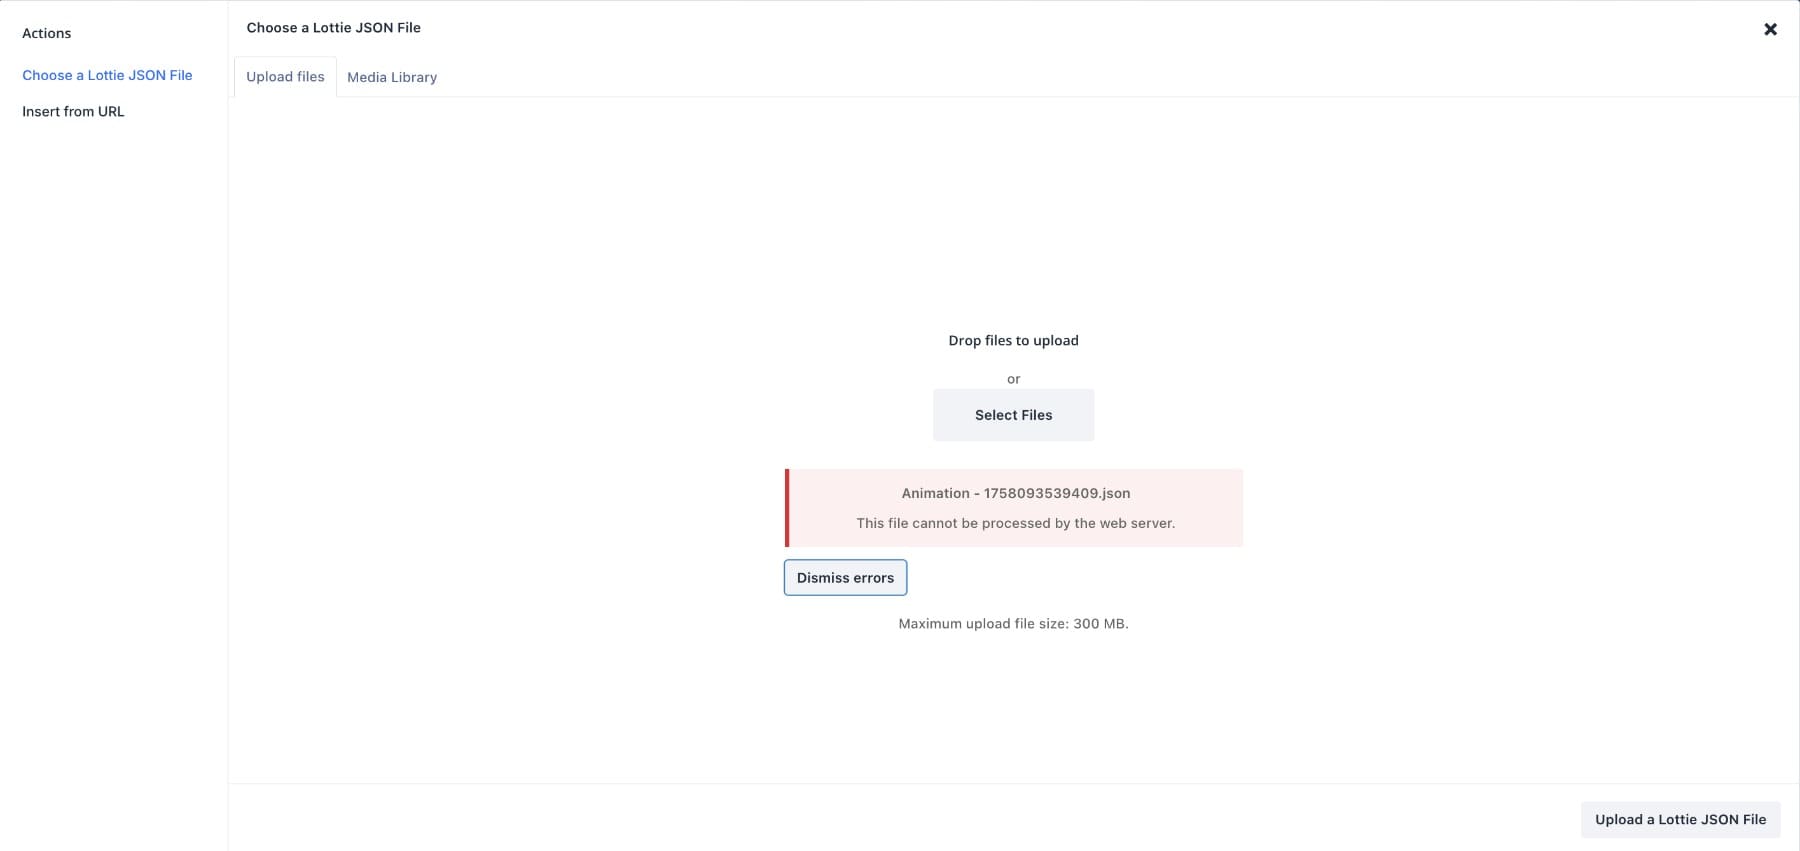
You will receive a JSON file that you can upload to your WordPress site. But to do this successfully, you will need to change some settings.
By default, WordPress does not allow JSON uploads for security reasons. If you try to upload directly, you will see a file type error.
The easiest solution is to enable JSON uploads using the File upload types by WPForms plugin, which enables additional MIME types, including JSON. Once the plugin is activated, search for ‘JSON’ in the Add file upload types list and enable the option.
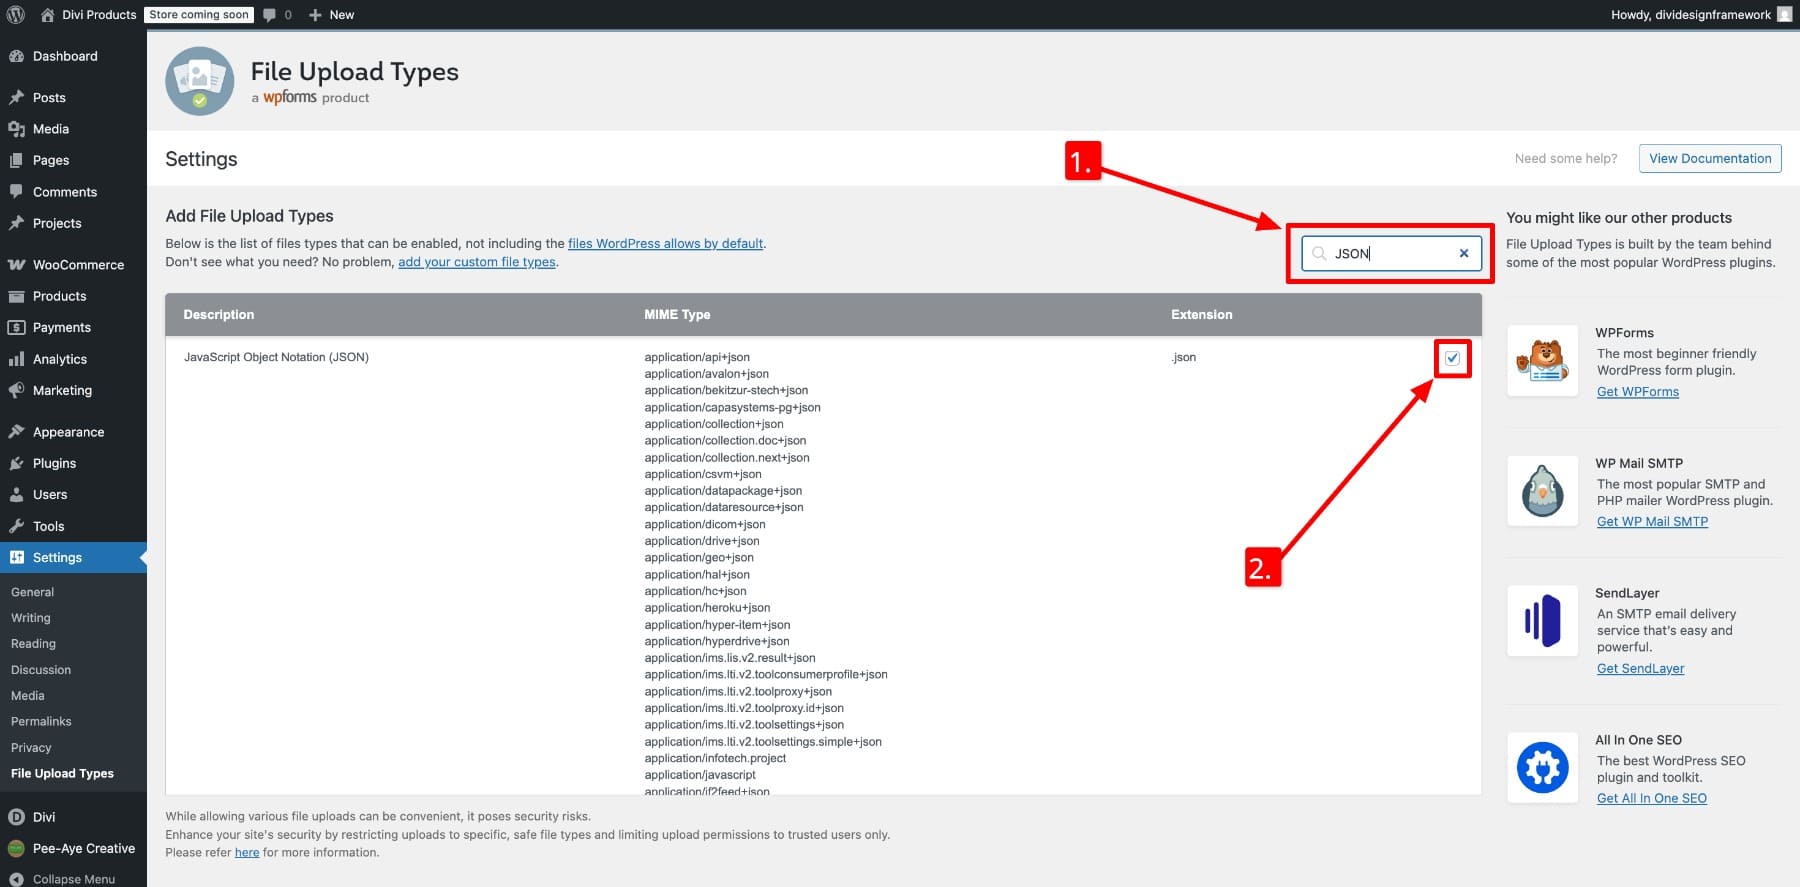
Scroll down and Save changes. Your JSON uploads no longer display an error.
Once you’ve successfully uploaded your Lottie file, it’s time to use it for page designs. In Divi Builder, add it Lottie module.
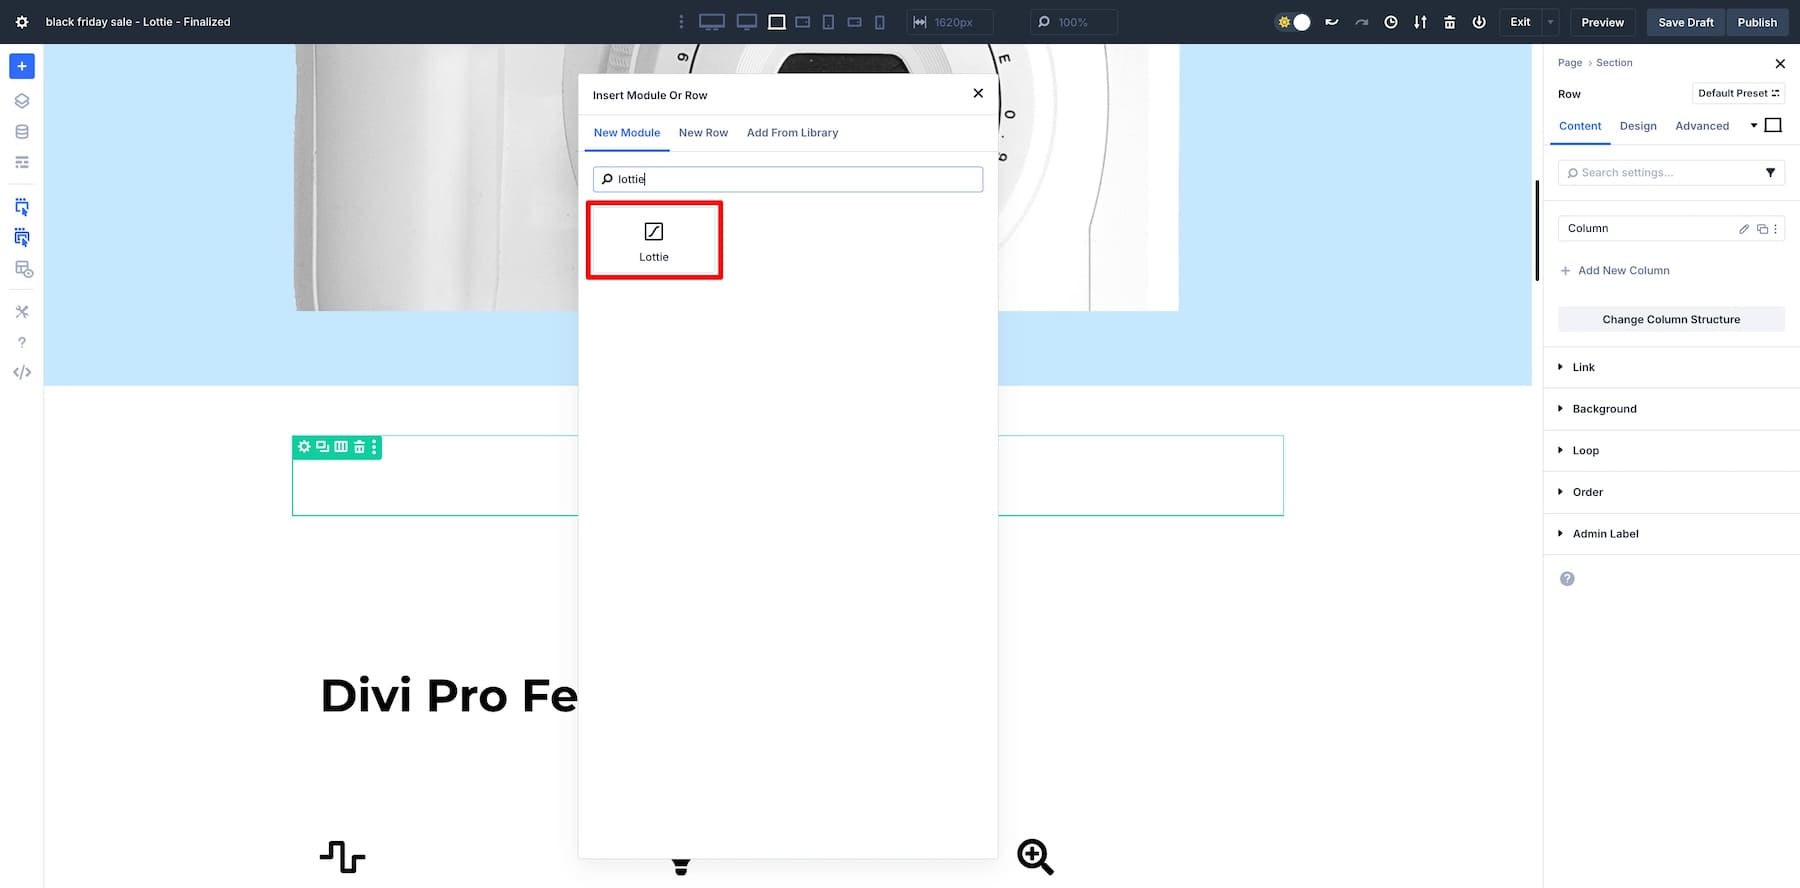
Thanclick Upload to add the Lottie animation you downloaded.
You can also add the Lottie URL from the original source, but this method can be risky. You don’t know when the creator will take the Lottie off the platform, so it’s better to have it uploaded to your setup.
Note some Lottie controls below the Upload option?
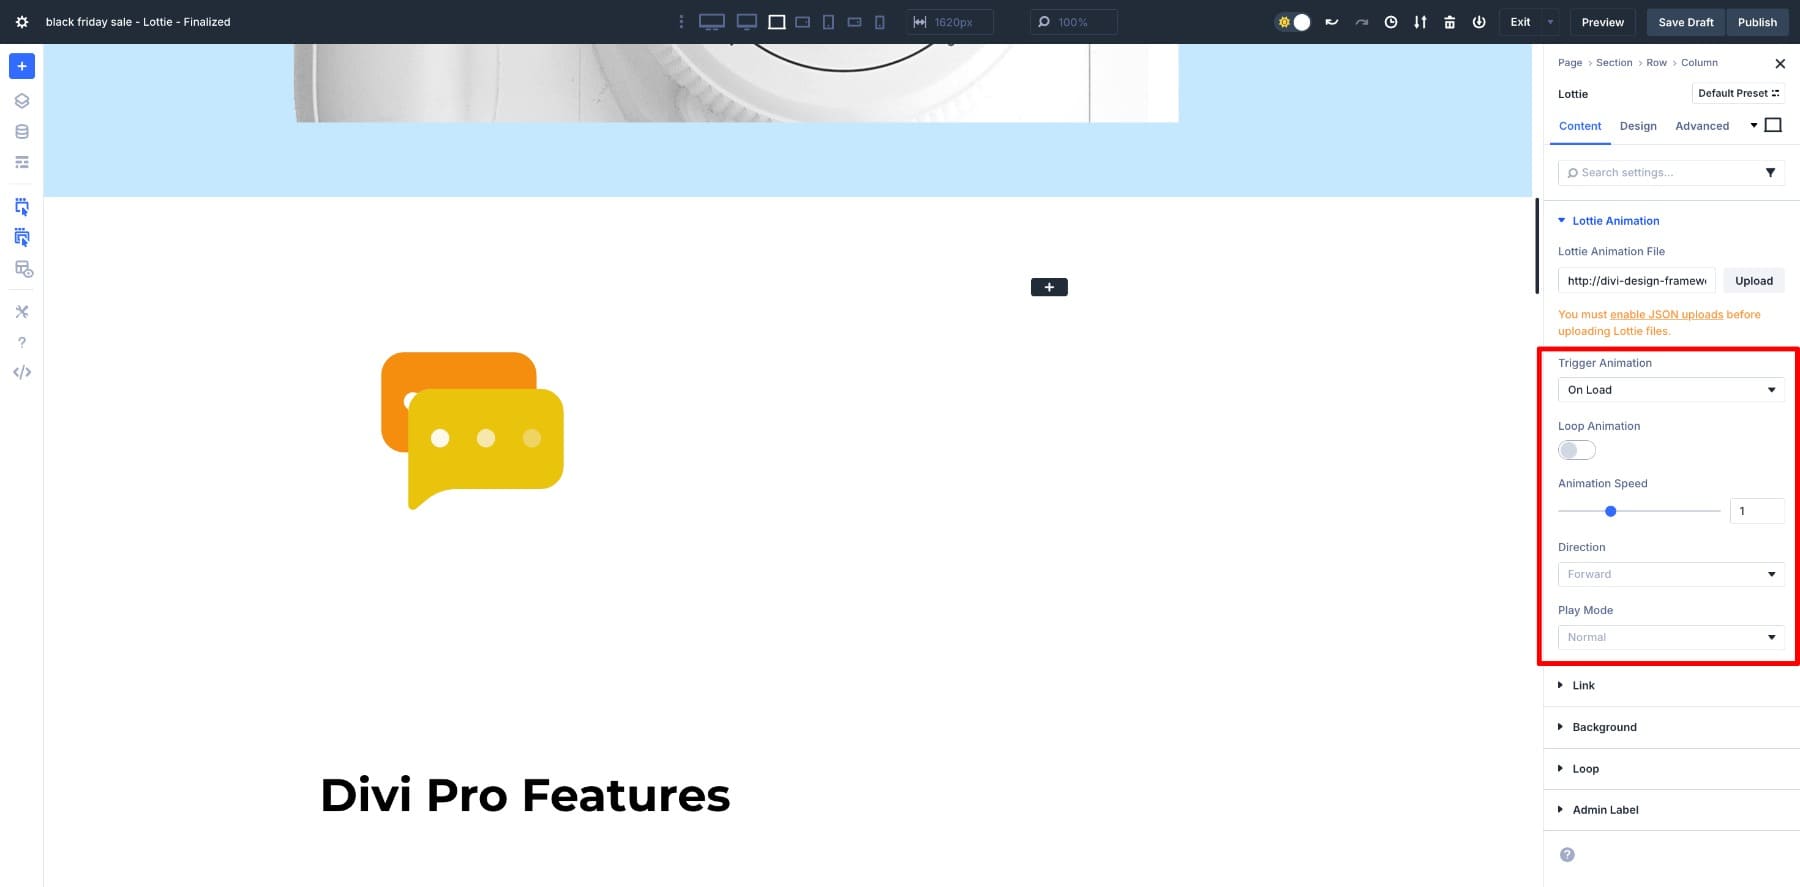
This allows you to determine how your Lottie should behave:
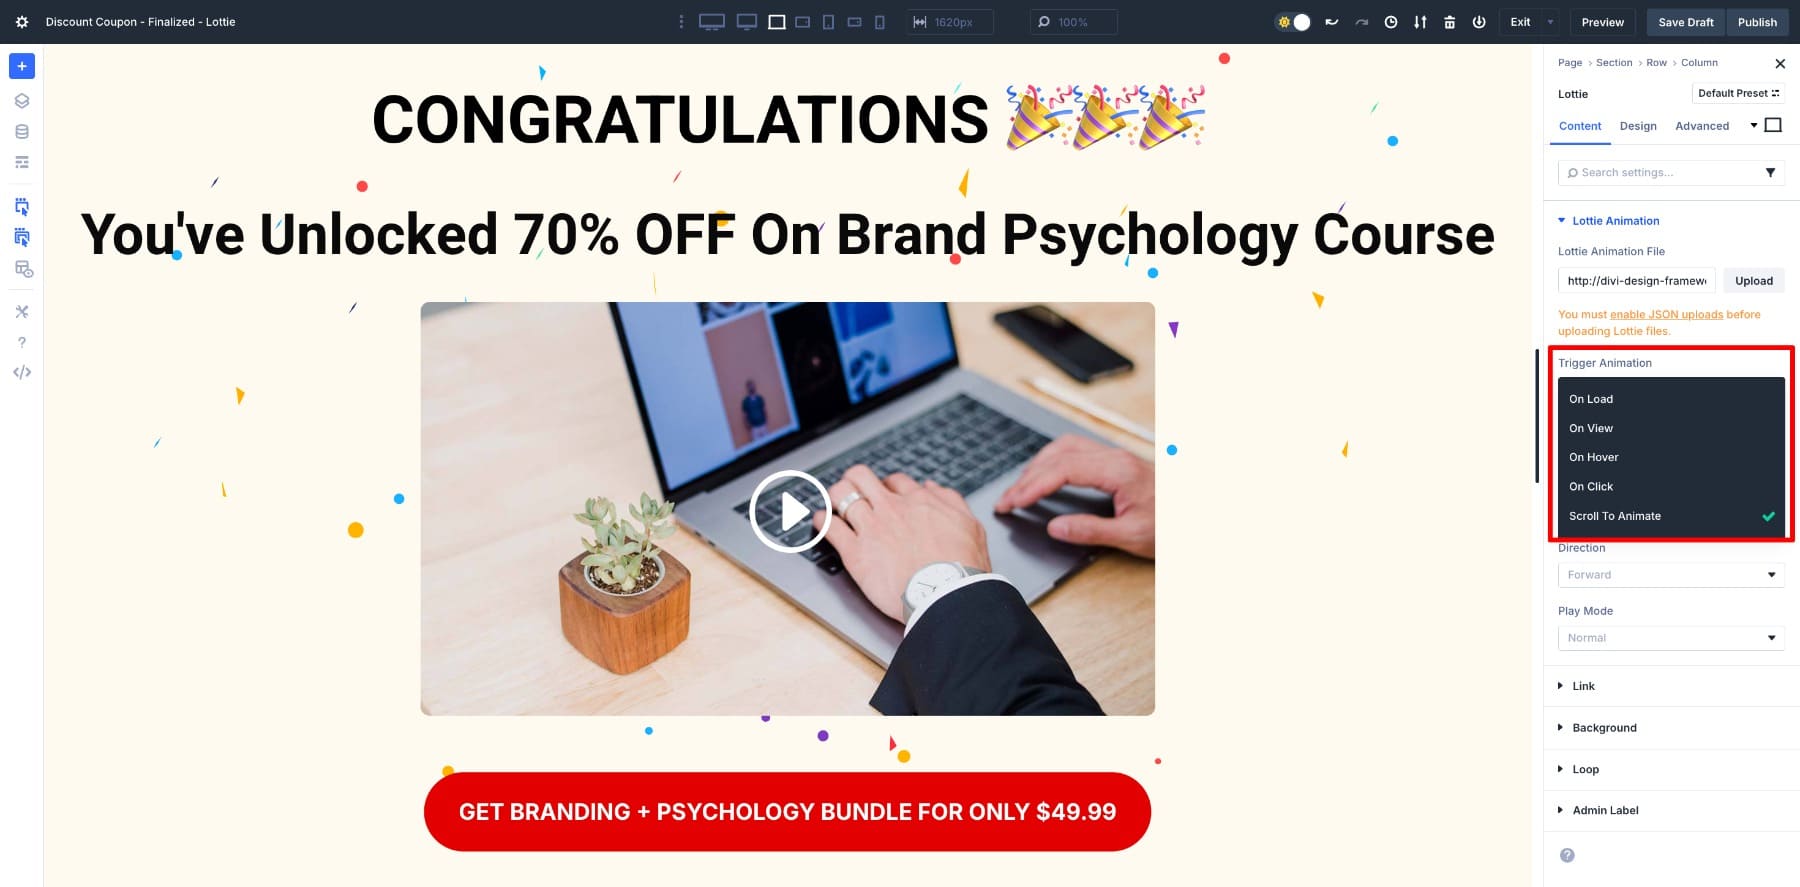
- Trigger animation: Determine when the animation starts. Options include On Load, On Hover, On Scroll, On Click, and Scroll to Animate.
- Loop animation: Determine whether the animation loops continuously or plays only once.
- Animation Speed: Adjust the speed at which frames progress. It helps synchronize the animation timing with the flow of the page or user actions.
- Direction: Determine whether the animation plays from start to end or vice versa from start to start.
- Play mode: Set how the animation behaves when triggered.
And that’s it. Once you configure the settings, the animation will immediately appear in the Divi builder and you can adjust its size and placement using the Divi design options.
Of all these controls, the one that unlocks scroll-based motion is the one Scroll to Animate. This option links your animation frames directly to the visitor’s scrolling position, allowing them to control how the motion unfolds as they scroll across the page. Since this tutorial is about scroll-based animations, we’ll be using this option for all our builds.

In the next section we will set up various Lottie animations using Scroll to Animate. For that, you need the latest Divi 5 version installed on your website.
Create scroll-based discounts and reveal upsell offers in Divi 5
There are many use cases of scroll-based Lottie animations, but perhaps one of the most useful is building hype with an upsell offer. For this walkthrough, we’ll build a discount reveal section like the one below.
Confetti and bold text are used to unlock a special offer as the visitor scrolls into view. This animation works perfectly for upsells, guarantees or temporary promotions.
1. Upload the Lottie JSON file
The above design uses a confetti backgroundwhat a Lottie file is. I downloaded it from LottieFiles and uploaded it to my WordPress Media Library.
You will need to save the design to your LottieFiles dashboard. Once you have done this you can use the Lottie JSON filetype.
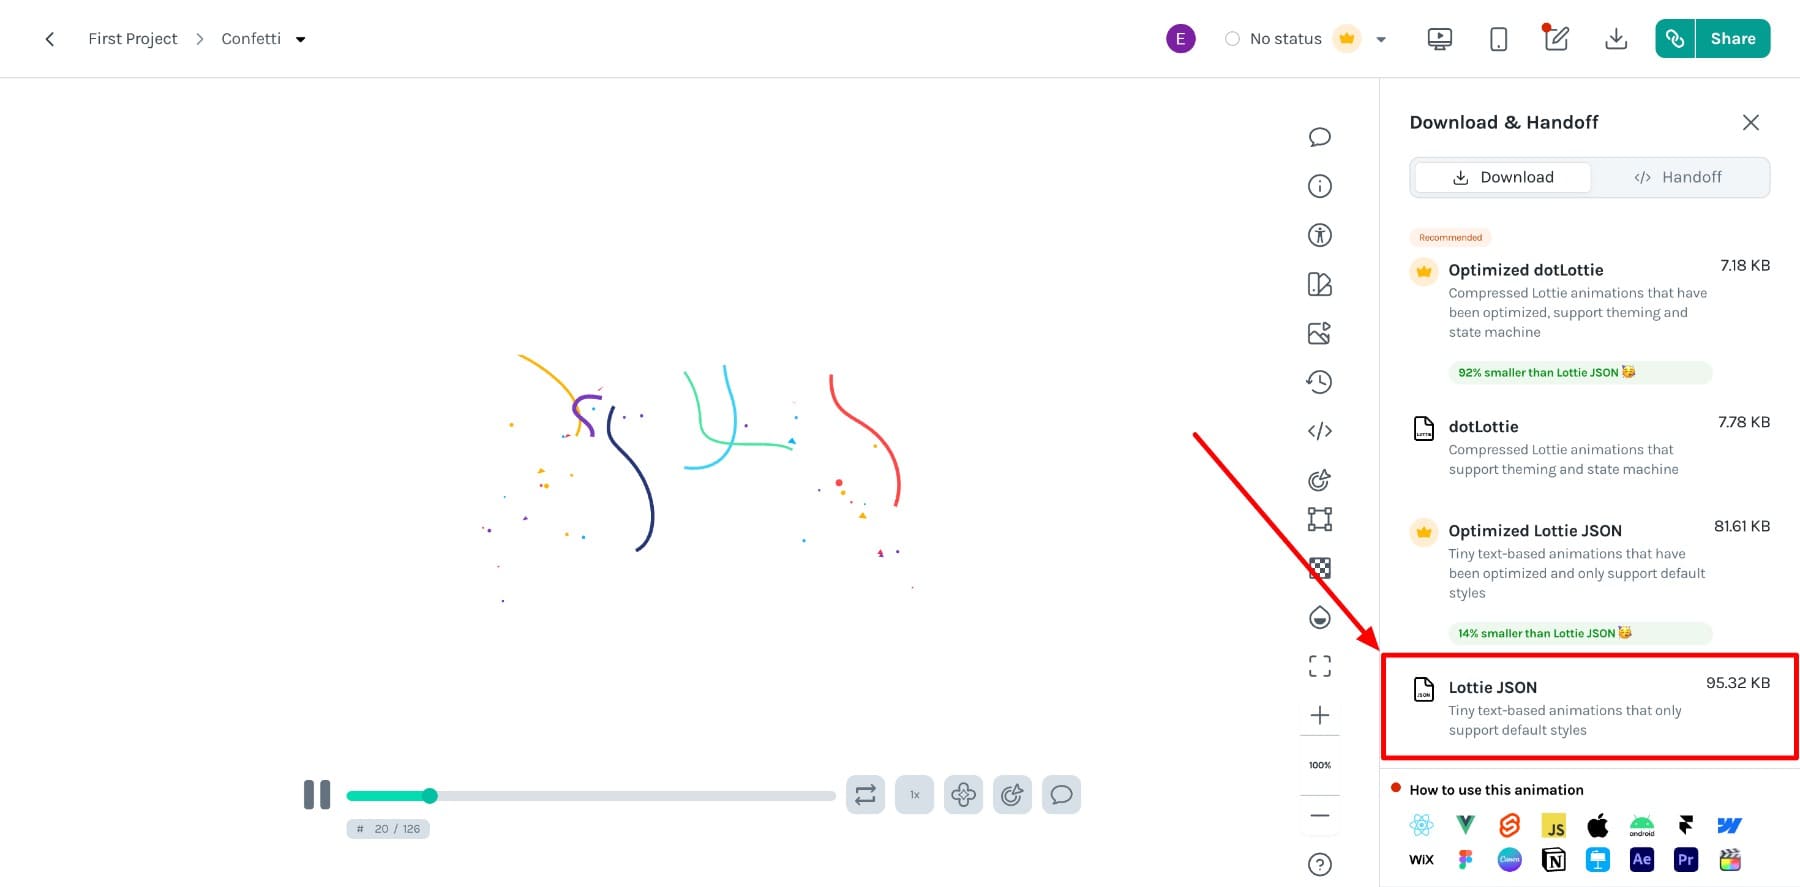
It is stored on your device. Then upload it to WordPress. (Make sure the The option to upload JSON files is enabled.)
2. Design your upsell offer
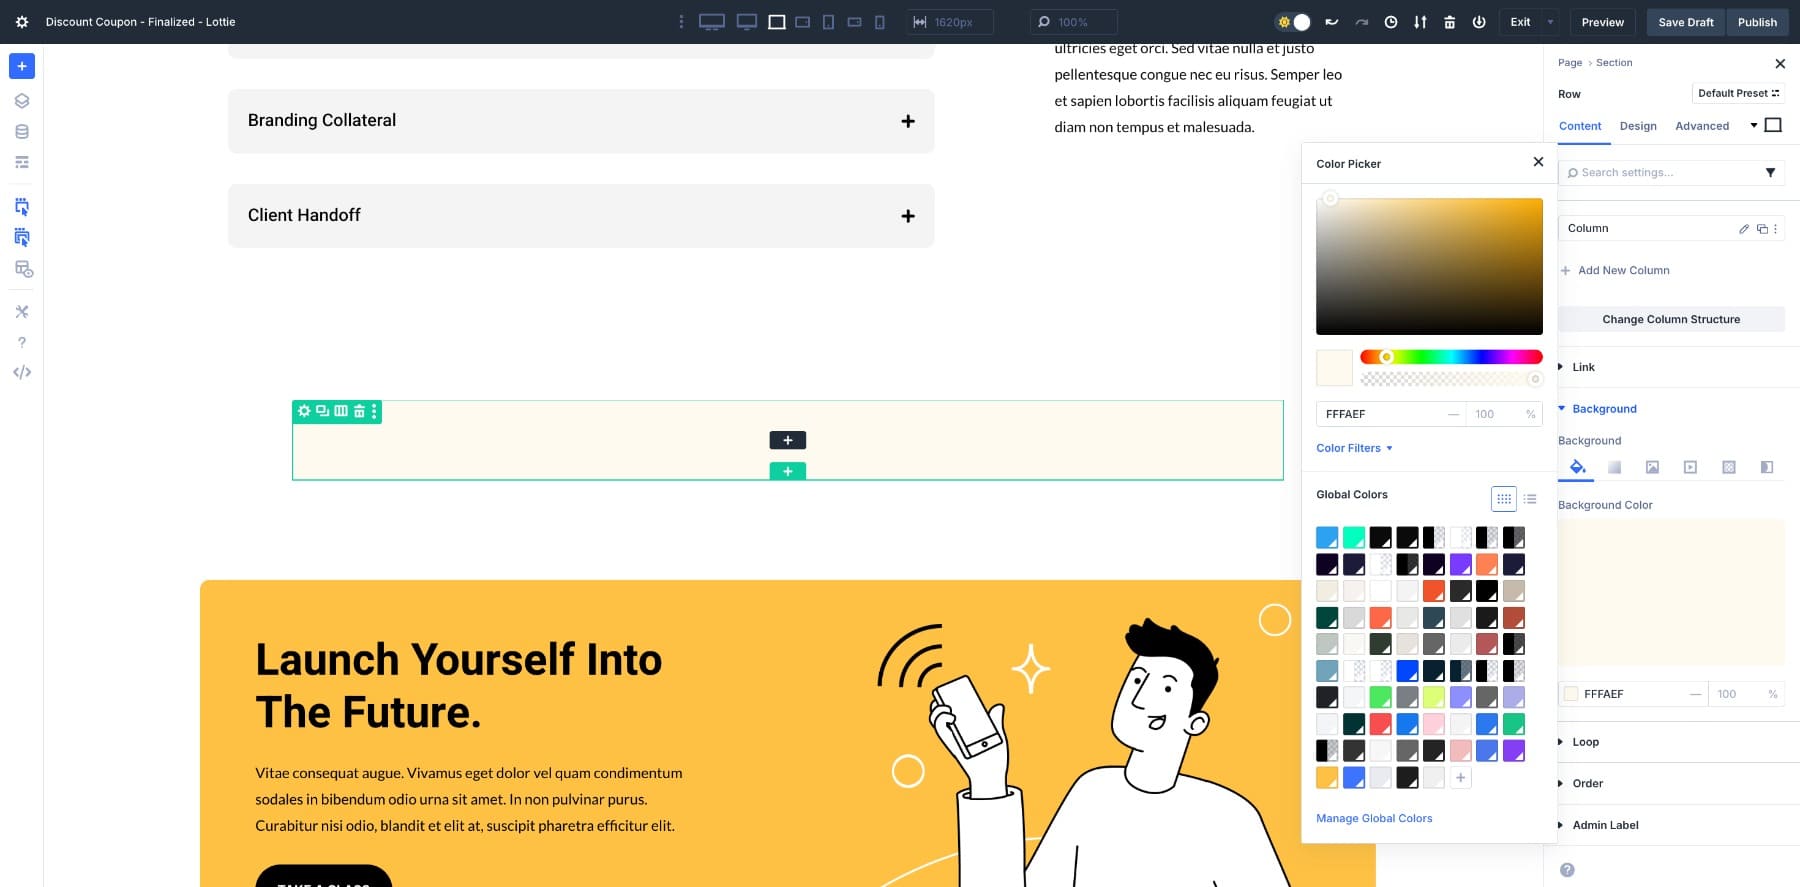
Now that the confetti file is ready, the next step is to design the offer. Start by adding a new section with a single column row. Now set the background color of the row to something neutral so that the animation stands out.
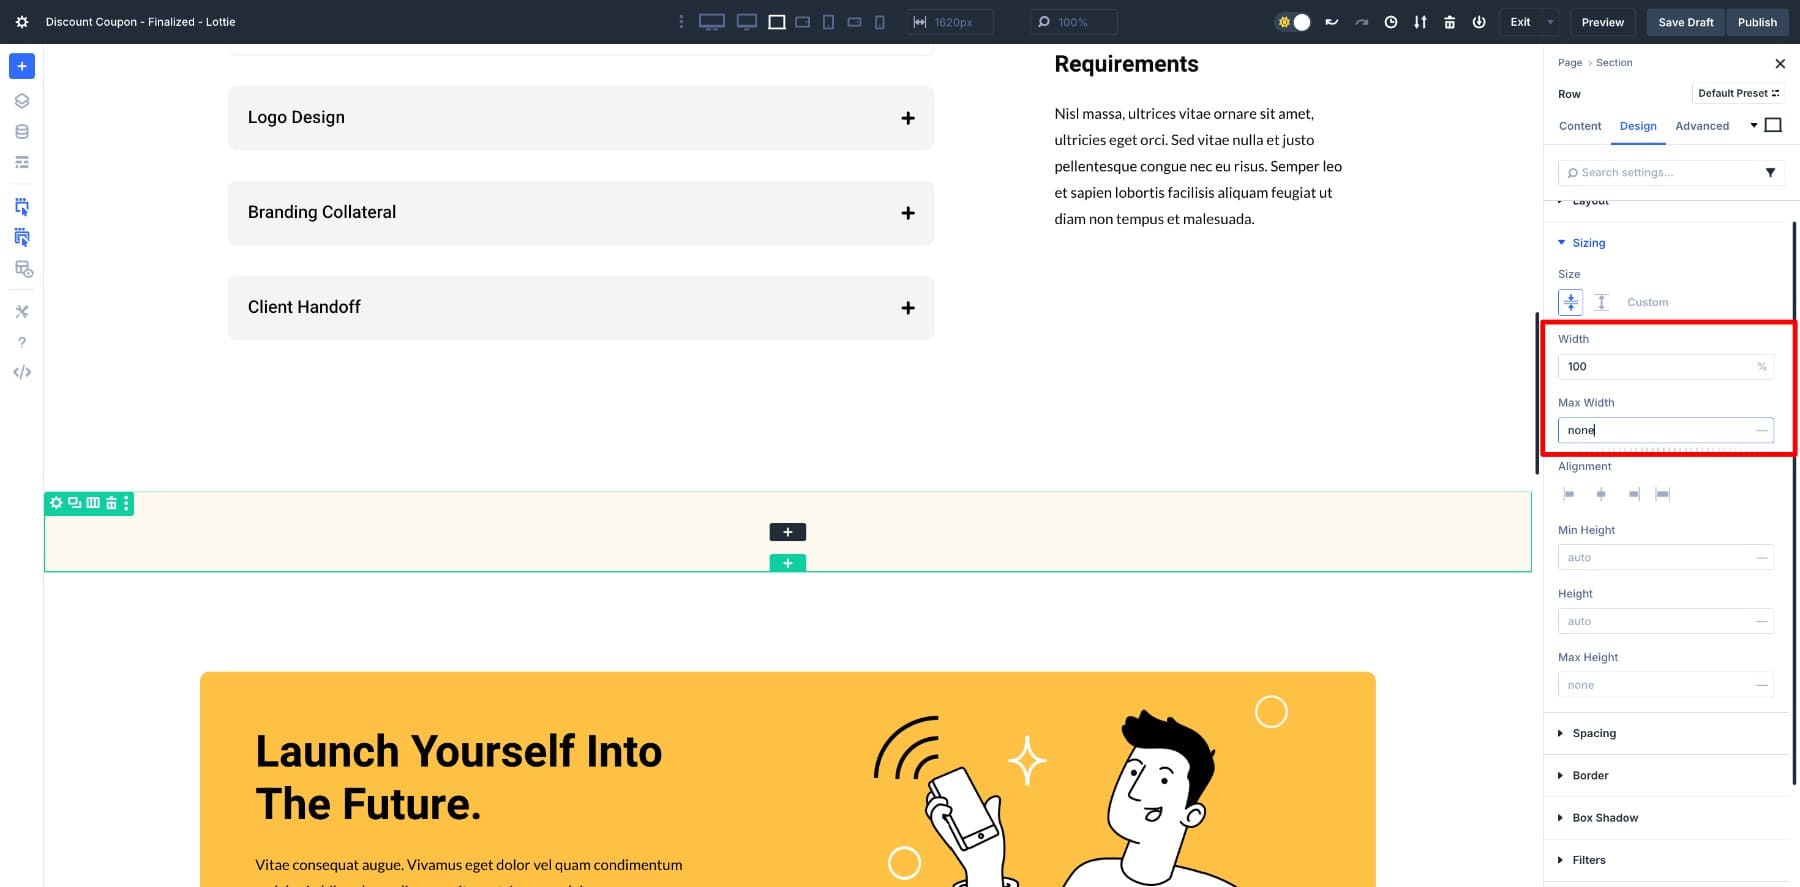
Then adjust the size of the row. Set Width up to 100% and Maximum width for no one.
Add a header module to your main message (e.g. “Congratulations!”) and adjust it as necessary.
Similarly, add another Heading module and write your supporting line: You’ve unlocked 70% OFF our Brand Psychology course. Keep it centered and easy to read so that it complements the main message without overwhelming it.
To show a product demo or preview, insert a video or image module below it.
Then add a strong CTA. Style it with a bold background color, like red, so it can’t be missed.
Adjust the padding of all elements to give your layout some breathing room.
3. Add scroll effects to the CTA
Enable Scroll effects in your button so that in addition to the confetti, it also shows animation when users scroll.
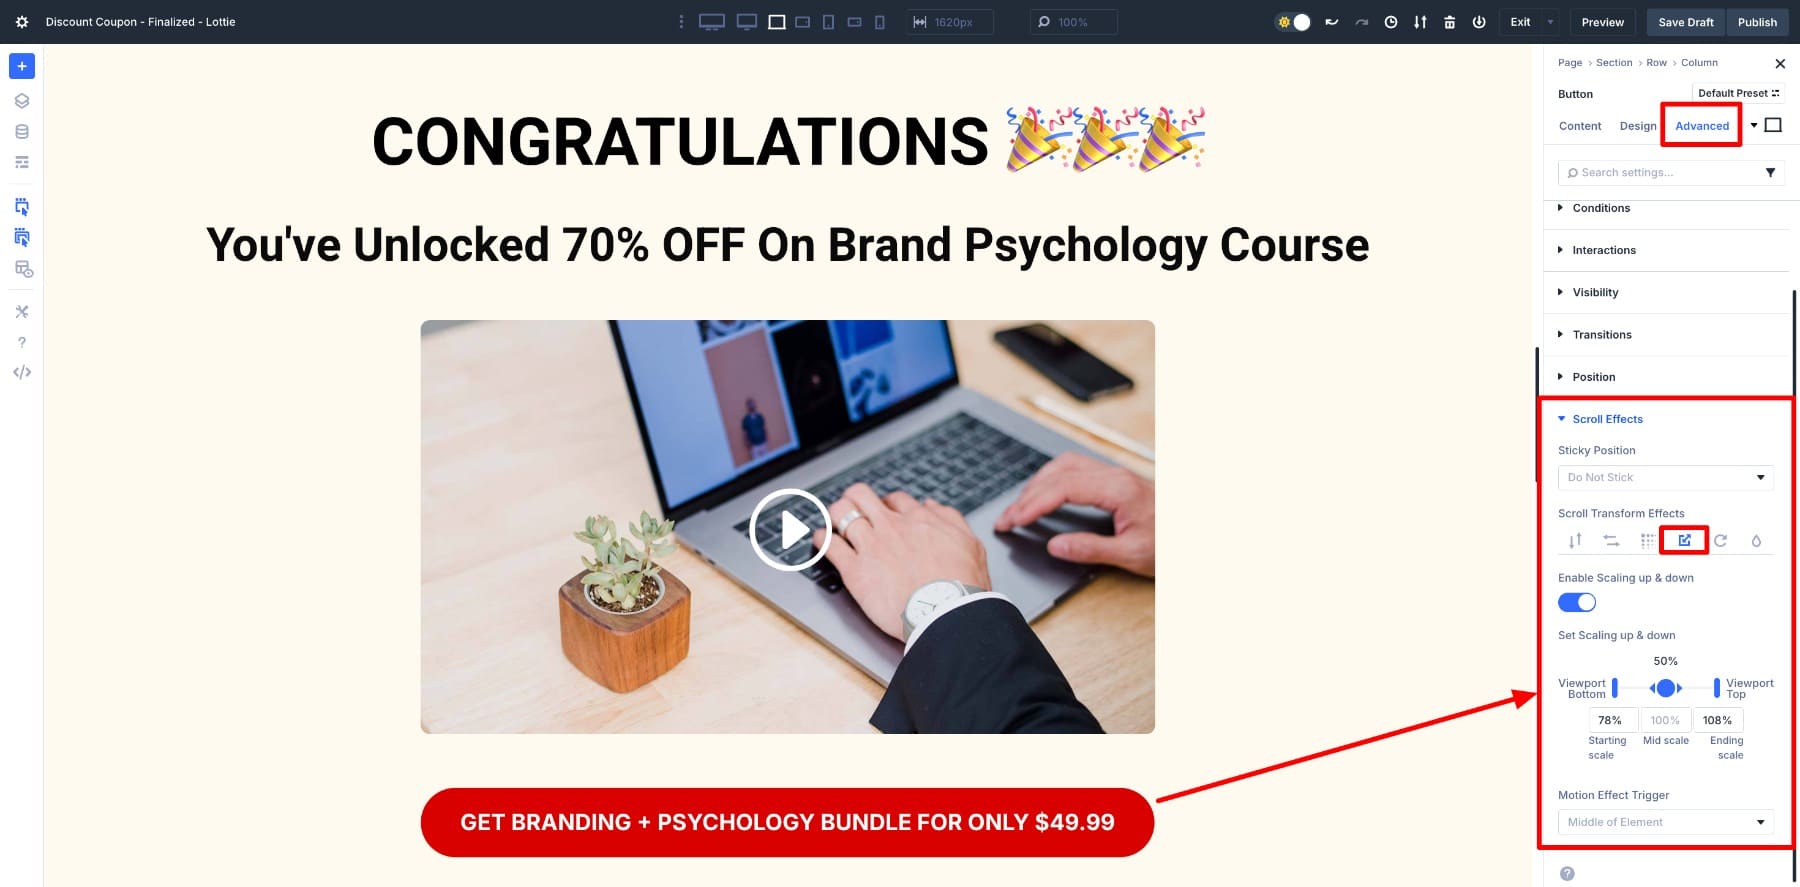
Go to Advanced > Scroll Effects > Scroll Transform Effects. Enable Scaling up and down, and set Viewport Bottom to 78% and Viewport Top to 108%.
4. Add Lottie module
Now it’s time to bring the confetti animation into your layout. In the same row, add a Lottie module below the button and insert your JSON file.
As you can see, the Lottie is currently under the bud. However, we want to put it in the background of our layout. To do this, we will use the Position by Standard Unpleasant Absolute.
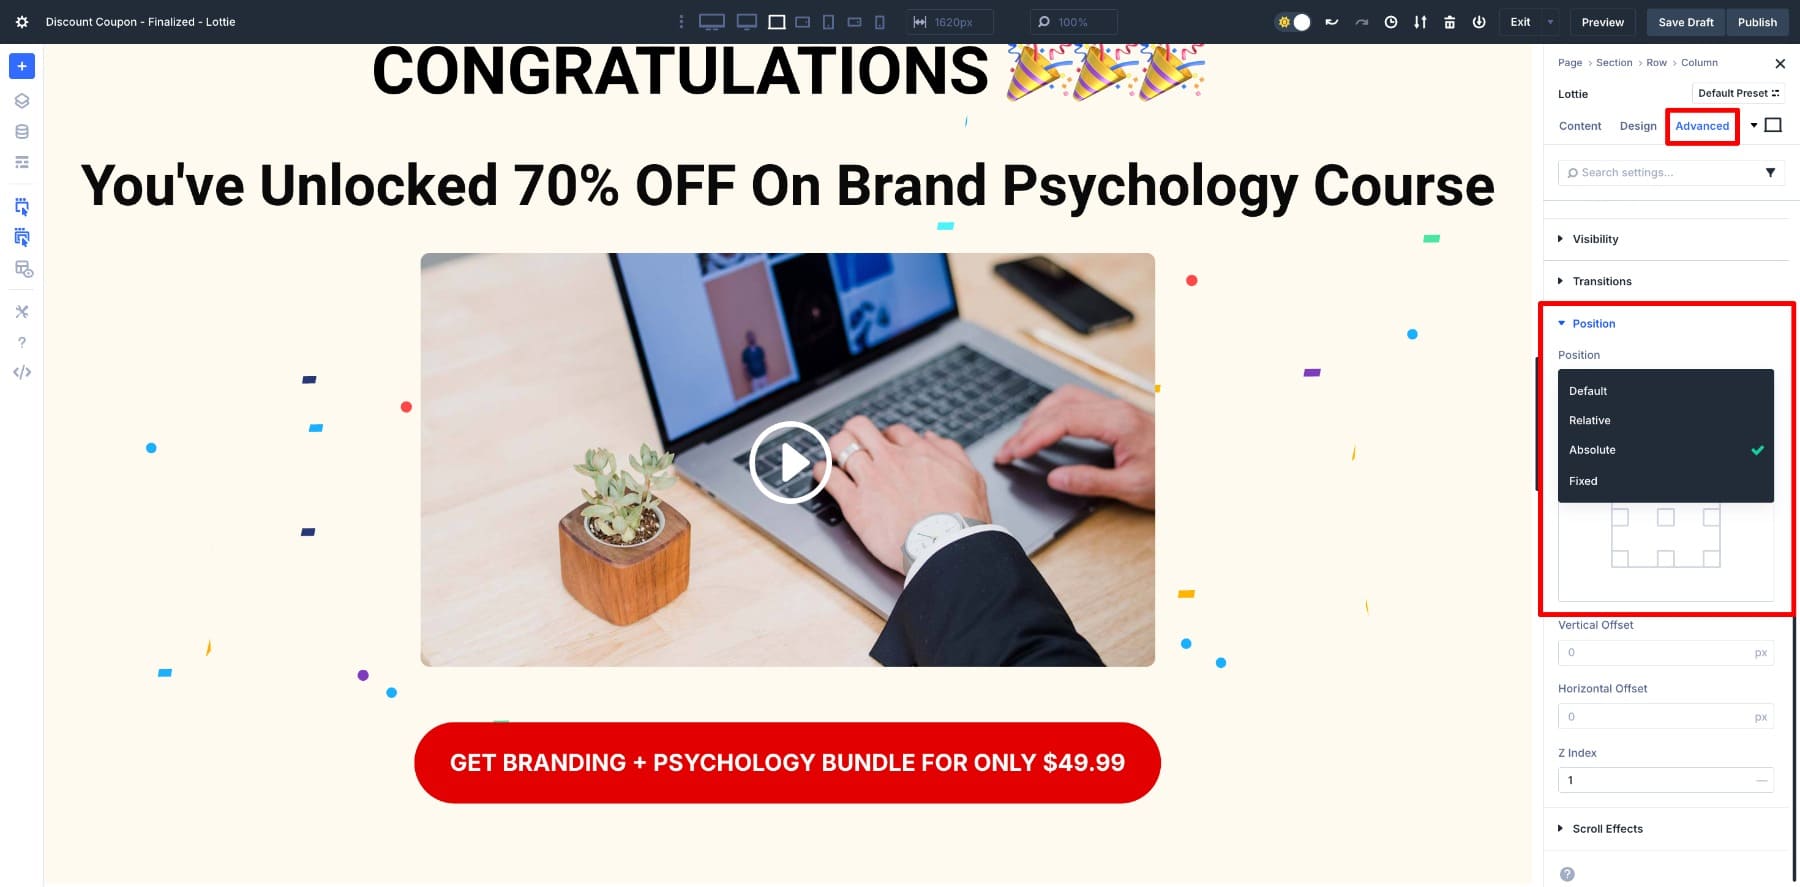
Go to Advanced > Position > Absolute. Set the Z-index to 1. If you want to place the confetti in the background, change the Z Index values of all elements (button, video and headings) to 10.
Now switch the Scroll to Animate option Lottie Animation > Trigger Animation.
Save your draft and Example.
More examples of scroll-based Lottie animations
We’ve built a full-discount reveal section above, but scroll-based Lottie animations can be customized in many other ways. Here are a few quick examples:
1. Blurb icon movement
Add subtle movements to the icons in the summary so that they move as the section comes into view. This makes service lists or highlights feel vibrant without overwhelming the design. It’s a great way to add movement to your landing pages and product highlights.
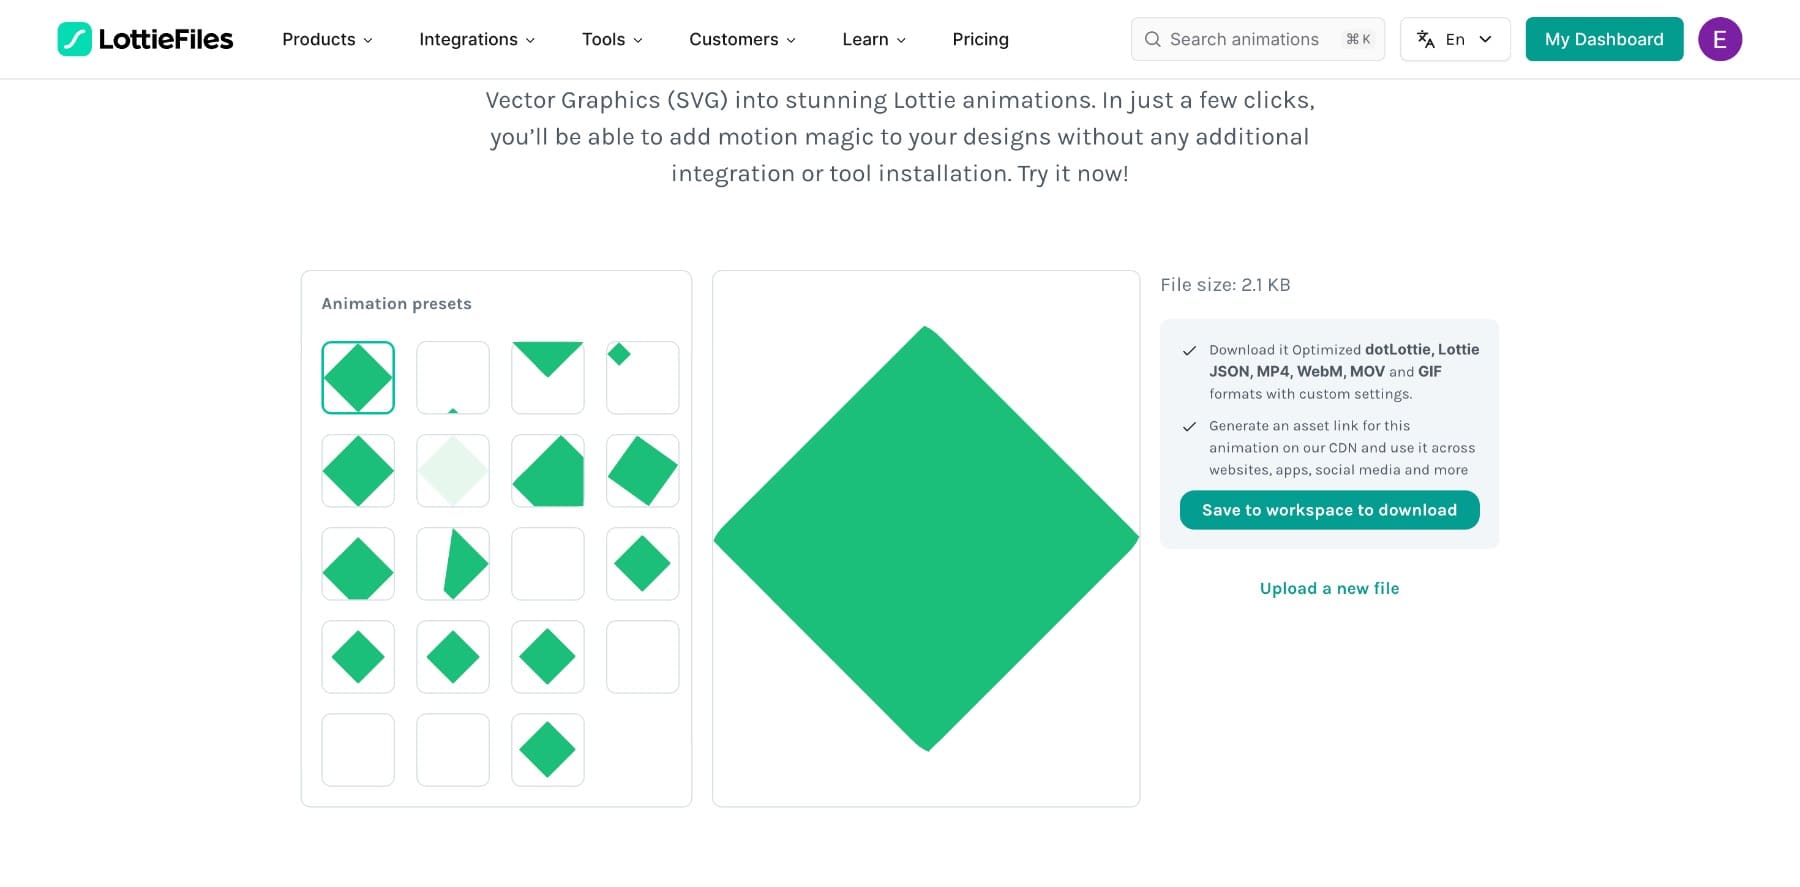
I created these Lottie animations using SVG to Lottie (a tool from LottieFiles). All you need to do is upload icons as SVG files, select a preset and download as a Lottie file.
2. Revealing seasonal sale
Scroll-based Lottie animations are perfect for seasonal promotions like Black Friday sales.
As the visitor scrolls to the sales section, you can also activate effects such as confetti, exploding price tags or countdown timers. It’s a simple way to build excitement and emphasize urgency without overwhelming the design.
3. Small animations
Even small animations, such as arrows, badges or check marks, can be associated with scrolling. These micro-interactions help guide the eye, reinforce key points, and keep users engaged as they scroll through the page.
Bring movement to Divi 5 with Lottie
Scroll-based Lottie animations provide powerful ways to add interactivity to your Divi 5 designs. Whether it’s a reveal of full discounts, a seasonal promotion or small icon moves, the Scroll to Animate option makes movement feel natural and connected to the browsing experience.
Try experimenting with different Lottie files and you’ll be surprised how much personality even a little animation can add to a page. Ready to design your first Lottie?
#Create #ScrollBased #Lottie #Animations #Divi