
In yoga we often rely on sensation to guide us. When we feel a stretch or challenge in a pose, we assume we are aligned. But intensity does not always equal integrity. You may strain while subtly slumping in your lower back or shoulders or otherwise not using the body as intended.
That’s exactly why using a wall as a prop is a game changer. Instead of guessing where your body is in space, you get immediate physical feedback when you rest or press part of your body against the support.
Practicing poses against a wall can reduce the intensity of a pose. But it can also increase the challenge. A wall is not just a prop to make the pose easier.
The benefits of using a wall in yoga
The use of walls in yoga has strong roots in the teachings of BKS Iyengar. In the Iyengar tradition, walls were used to help students experience the alignment of a pose and find stability. Today, the wall remains one of the simplest and most effective yoga teachers.
Practicing with a wall refines alignment in ways that a freestanding practice sometimes cannot. It helps you understand what true “stacking” feels like – head over ribs and ribs over hips – reducing unnecessary tension in certain poses.
Pressing on a stable surface also activates your stabilizing muscles, which improves shoulder and hip mechanics. Your balance will also feel more stable as the body feels support, allowing you to stabilize your breathing and ensure that the muscles do not engage unnecessarily.
The wall can also help you stay in poses longer without putting weight on your joints. Those longer postures build strength, awareness and endurance. Over time, this awareness carries over into life, where posture, balance and joint integrity are just as important as flexibility.
Perhaps the best thing about practicing poses with the help of a wall is that it changes the monotony of the yoga class, gets you off the mat and encourages you to break habitual patterns so you can experience a pose as if it were new again. And because walls are everywhere – at home, in the office and in hotel rooms – using them as props is an accessible and practical way to integrate your yoga practice into your daily routine.
6 yoga poses that use a wall to stretch and strengthen
Move slowly through the following poses, actively using the wall to give you feedback rather than passively leaning against it.
1. Warrior 3 (Virabhadrasana III)
In Warrior 3, pressing your fingertips against the wall ensures that you don’t “pour” your weight into your standing leg. Instead, it’s a reminder to keep your arms and straight leg active to distribute your weight and help you balance.
How: Stand 3 to 3 feet away from a wall, facing it. Shift your weight to your right foot. Extend your arms and chest forward as you lift your left foot off the floor and extend your left leg straight behind you in Warrior 3. Press your fingertips or palms against the wall for balance. Keep your standing knee slightly bent. Reach the crown of your head toward the wall and your lifted heel away from it. Continue pressing your hands against the wall while checking that your left hip is not higher than your right hip.
To intensify the pose, reduce the amount of pressure you press against the wall.
Stay here for 5-8 breaths. Repeat on the other side.
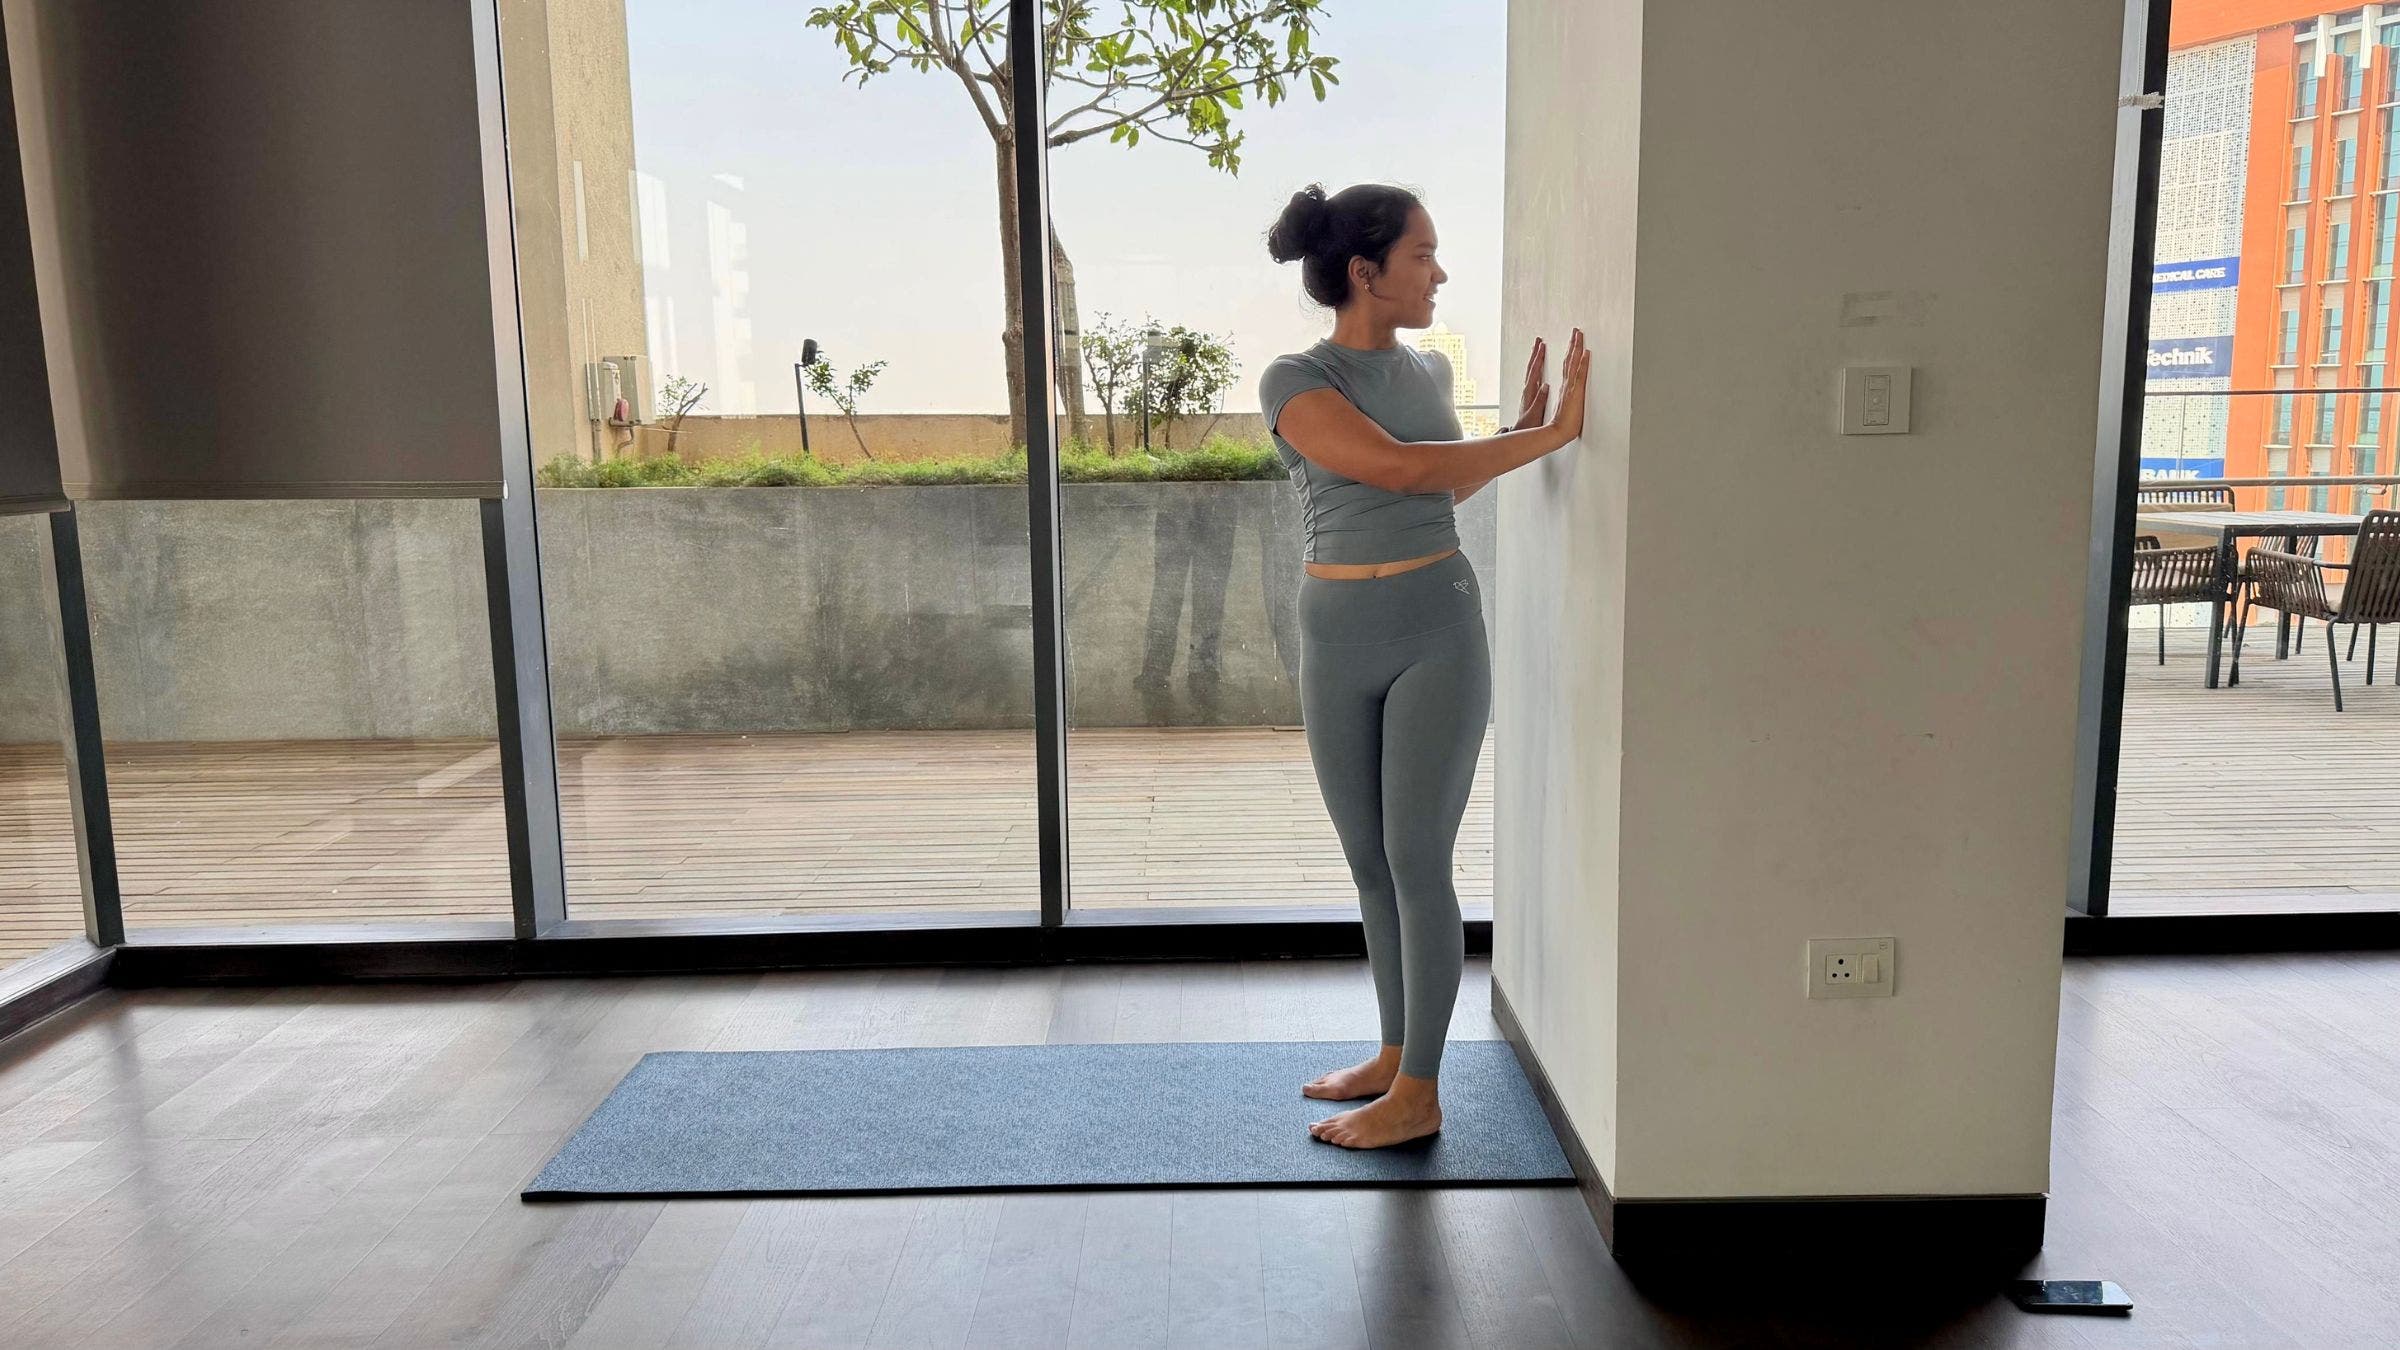
2. Standing Twist (Kati Chakrasana)
You’ve probably heard the advice not to initiate movement from your shoulders into twists. Practicing this pose against the wall helps prevent this.
How: Stand about a foot from a wall, facing away from it. Rotate your torso to the left and touch your palms or fingertips to the wall at chest height. Turn only as far as feels comfortable. If this feels too intense, practice touching the wall with just one hand. Press your feet into the floor. Keep your hips pointed forward. If your hips rotate with your ribs, you will lose contact with the wall. If this happens, reduce the amount you twist. Stay here for 5-8 breaths. Repeat on the other side.
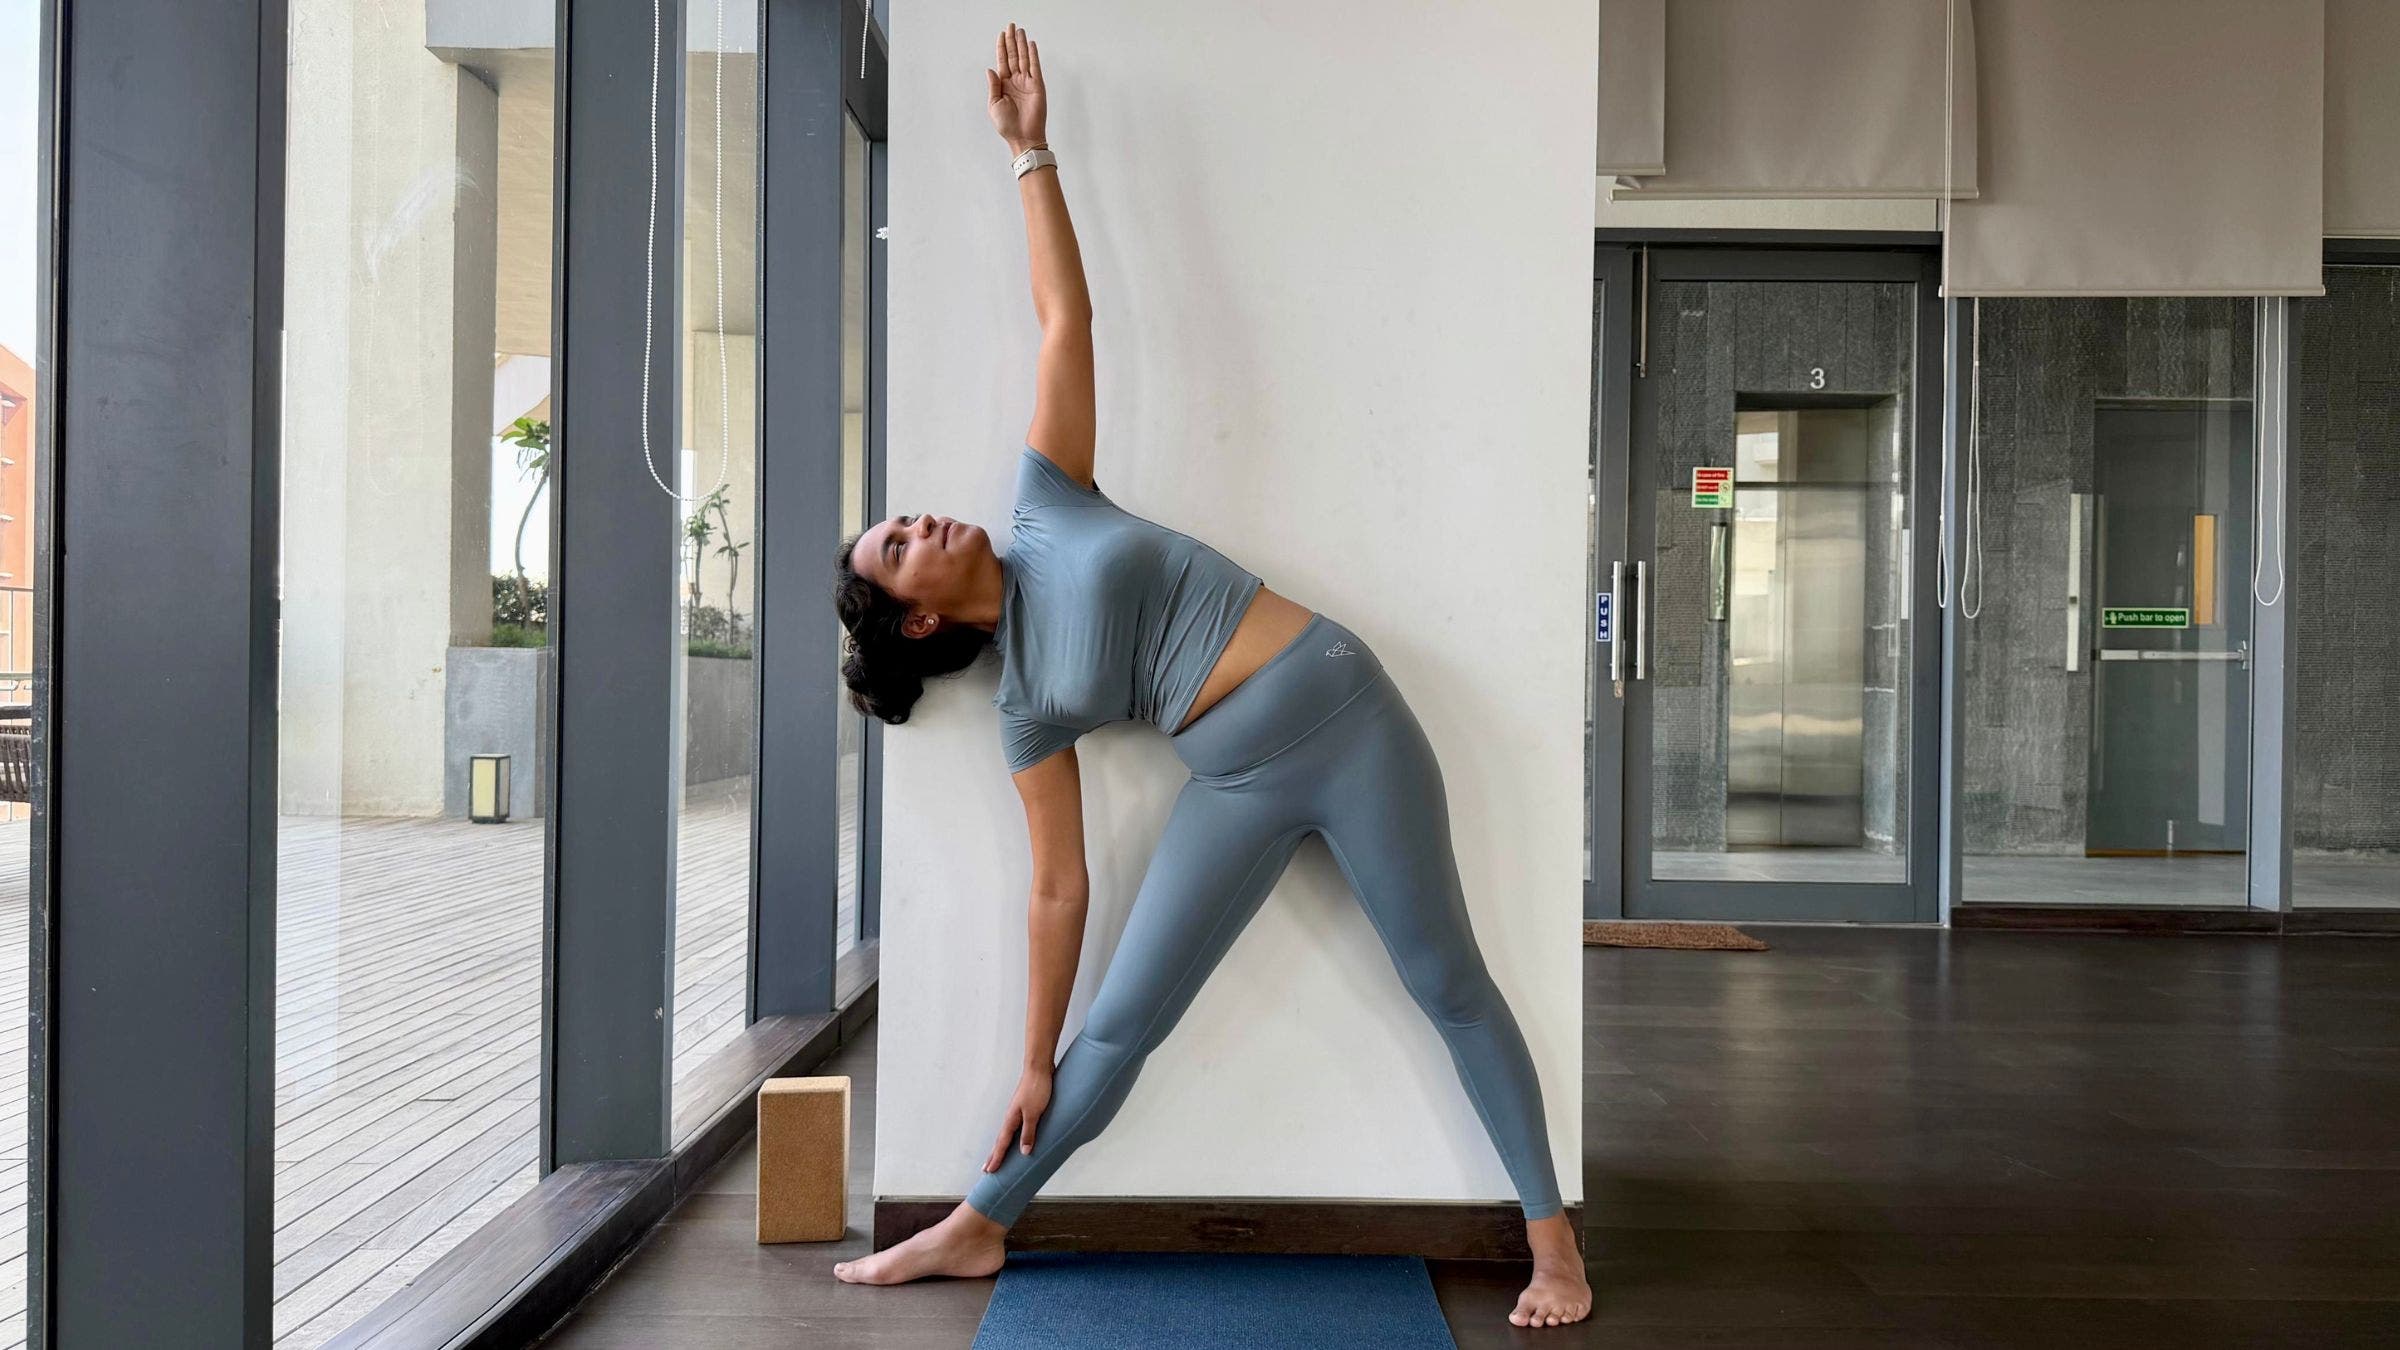
3. Triangle Pose (Trikonasana)
This wall version of Triangle teaches you what it feels like to keep your body in one ‘plane’ instead of sinking to the ground. You might be surprised at how much you leaned forward.
How: Stand with your back body against the wall with your feet in a wide stance. Turn your right foot parallel to the wall. Reach your torso over your right leg as you lower your right hand toward your shin or a block. Reach your left hand toward the ceiling in Triangle Pose. Press your shoulder blades and the back of your head against the wall. If you feel unsteady, shorten your stance. Stay here for 5-8 breaths. Repeat on the other side.
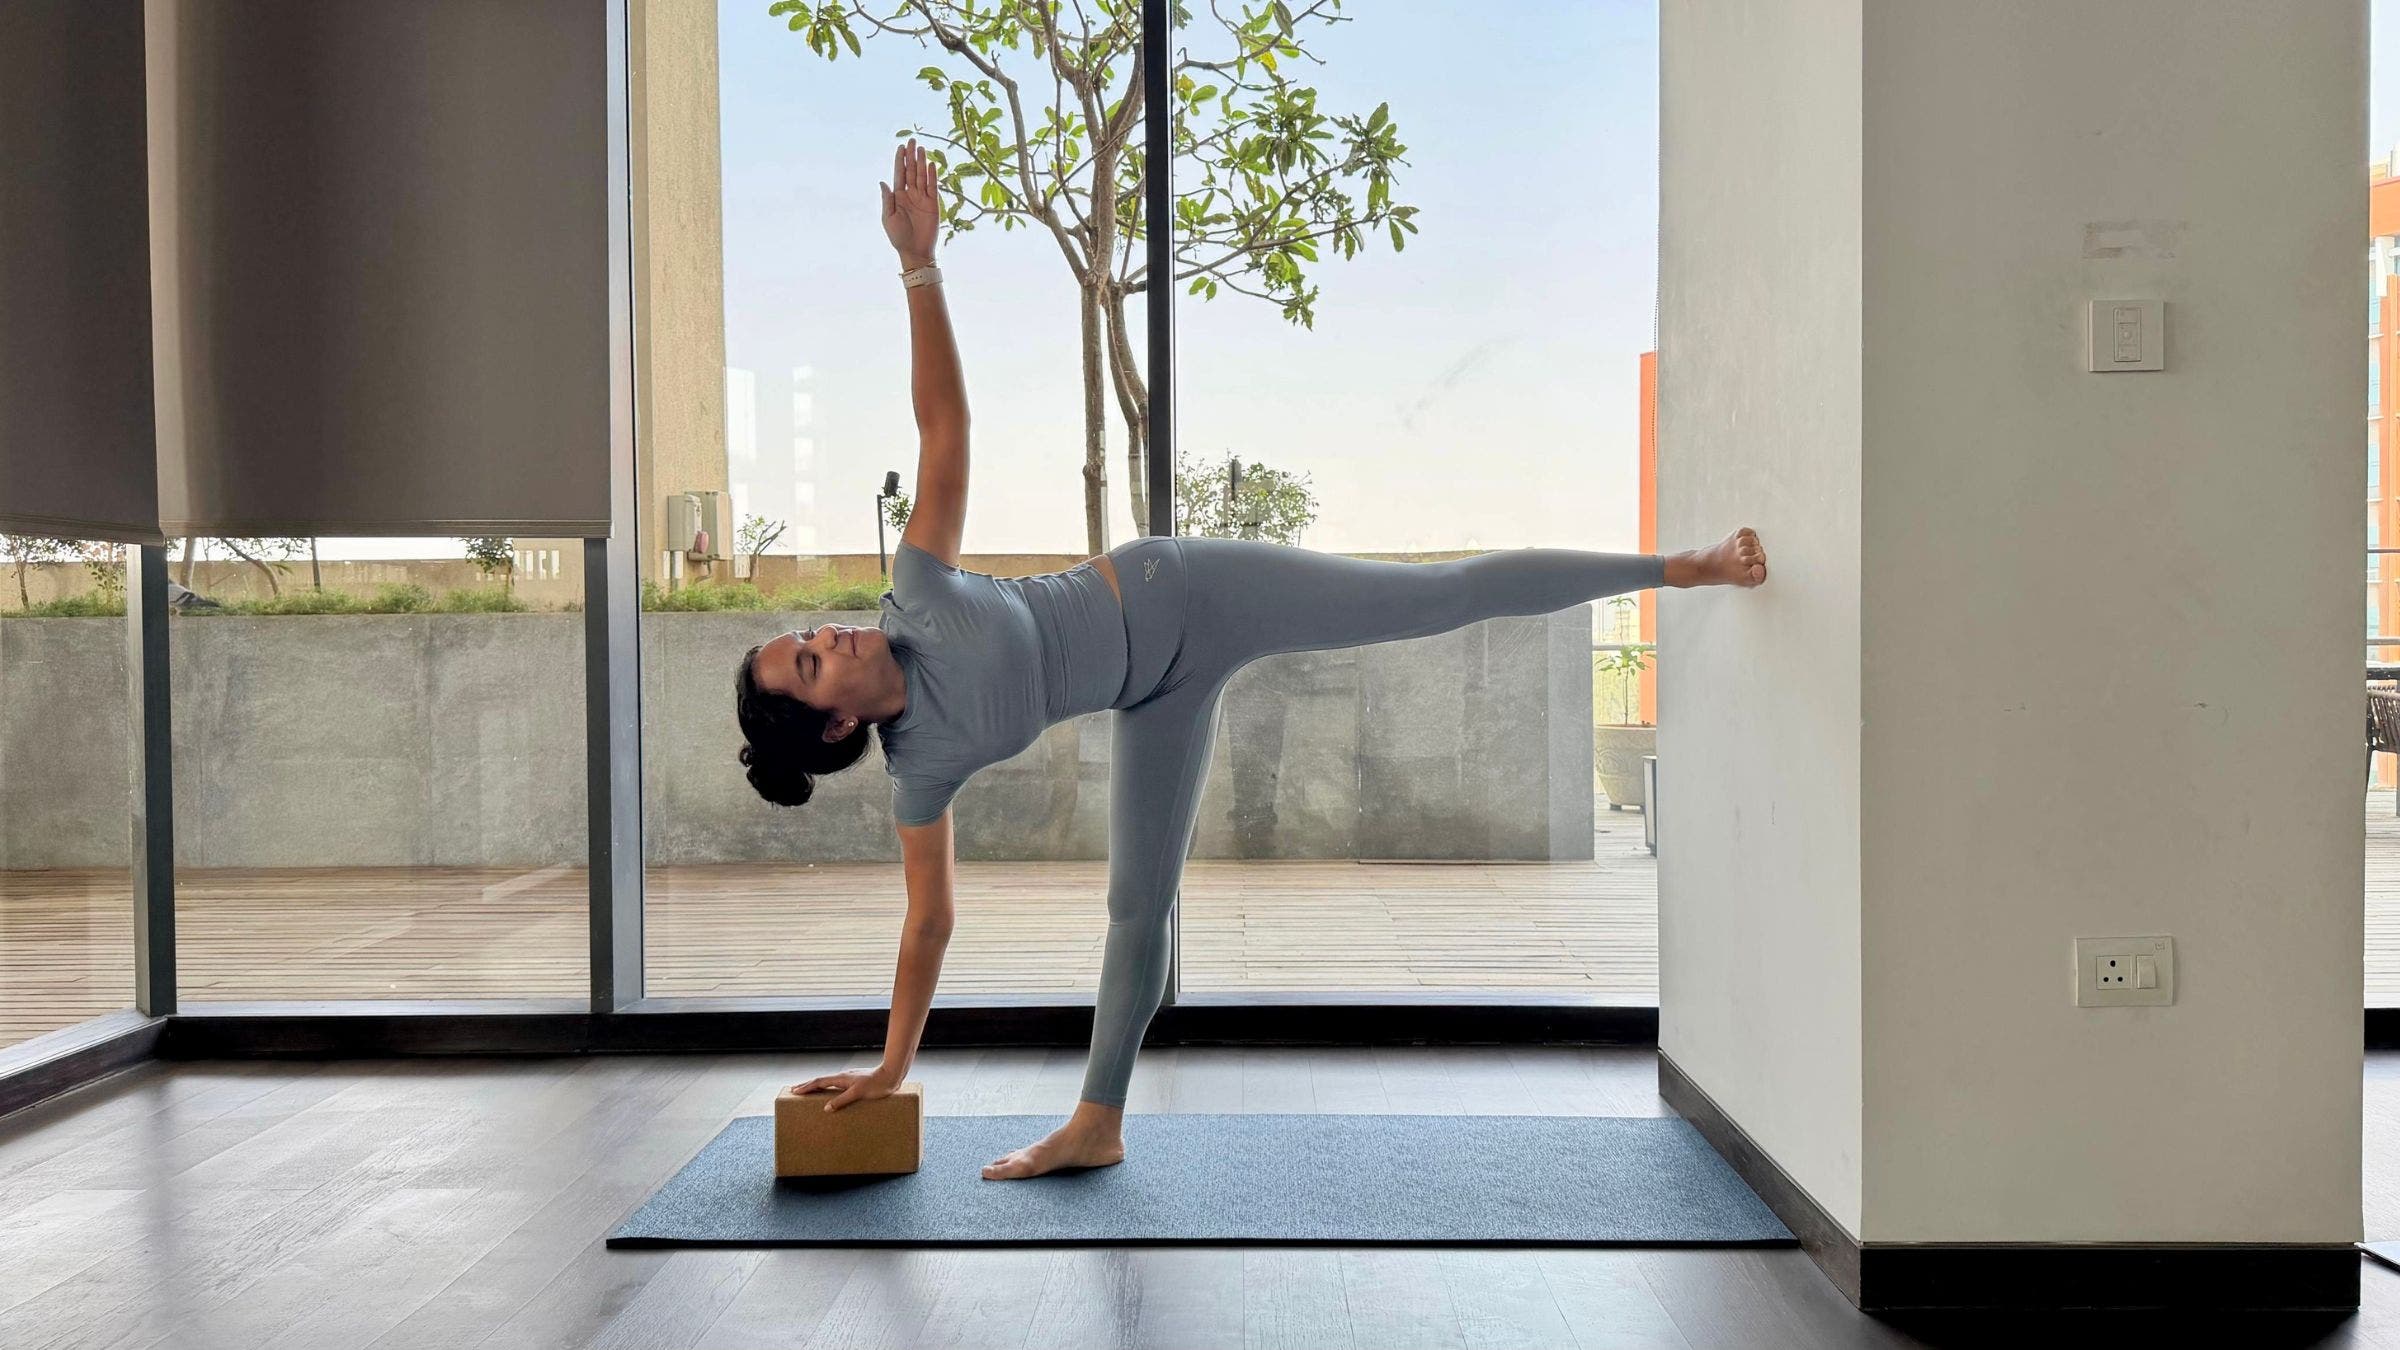
4. Half Moon Pose (Ardha Chandrasana)
Like Warrior 3, this version of Half Moon Pose against a wall allows you to achieve a more even balance between your standing foot and your lifted heel.
How: Stand 3 to 3 feet away from a wall, with your left body facing toward it. Shift your weight to your right leg. Reach your right hand toward the floor or a block next to your right foot as you lift your left foot off the mat and extend your leg to hip height. Press the back of your lifted heel against the wall in Half Moon Pose. Keep your chest open and press your shoulders away from your ears. Stay here for 5-8 breaths. Repeat on the other side.
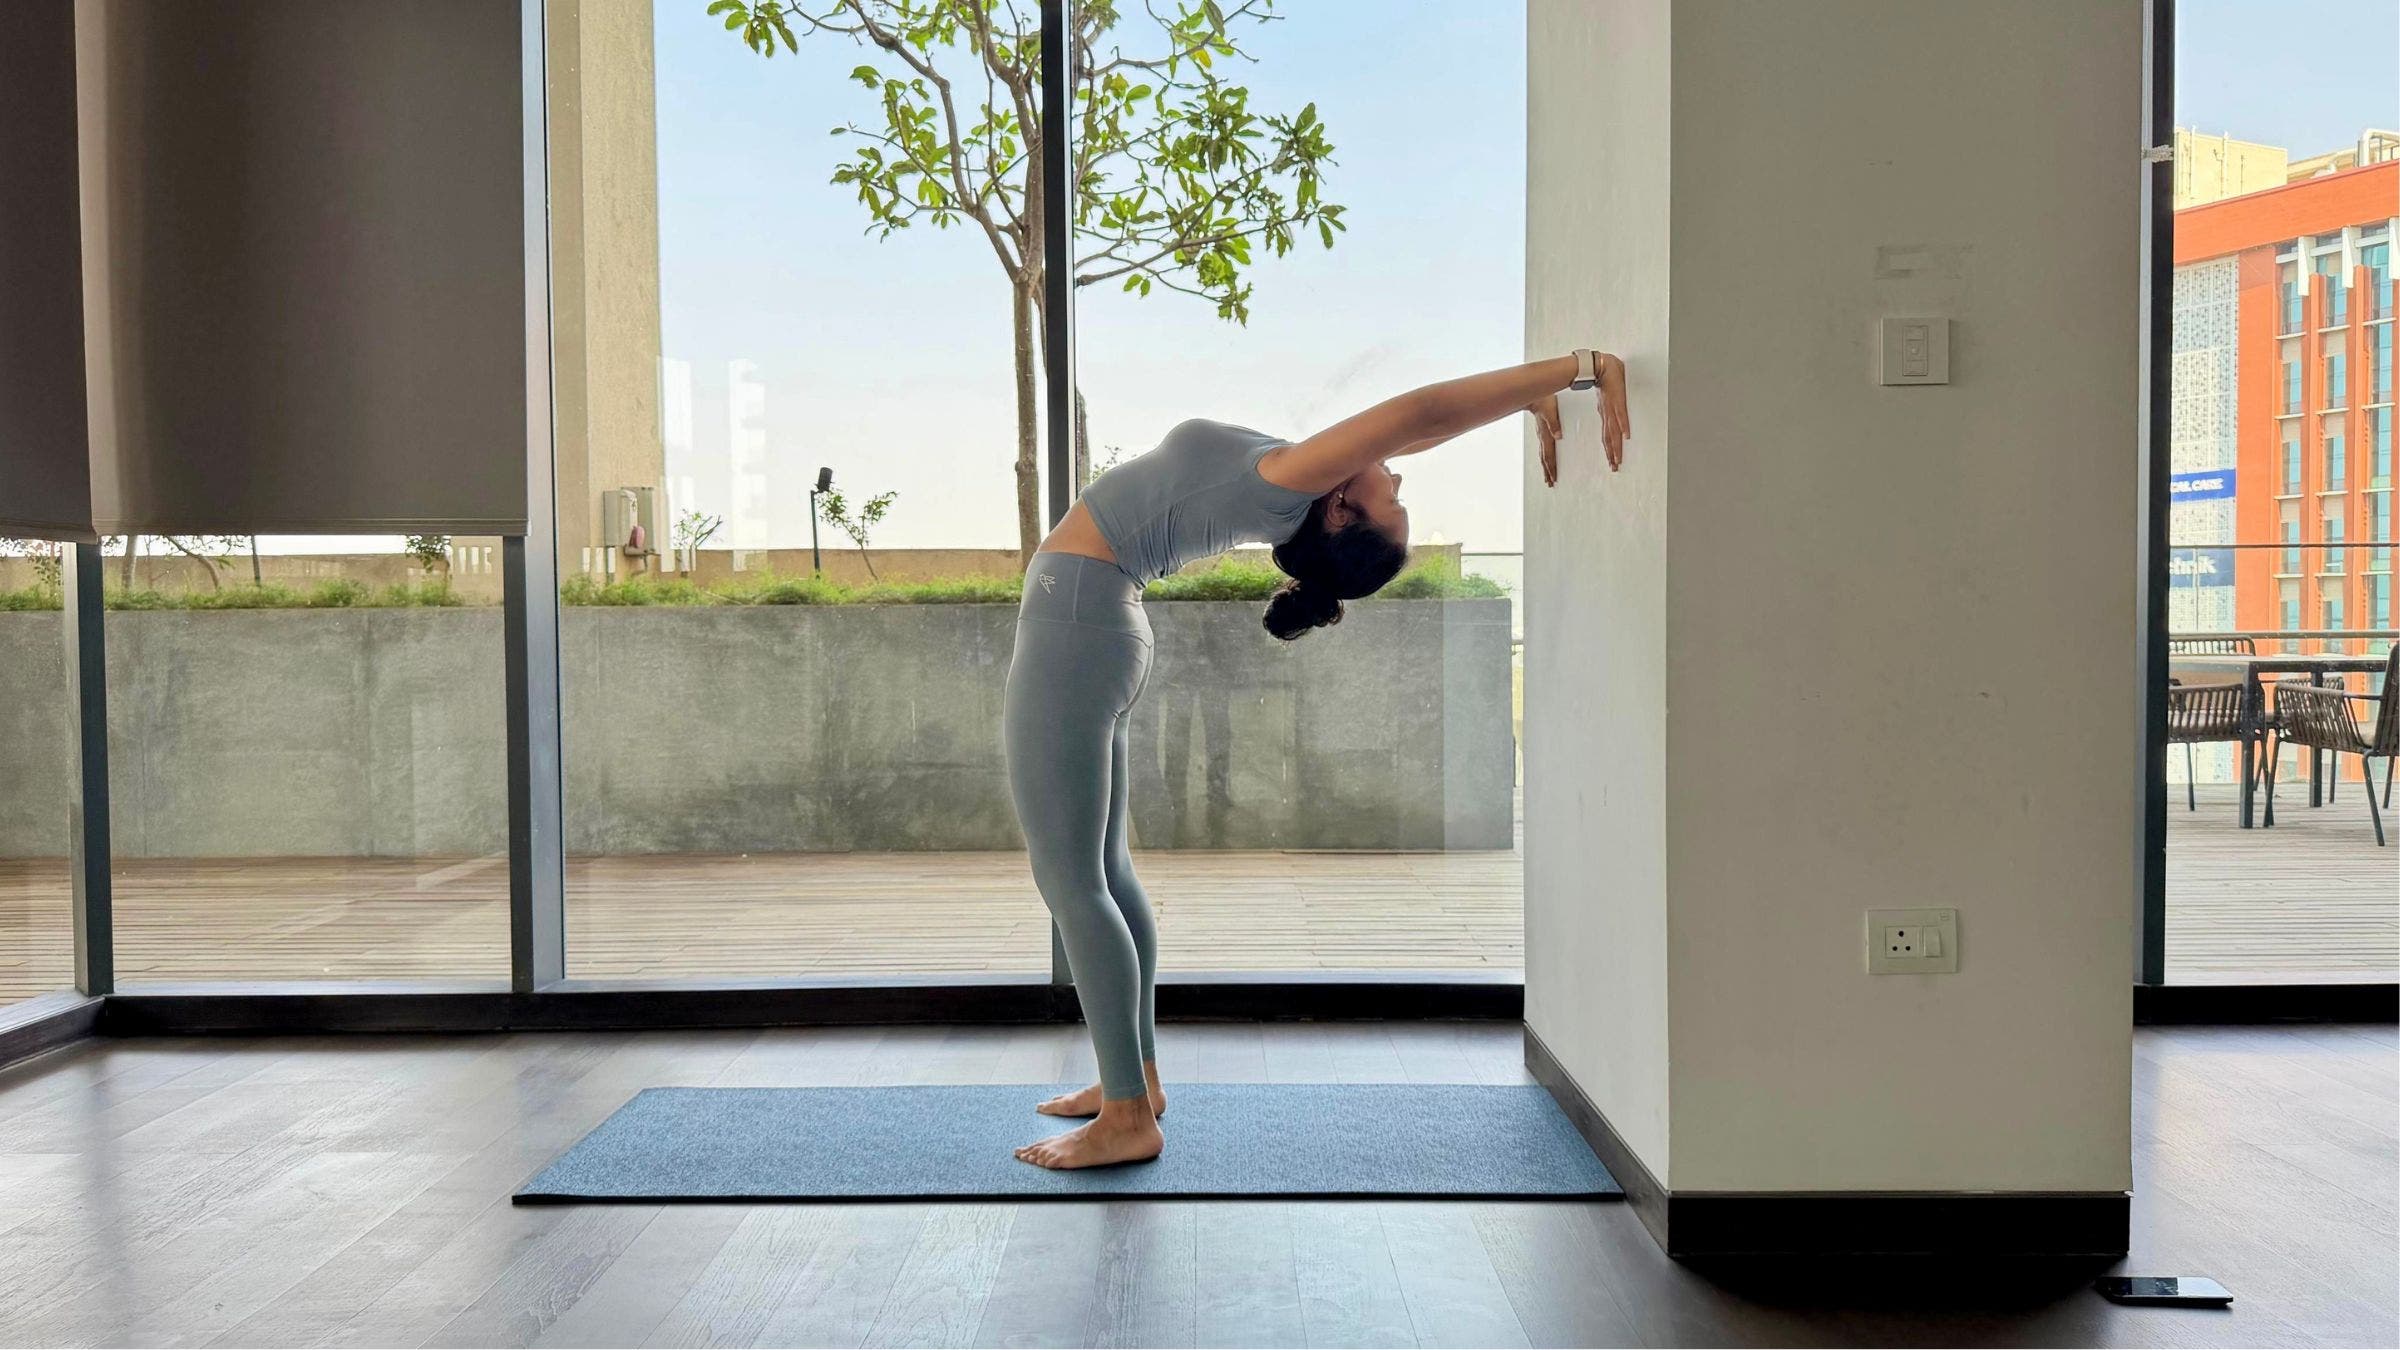
5. Wheel Pose (Chakrasana) Preparation
Using the support of the wall can help you work toward Wheel Pose or a more intense backbend that opens your chest and builds body strength.
How: Stand 1 to 2 feet from the wall, facing away from it. Press your feet into the mat and pull your belly button toward your spine. Reach your arms above your head. Imagine pulling the crown of your head up and back toward the wall as you arch your back until your palms reach the wall (you may need to step closer or further away from the wall). Press your palms against the wall and gently push your hips forward. Take 3-4 breaths here and then press your feet into the mat as you lift your chest, reach your arms toward the ceiling, then lower them to your sides as you return to standing.
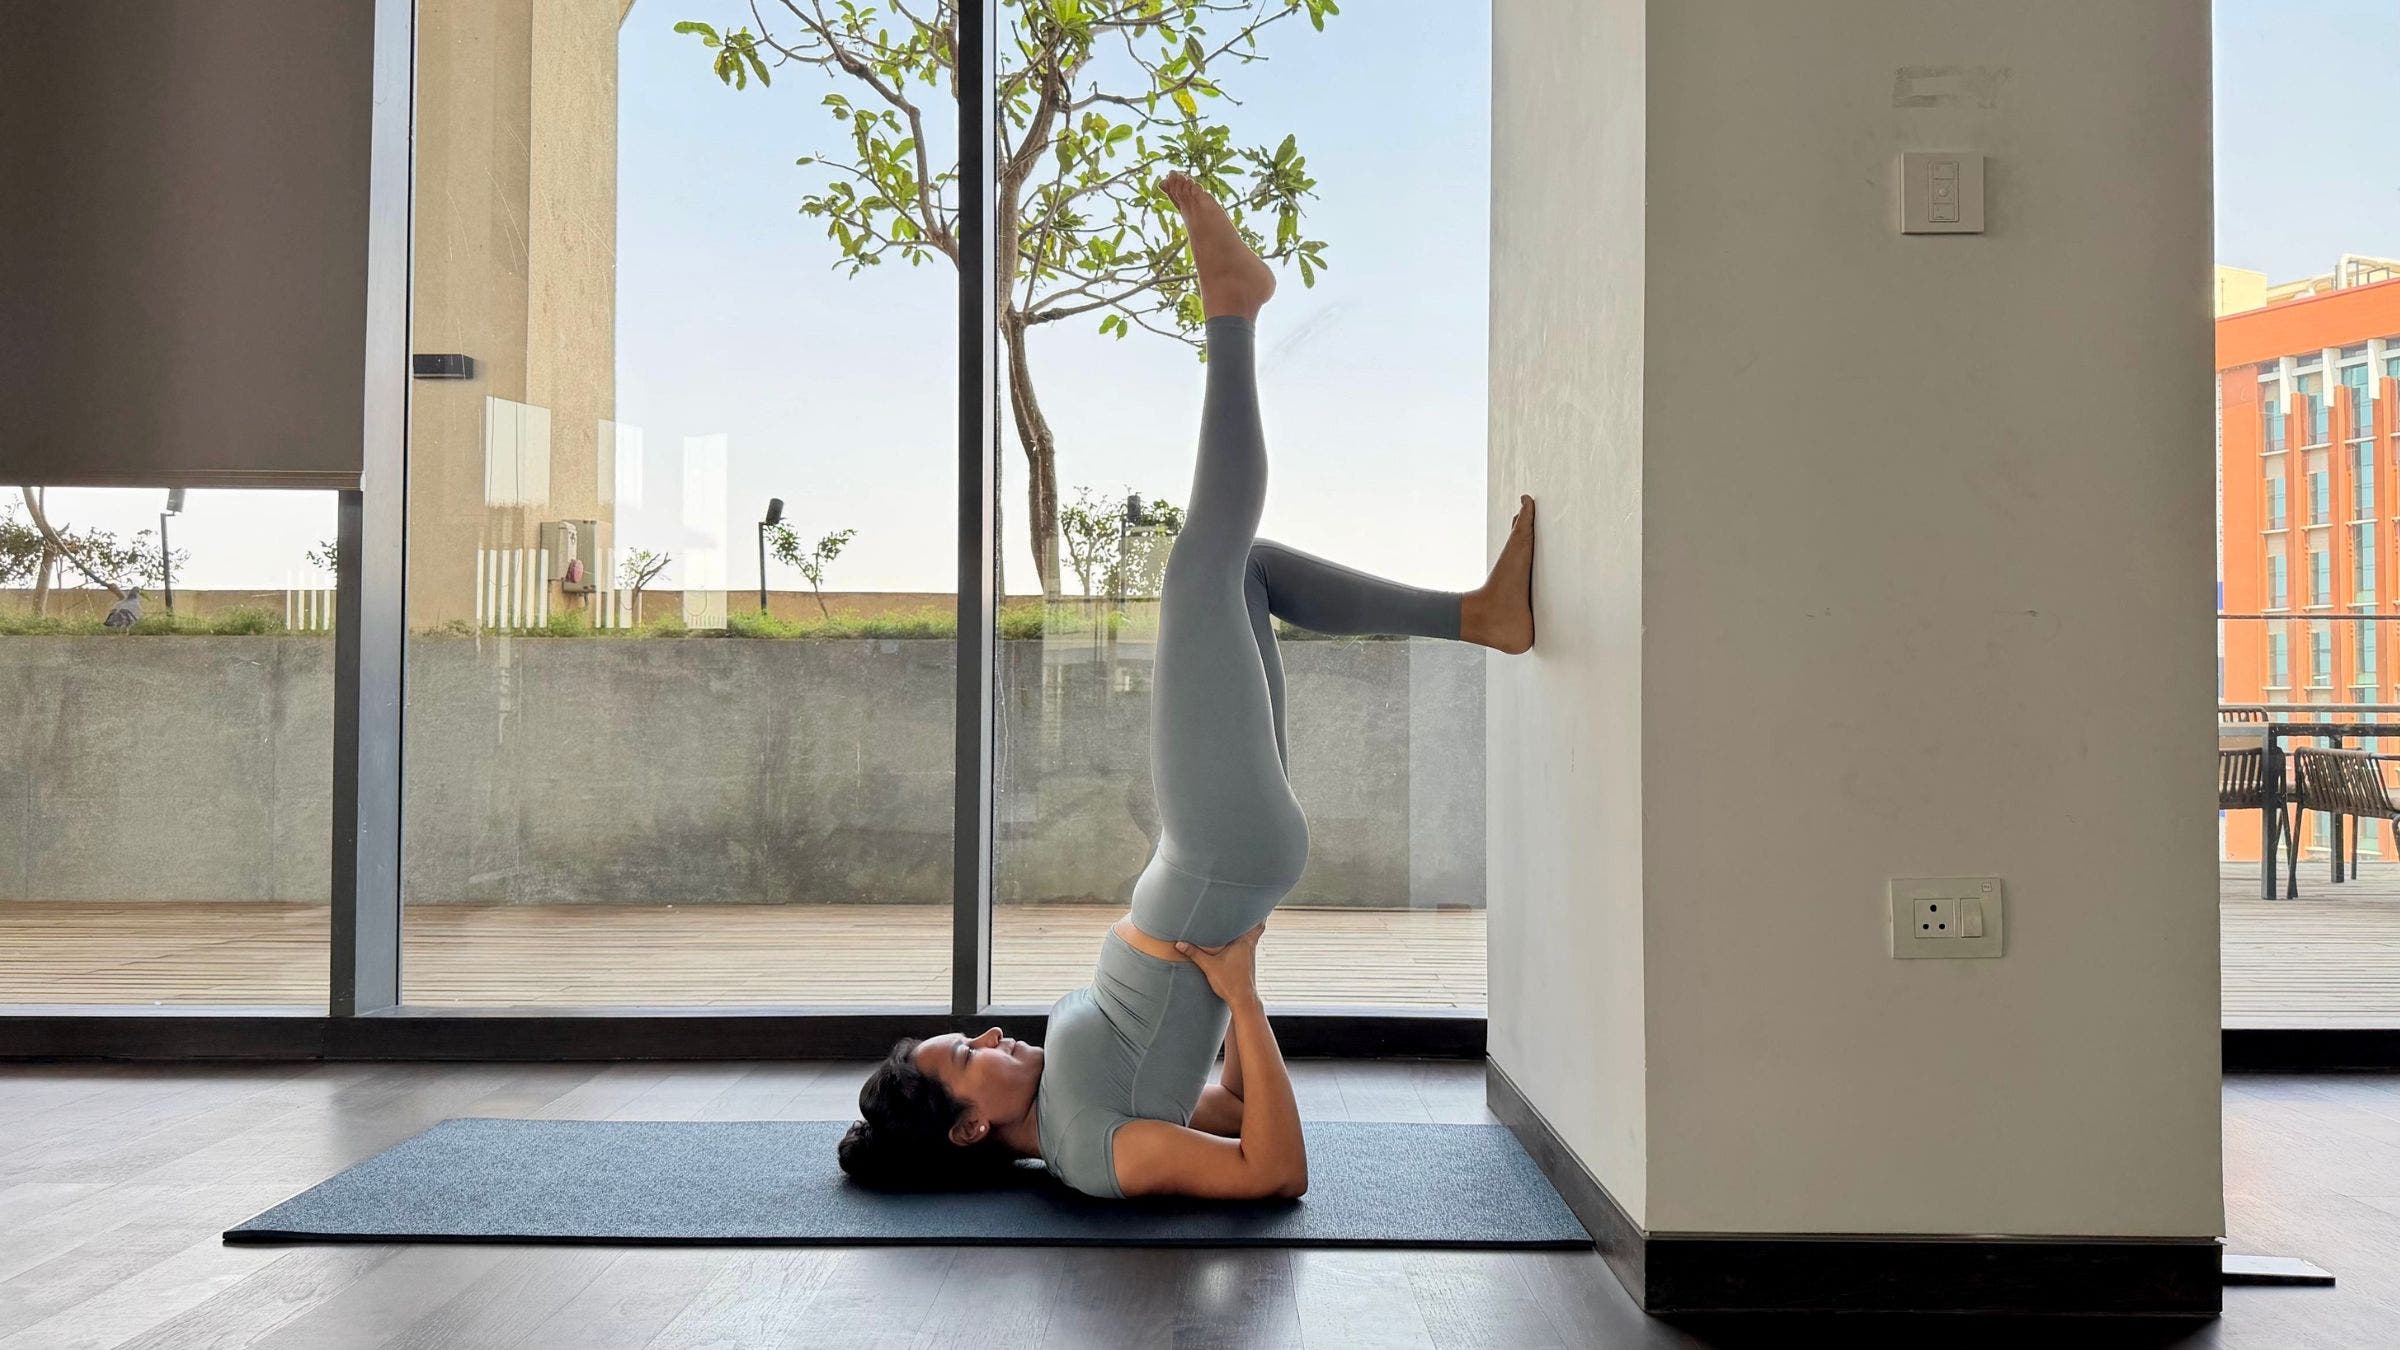
6. Shoulderstand (Salambasarvangasana) variation
A wall can support you with inversions, whether you’re working toward Shoulder Stand or want to find more ease in the pose.
How: Lie on your back with your knees bent, your feet flat on the floor and your arms at your sides with your palms facing down. Your toes should just touch the edge of the wall. Exhale as you press your arms into the mat, then draw your knees to your chest, curl your lower back off the mat and bring your hands to either side of the back of your waist. Press your elbows against the mat.
Inhale and extend one leg toward the ceiling. Bend your opposite knee and plant yourself against the wall in this variation of Shoulder Stand. Stay standing for a few breaths, then place your other foot against the wall and straighten your bent leg. Take a few breaths here, then bend both knees and slowly lower your hips to the mat.
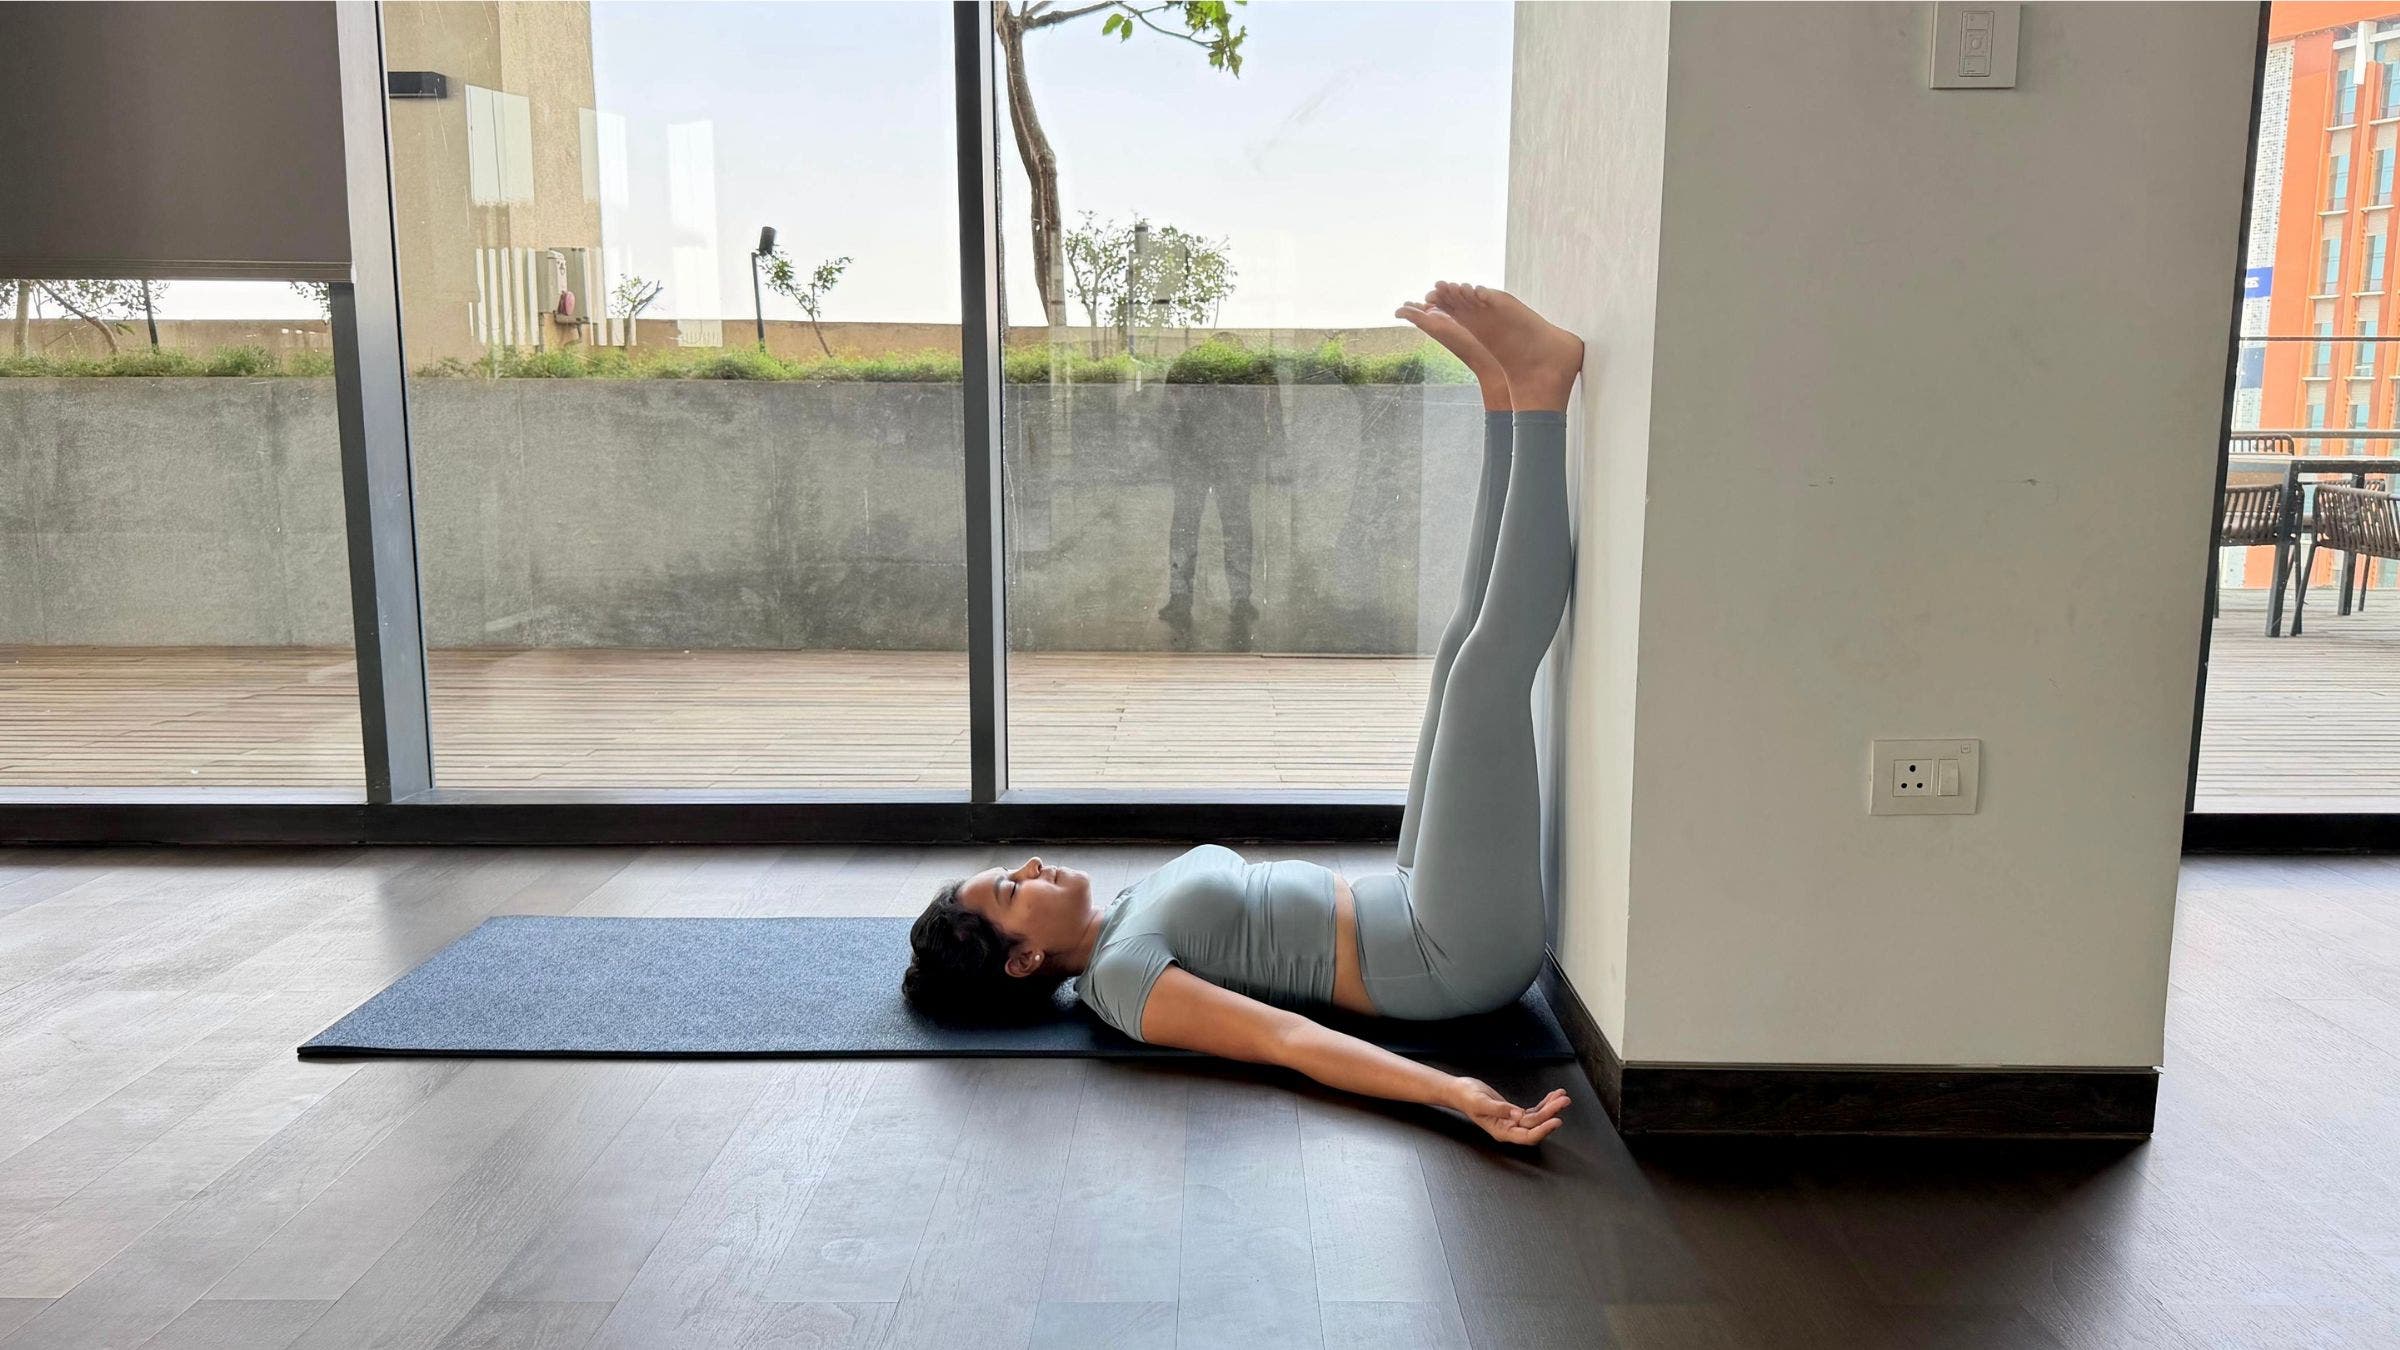
7. Legs Against the Wall (Viparita Karani)
A wall can intensify some poses, and it can help you relax and rest more in others.
How: Sit with one hip against a wall and gently swing your legs against the wall as you lower your back to the mat in Legs Up the Wall. Move your hips closer or further away from the wall so that you are in a comfortable position. Bend your knees slightly if this is more comfortable. Rest your arms at your sides with your palms facing up. Place a folded blanket under your hips for more support for your lower back. Stay here for 5-8 breaths or longer.
#unexpected #ways #wall #yoga #stretch #strengthen