
These fields allow you to insert valid HTML directly around any Divi element, acting as two built-in code modules that link exactly where you need them. This allows for advanced customizations such as creating custom parent wrappers in areas that a standalone code module cannot reach.
In this post, we’ll cover everything you need to know about custom HTML wrappers, including where to find them, how they work, and a step-by-step example so you can get started right away.
Let’s dive in.
Custom HTML in Divi 5
While semantic elements help define what your content is, Divi 5’s custom HTML wrappers give you the ability to add arbitrary markups around them. This feature unlocks advanced customization options directly within the Visual Builder.
Subscribe to our YouTube channel
What are custom HTML wrappers?
In Divi 5, two new code fields let you add custom HTML before and after each element. These act as precise wrappers, allowing you to insert opening and closing tags, attributes, and other valid HTML directly around the element’s output.
These wrappers can be found in the same new copy HTML options group in the Advanced tab, right next to the Element type selector for semantic tags.
Where to find custom HTML wrappers
In Divi 5, the Before and After custom HTML fields are part of the brand new HTML options group in each element’s settings.
Open the Visual Builder and select an element. Navigate to the Advanced tab.

Scroll to the HTML options group. Expand the menu to reveal Element type (which is used for assigning semantic tags), HTML forAnd HTML na. The HTML for field allows you to insert custom HTML immediately before the main output of the element on the front end, while the HTML na field is for placing code immediately after the main output of the element.

Implement custom HTML in Divi 5
In this section, I’ll show you how to create an image tag using custom CSS at the page level and then inject the code into the custom HTML fields in the Advanced tab of an image module.
Step-by-step guide to using custom HTML
First I’ll add some custom CSS at the page level that sets the style for an image label.
Use Divi 5s Bread-crumbs function to select the Page settings.

Navigate to the Advanced tab and expand it Custom CSS dropdown menu.
Enter this CSS snippet in the field:
.custom-label-wrapper {
position: relative; /* This keeps the badge inside the image box */
display: inline-block;
}
.image-badge {
position: absolute;
top: 10px; right: 10px;
background-color: #3A6351;
color: #fff;
padding: 12px 35px;
font-size: 14px;
font-weight: bold;
z-index: 10;
border-radius: 50px;
}
Then open the settings panel for one Image module. Navigate to the Advanced tab. Scroll down to the new one HTML options group and expand it.
To display the image label, you need to add code to it HTML for And HTML na fields. In the HTML for field, add the following code:
Learn More Finally, add a closing div tag to the HTML After field. Once completed, the label will appear in the top right corner of the Image module.This method differs from the Code module in that it allows precise, embedded injections that wrap or extend existing Divi elements without requiring isolation.
Custom HTML Wrappers vs The Code Module
Divi users have long relied on the Code Module for inserting custom HTML, CSS, and JavaScript. It’s excellent for standalone content, like embedding an iframe, creating new modules, or a custom HTML section that doesn’t need to interact with surrounding Divi elements. However, the Custom HTML wrappers solve a different problem. They shine when you need precision and integration with existing Divi elements, rather than adding isolated blocks. Here’s a breakdown of the key differences and why wrappers often win for advanced, targeted customizations.Structural Placement And Wrapping
The Code Module inserts itself as its own separate block in the layout. Because Divi 5 is built with modules, rows, and sections as distinct, individual elements, a Code Module cannot always wrap around or inject directly into another module’s output. Custom HTML wrappers, on the other hand, are attached directly to the element you’re editing. They let you add opening tags in HTML Before and closing tags in HTML after, effectively wrapping the module’s content in custom markup.Wrapping Modules For Effects Beyond Native Options
Custom HTML wrappers let you add a true enclosing parent div (or other tag, like span) that serves as a perfect target for advanced CSS pseudo-elements like ::before and: ::after. This opens up creative possibilities that go far beyond Divi’s native positioning, overflow, shadows, or borders applied directly to the module itself. Adding a custom parent div or other tag around a module to apply advanced CSS effects like complex clip path shapes or gradient effects that need to target a true enclosing parent. This goes beyond what native positioning or overflow can achieve on the module itself. For example, you can create a custom clip-path animation on an Image Module by wrapping the module with an HTML class and placing custom CSS at the page level. You can also apply a neon gradient effect to a Button Module for a little extra flair. These wrapper-based techniques give you perfect control over effects that feel custom, all without cluttering your layout with extra modules.Cleaner HTML Output And Layout Simplicity
Using a Code Module means adding additional modules just to place your code, which can clutter the Builder and introduce unnecessary nesting in your page’s HTML. Wrappers keep everything contained within the target element. This results in cleaner, more semantic output on the front end, leading to better performance, easier maintenance, and more control over the final markup. In short, the Code Module is your go-to for independent custom code sections. Custom HTML wrappers are the precision tool that unlocks deeper integration, giving you more freedom to create custom wrappers and inject code into specific areas of the page that a Code Module can’t access.Tips And Best Practices
Custom HTML wrappers in Divi 5 are a lightweight yet powerful tool for advanced customization. To get the most out of them while keeping your site clean and performing at a high level, follow these tips.Always Pair Before And After Correctly
If you open a tag in HTML Before, make sure you close it in HTML After. Mismatched tags are the number one cause of broken layouts, invalid HTML, and strange rendering issues. Double-check every time, and preview the front end after saving.Use Descriptive, Reusable Class Names
Give your wrappers meaningful classes like neon-glow-wrapper or clip-shape-parent instead of generic ones like div1. This makes your CSS easier to read, debug, and reuse across projects. Prefix with your project name for even better organization.
Keep the injected markup minimal and semantic
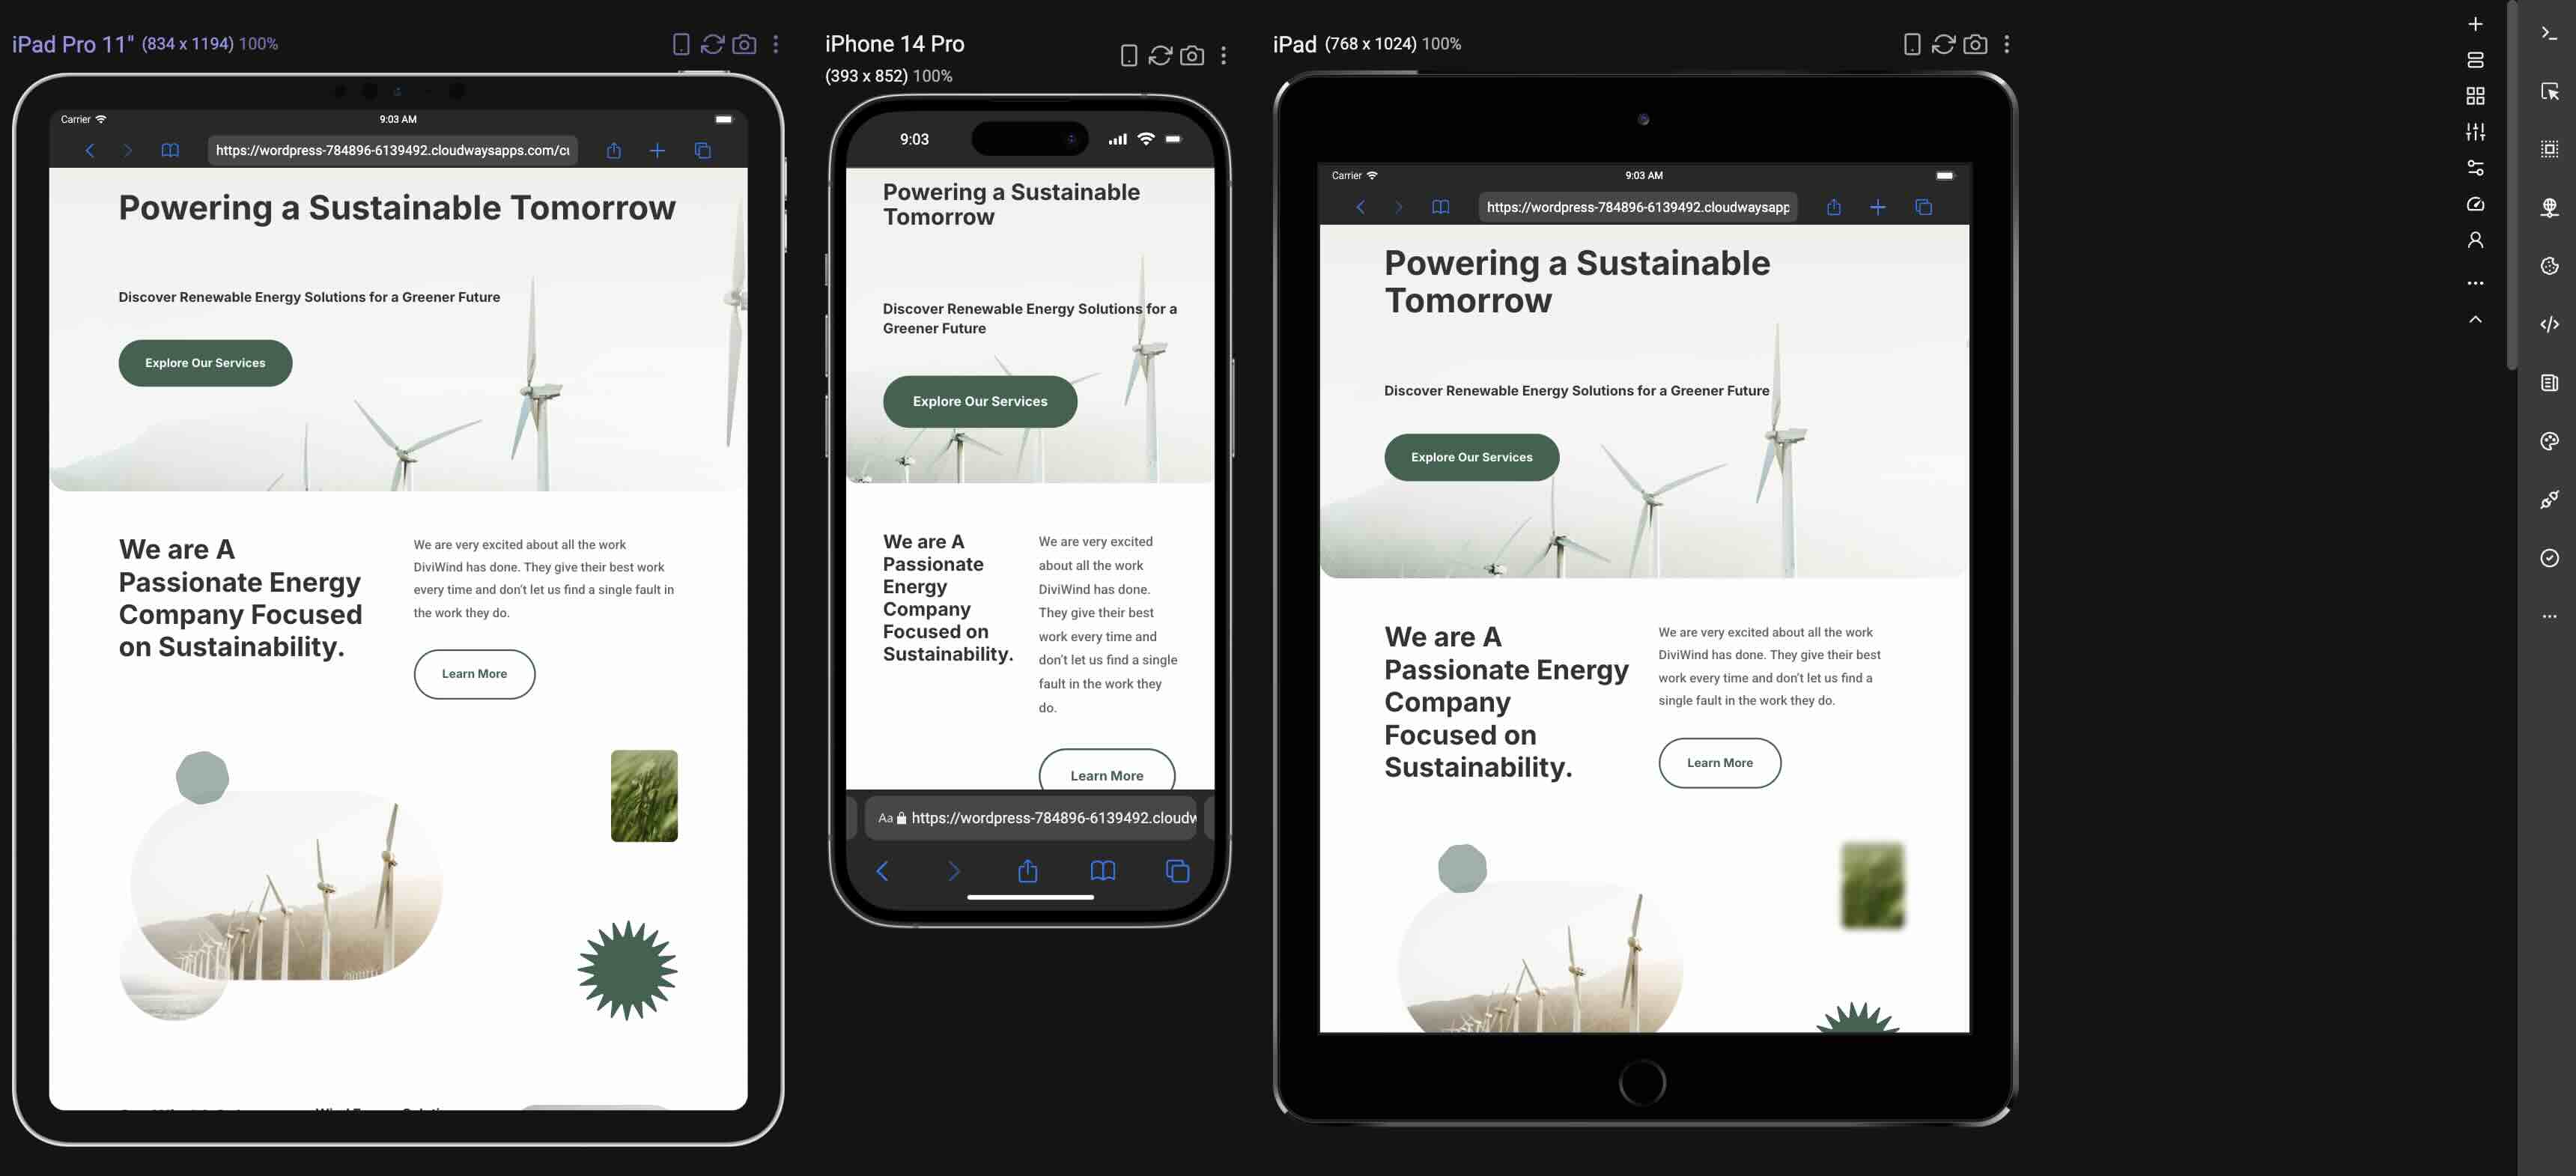
Add only what you need in the Before and After fields. Extra empty divs or unnecessary spans can bloat your HTML output. Use them mainly for structural wrappers, helper tags or pseudo-targets. Avoid heavy content; it is better suited for Divi's Code Module.Test thoroughly on the front
Some effects may look different in the Visual Builder than on the live site. Always save, clear your browser cache and test on all device sizes. Tools like browser development tools (inspect element) or Sizzy are your best friends for debugging wrapper-related issues.
Prioritize performance
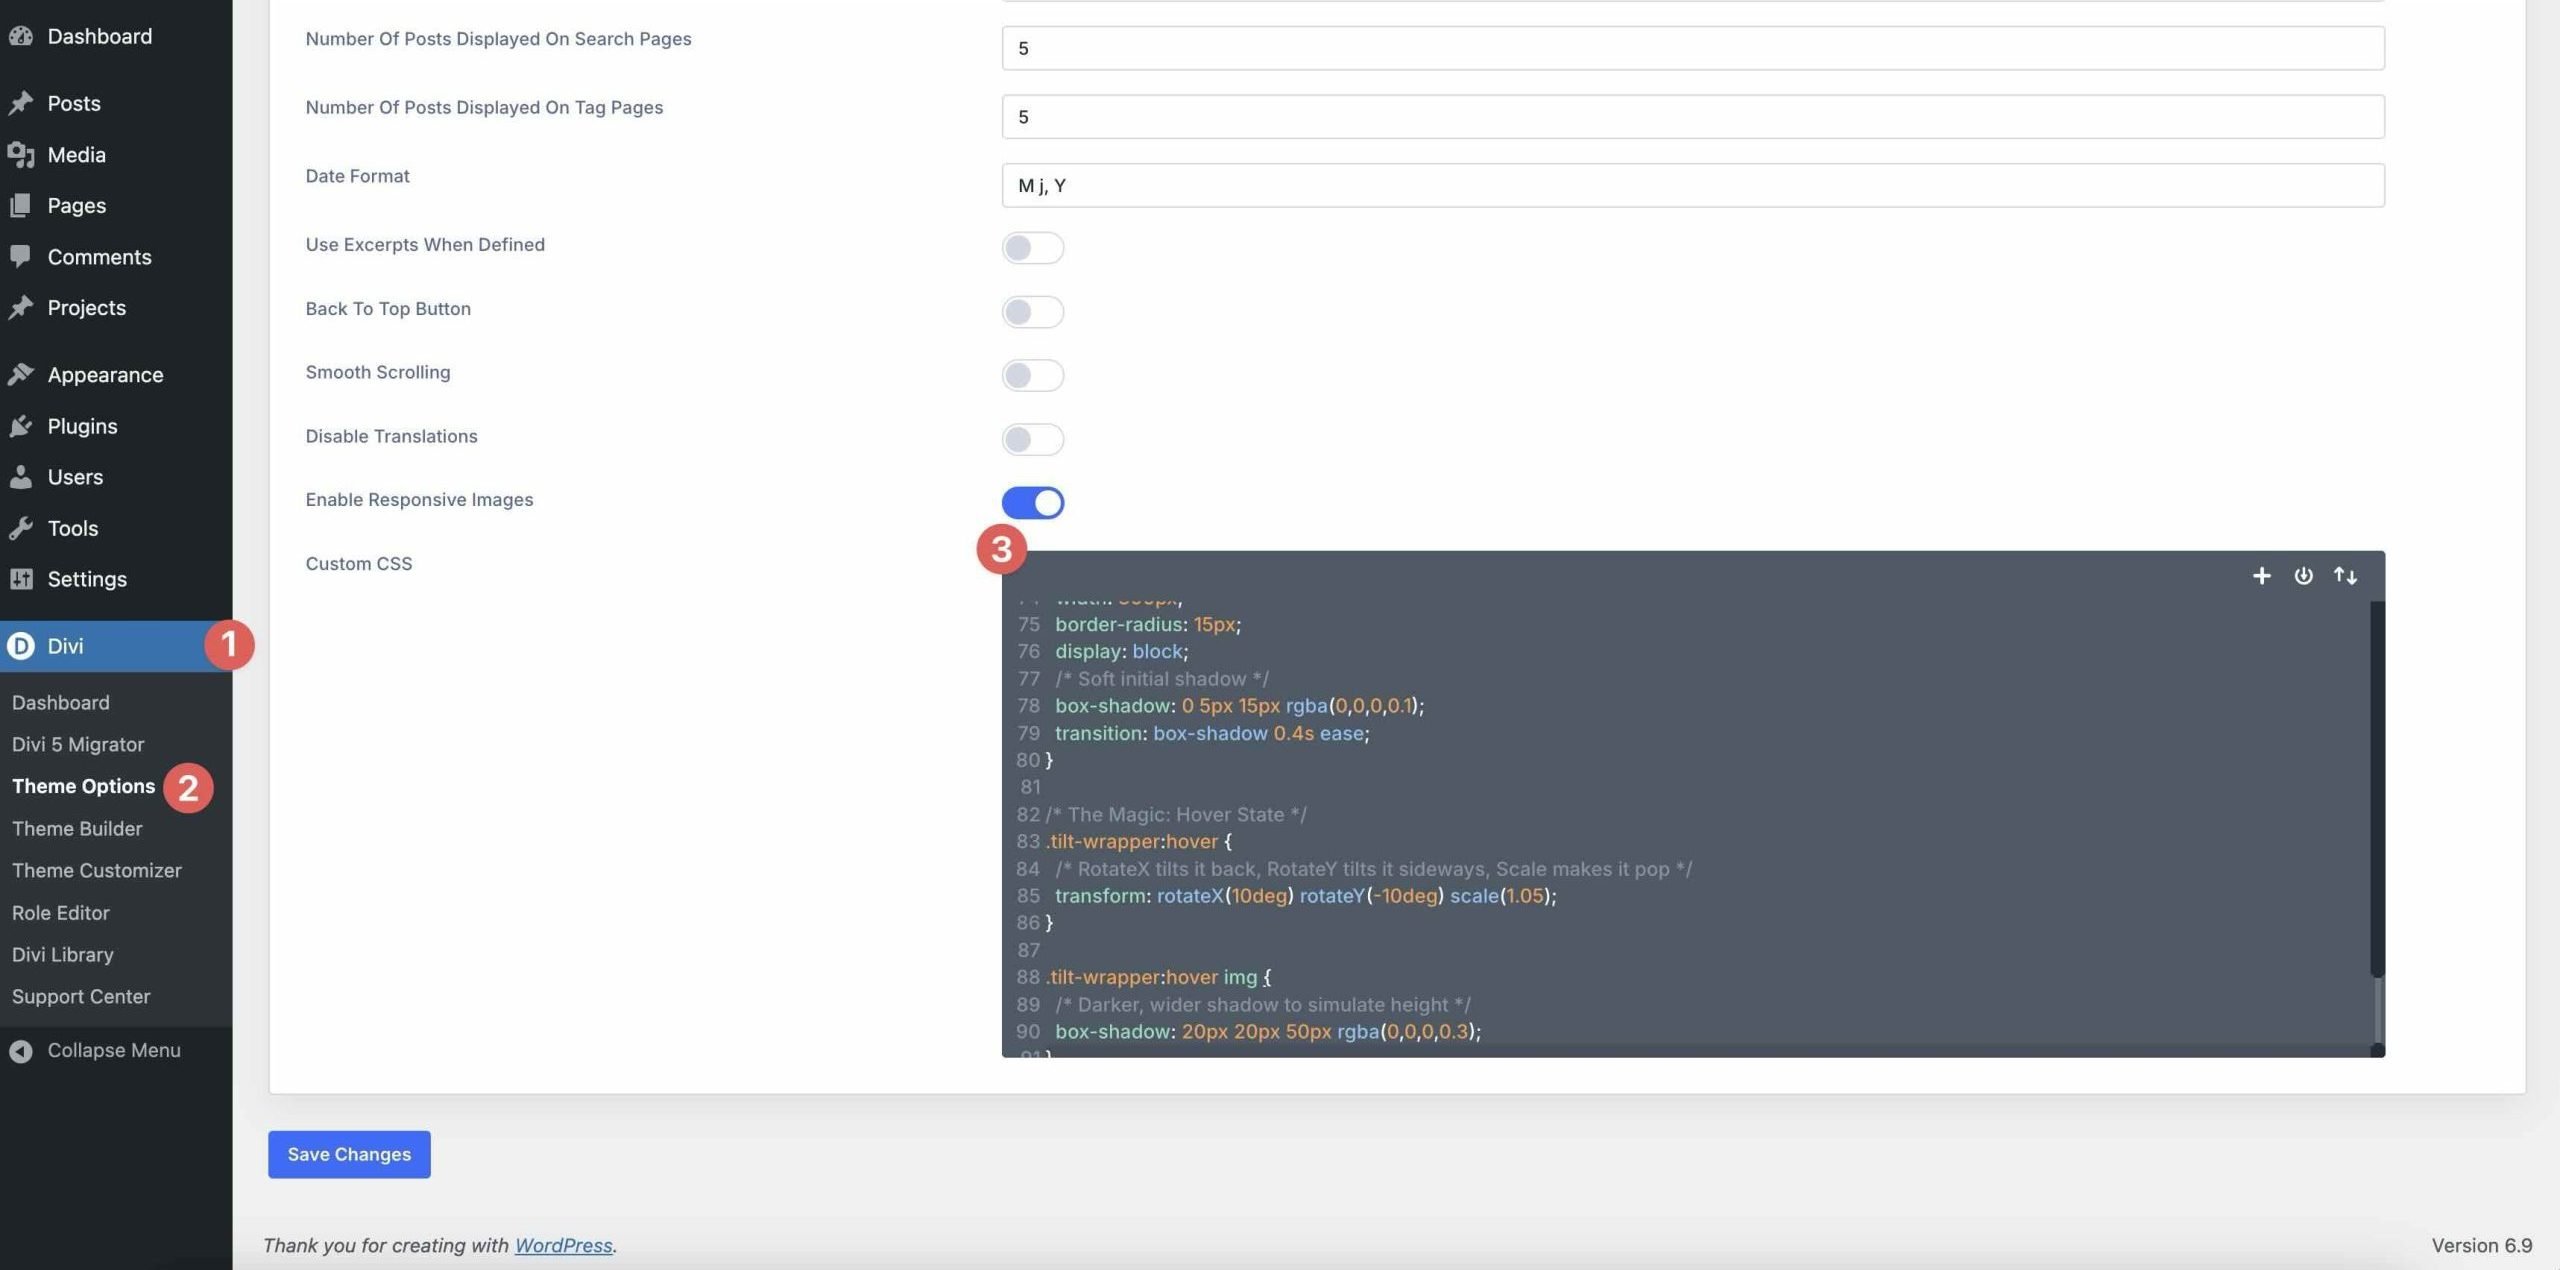
Avoid overloading wrappers with too many heavy elements or complex animations on each module. Use them selectively on key components, such as CTAs. For site-wide effects, consider custom CSS in Divi 5's Theme Options instead of per-module wrappers.
Know when to use wraps
If the effect can be achieved with Divi 5's native Design tab options, Nested Modules, or simple page-level CSS, use those first. Reserve custom HTML wrappers for precision cases, such as custom parent targets for complex effects. By following these guidelines, you'll harness the power of custom HTML wrappers while maintaining clean code, fast sites, and frustration-free maintenance. They are small features with too big an impact. Use them wisely, and your designs will stand out.Custom HTML is easy in Divi 5
Divi 5's custom HTML wrappers are a great addition that finally gives Divi users the precision they've always wanted, right in the Visual Builder. What used to require workarounds, additional modules, or custom hacks for underlying themes can now be achieved more easily, resulting in cleaner code, better performance, and designs that push the boundaries of what's possible with Divi. I encourage you to download the latest Divi 5 public beta, experiment with custom HTML, and let us know what you think in the comments below.
Are you a Divi user? Find out how to get more out of Divi! 👇
Browse hundreds of modules and thousands of layouts.
Visit MarktplaatsFind out how to improve your Divi workflow 👇
Learn about the new way to manage your Divi assets.
Buy Divi CloudWant to speed up your Divi website? Find out how 👇
Get fast WordPress hosting optimized for Divi.
Accelerate Divi
 This method differs from the Code module in that it allows precise, embedded injections that wrap or extend existing Divi elements without requiring isolation.


#Divi #custom #HTML #options