
This bedtime yoga practice is a soothing class that essentially consists of passive, slow, effortless stretches designed to help you relax at the end of the day. My main question when I was creating this evening class is how easy we can make this class to help you release tension from your body.
The poses are a mix of restorative and yin yoga, and although I did these poses on the yoga mat, you can certainly do them in bed as well. They are meant to be something you can do to fall asleep and stay asleep. You can use a pillow or just grab a lot of pillows or blankets to make everything more comfortable.
There is plenty of time in silence so you can focus on your experience of the pose or simply concentrate on your breathing. This is your chance to let go of your day and truly relax. So let yourself linger here and just continue breathing in and out through your nose.
A simple bedtime yoga exercise (that you can do in bed)
I use my pillow for these poses, but if you don’t have one, just grab some pillows or even a couch cushion. It will help make the poses a lot more comfortable and accessible. You stay in each pose for 3 to 5 minutes to achieve full body relaxation.
Reclining Butterfly or Bound Angle Pose
Place the pillow or stack of pillows lengthwise along the center of the mat. Sit away from it and lean back so that your upper back and head are supported. Let your arms extend out to the sides or even reach your arms above your head. You are looking for expansion across your breast. Bring the bottoms of your feet together and your knees apart into the lying butterfly or bound angle. Lower the weight of your body into the support and rest here for 3 to 5 minutes.
Stretch and slowly come off the pillow. You can use a small twist as a counter pose by sitting tall and bringing your left hand to your right knee and your right hand behind you as you twist your chest to the right. Then turn to the other side.
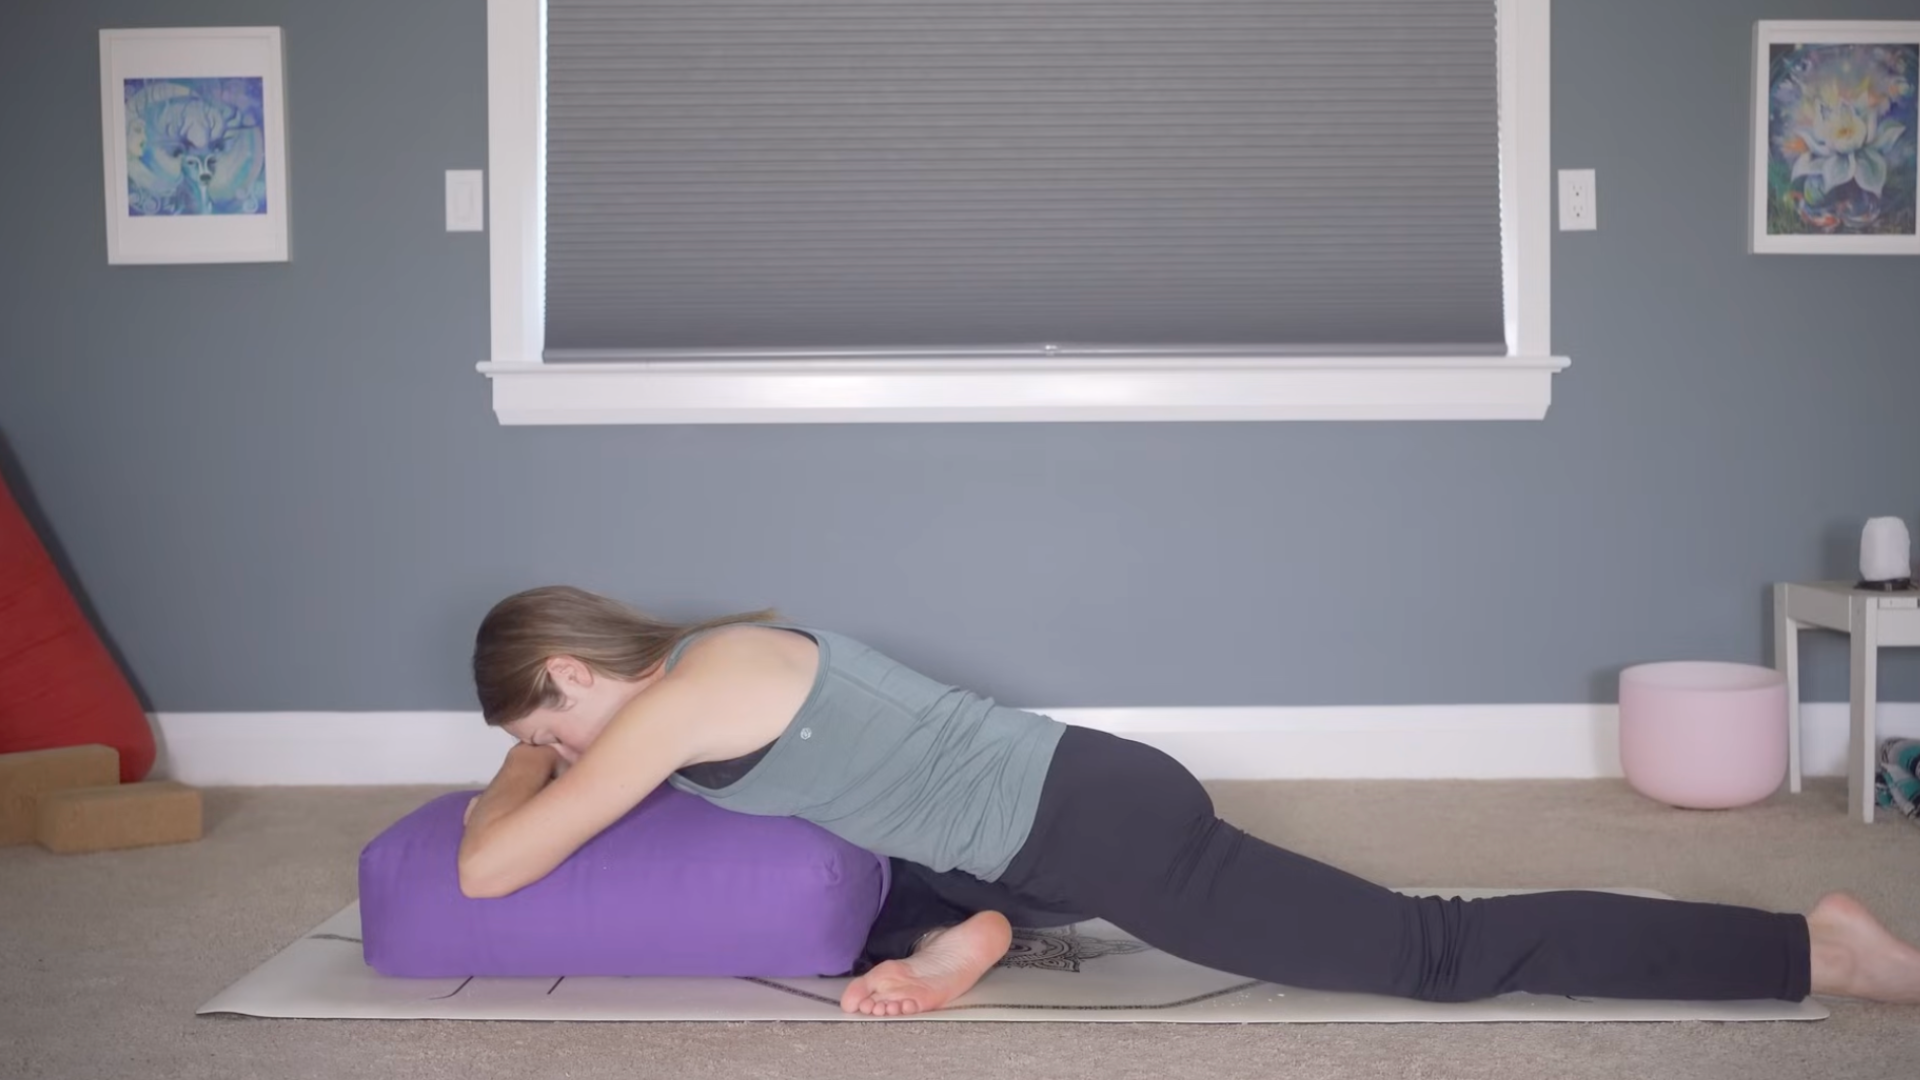
Supported pigeon pose
Bring the crop forward lengthwise for a more supported Pigeon style, a style that is not as intense as normal. So hold your bent right leg in front of you, extend your left leg straight back, and then lower yourself onto the pillow or pillows so that your abdomen and chest are supported. Think about lengthening and stretching your lower back.
You’re not trying to find the most intense part and then hold on to it. Less is more. You try to find that limit where you feel some sensation, but not so much where you tense your body or hold your breath. The postures should never feel painful. You are here to release tension and tightness in your hips. Breathe here for 3 to 5 minutes. You can keep your forehead on the support or turn your head to one side.
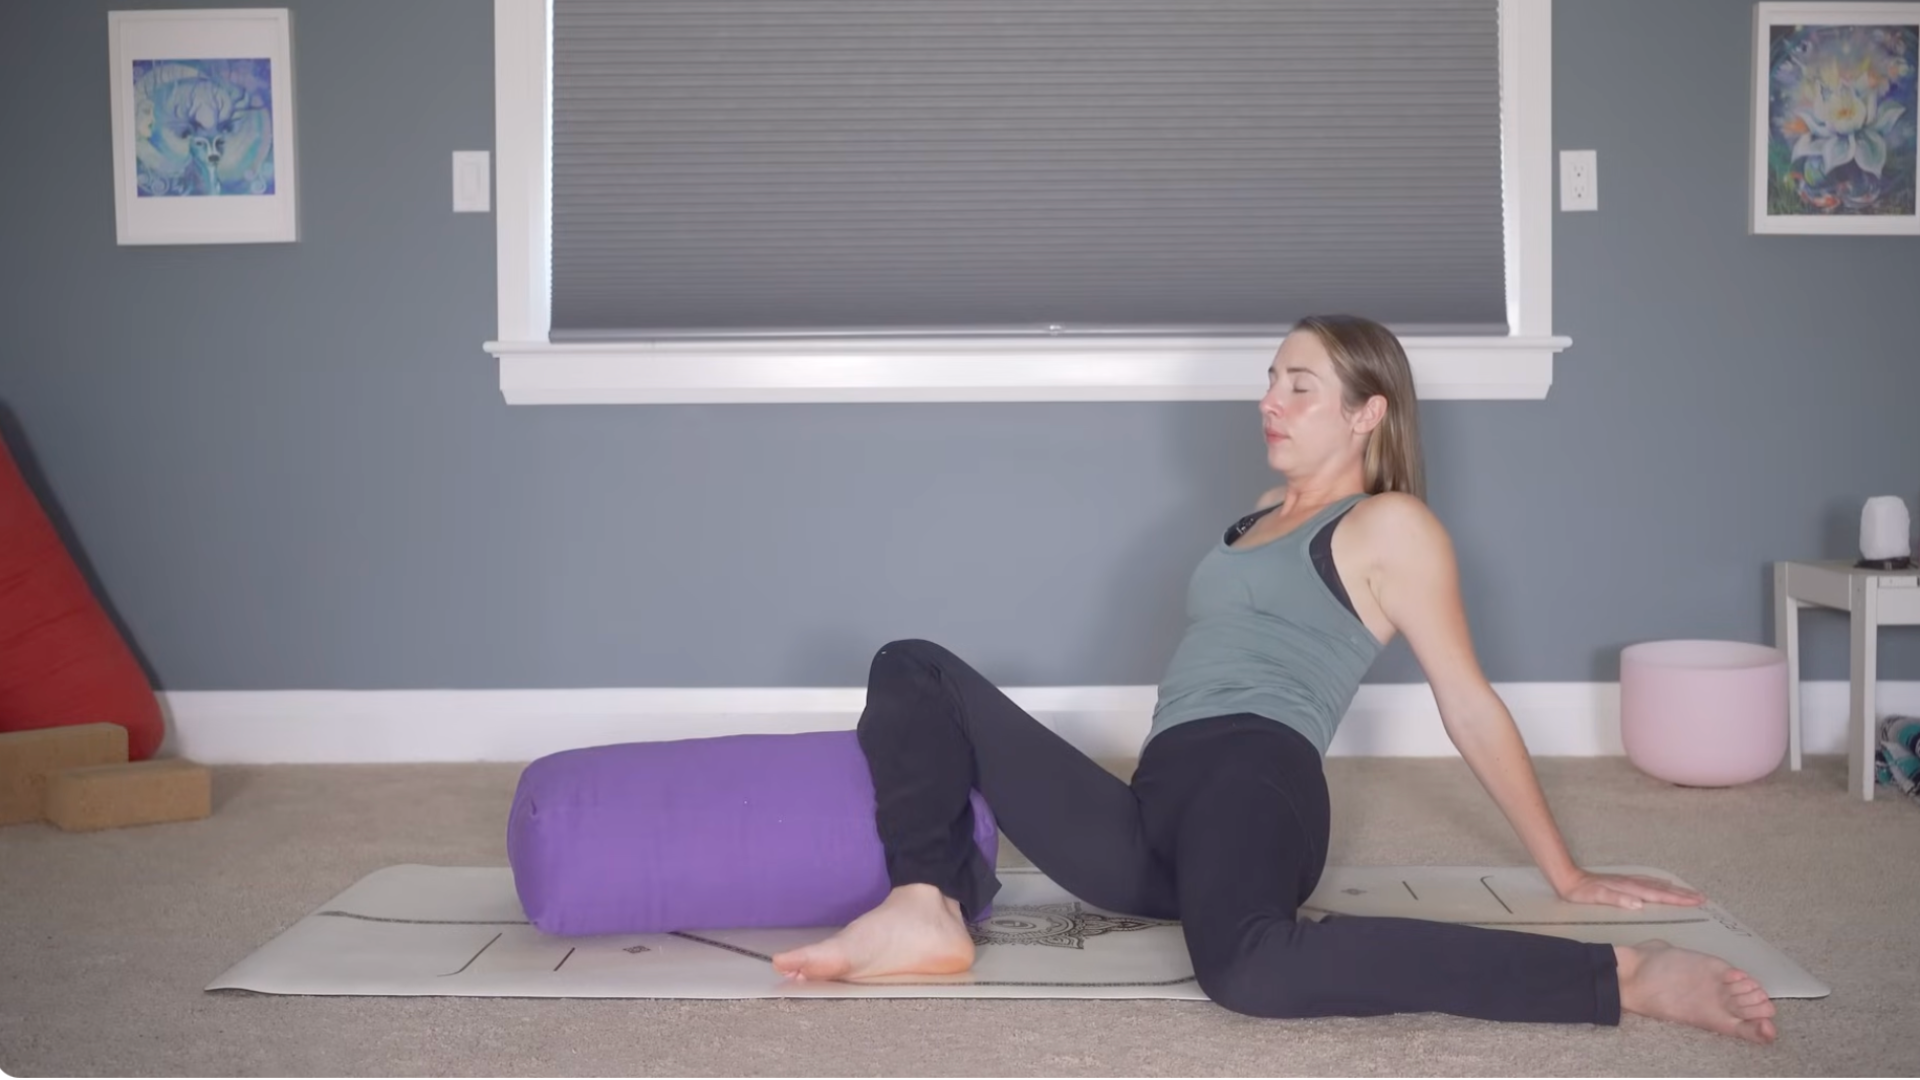
Supported deer pose
Roll onto your right hip and slide your left knee slightly forward so that it is in line with your hip and there is a 90-degree bend in your left knee. It doesn’t really matter what your front leg does. Walk your hands behind you, almost diagonally from your left knee, and press your left hip down toward the mat. Some people are comfortable lying completely on their back, although I find that I get enough of a stretch if I rest on my hands.
I’m going to support my right knee with the bolster, because that feels a little more comfortable for me. Give yourself permission to play and get a little creative when working with props. Allow yourself to relax into the stretch. You only breathe here for 3 to 5 minutes.
Bring your hands underneath you and lift yourself back up and notice what would feel good for you here, perhaps stretching your legs in front of you or making a windshield wiper motion with your knees.
Then go back to Pigeon and then Deer on the other side. Notice what would feel good for you coming out of this pose.
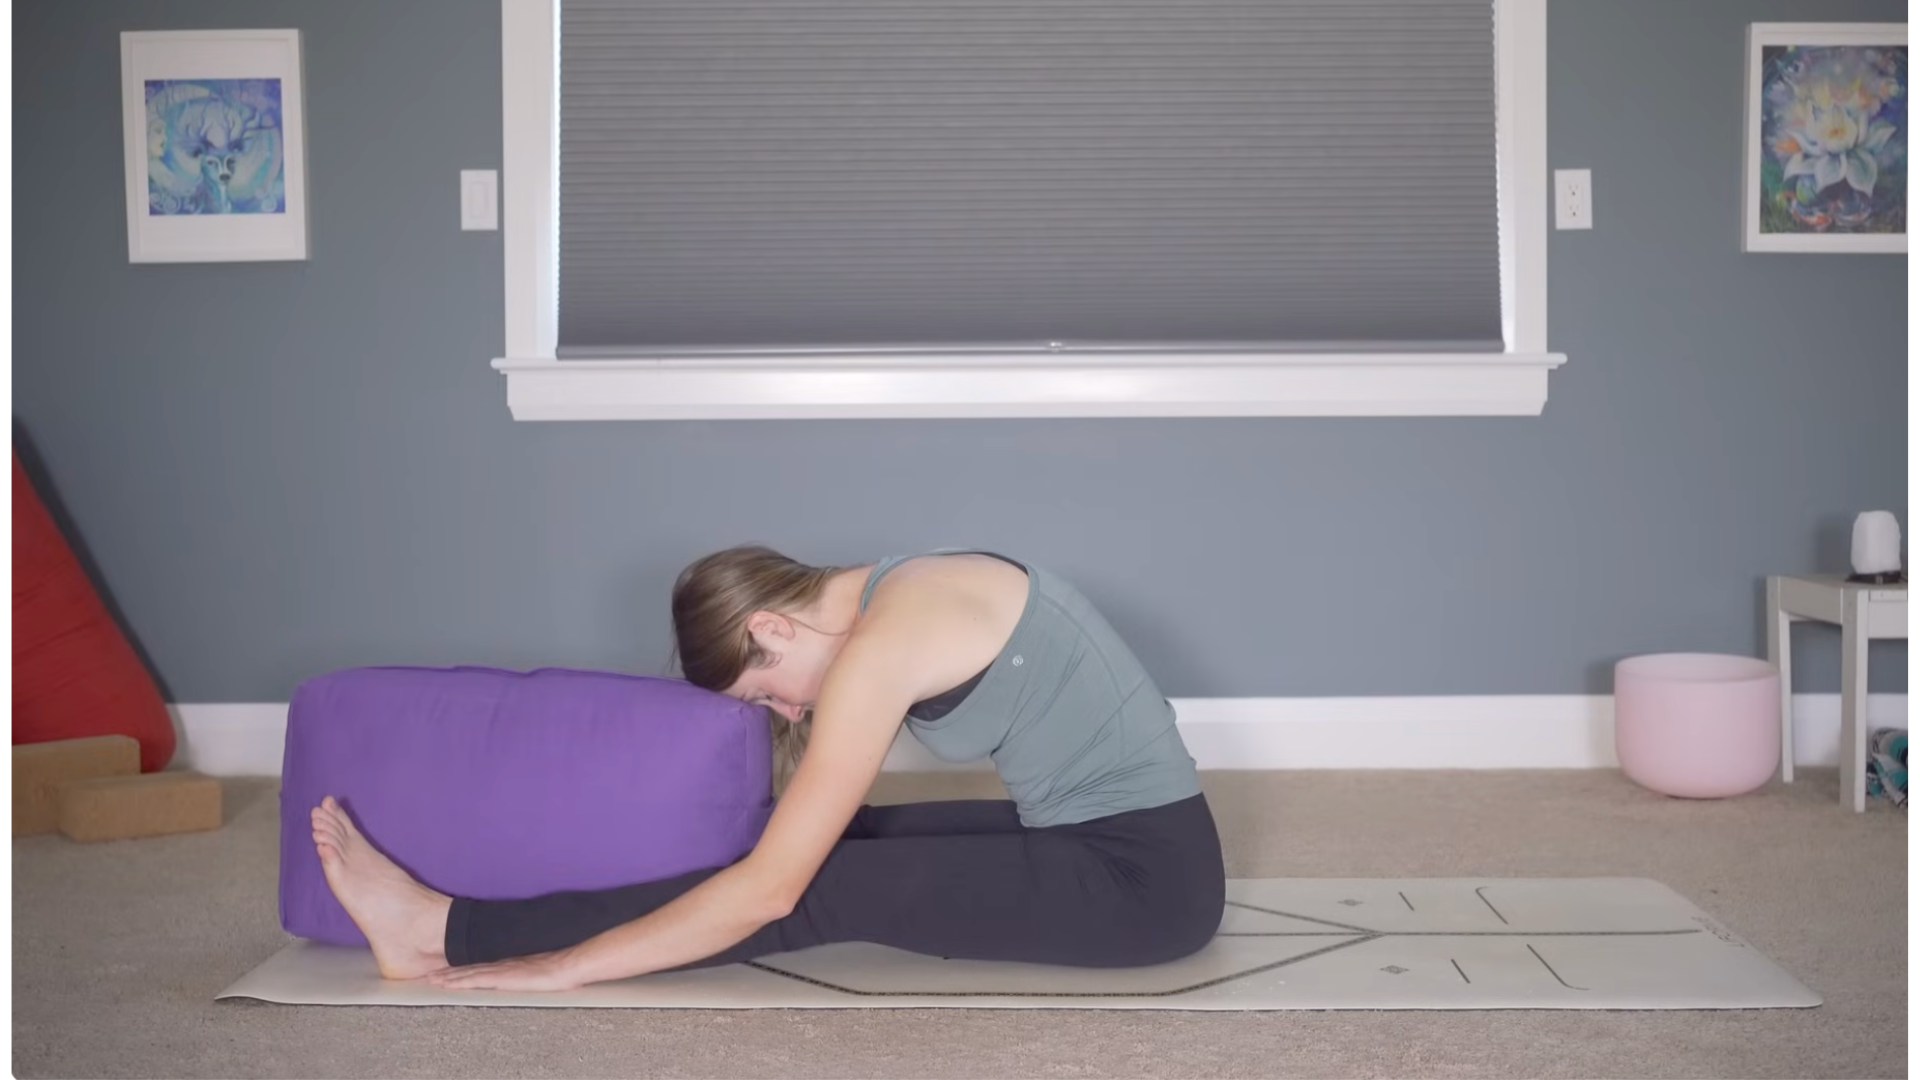
Seated forward bend
We’re going to do one last sitting pose. When you think about rest and relaxation, keep in mind that forward folds support the nervous system. You will do a seated forward bend with your legs extended and wide, or bend your knees and bring the bottoms of your feet together. Forward folds are meant to be passive, so as you lean forward you allow your spine to round slightly. You don’t pull yourself deeper into the piece. Instead, you let gravity take you there.
You’ll probably notice that as the minutes pass, your body gets a little deeper into the shape. Don’t feel like you have to go there right away. Simply let your breath flow in and out through your nose and stay there for 3 to 5 minutes.
Press your hands into the floor and slowly sit up. If it feels good to you, do a seated version of Cat and Cow.
Lying twist
Lower yourself to the mat and pull your right knee toward your stomach while keeping your left leg straight. Then cross your right thigh over to the left and reach your right arm straight out to the side. You try to stack your right hip on top of your left hip while also allowing your right shoulder to move toward the mat. Or if there is another variation of a supine spinal twist that you prefer, you can take that.
Slowly relax from this twist before moving to the other side. It can feel good to pull your knees toward your stomach and rock back and forth a little.
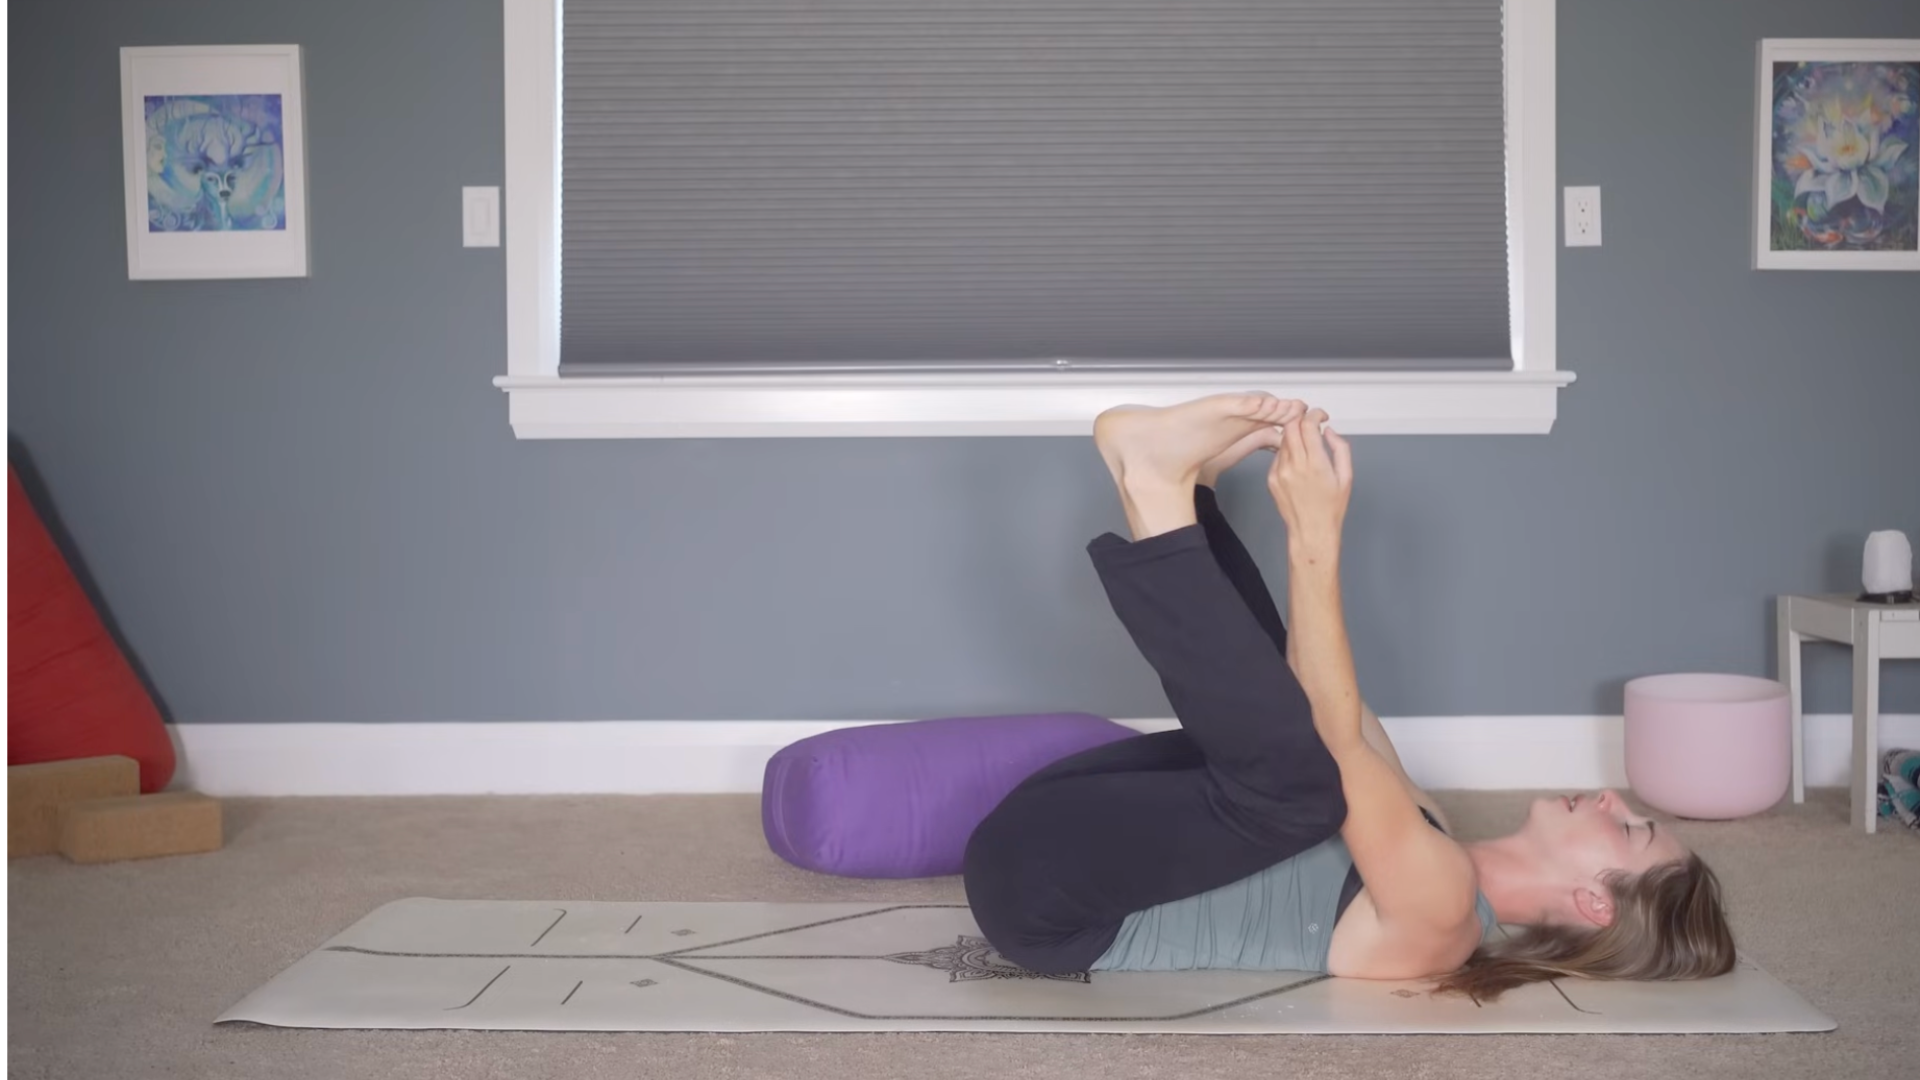
Happy baby
Continue hugging your knees toward your shoulders or grab your big toes with your two peace fingers and stack your ankles over your knees and bring your elbows to the insides of your legs in Happy Baby Pose. Try to keep the entire length of your spine against the mat. Very minimal effort is required here. Feel your breath going all the way into your lower abdomen, as if you could breathe directly into your hips. Stay here for 3 to 5 minutes.
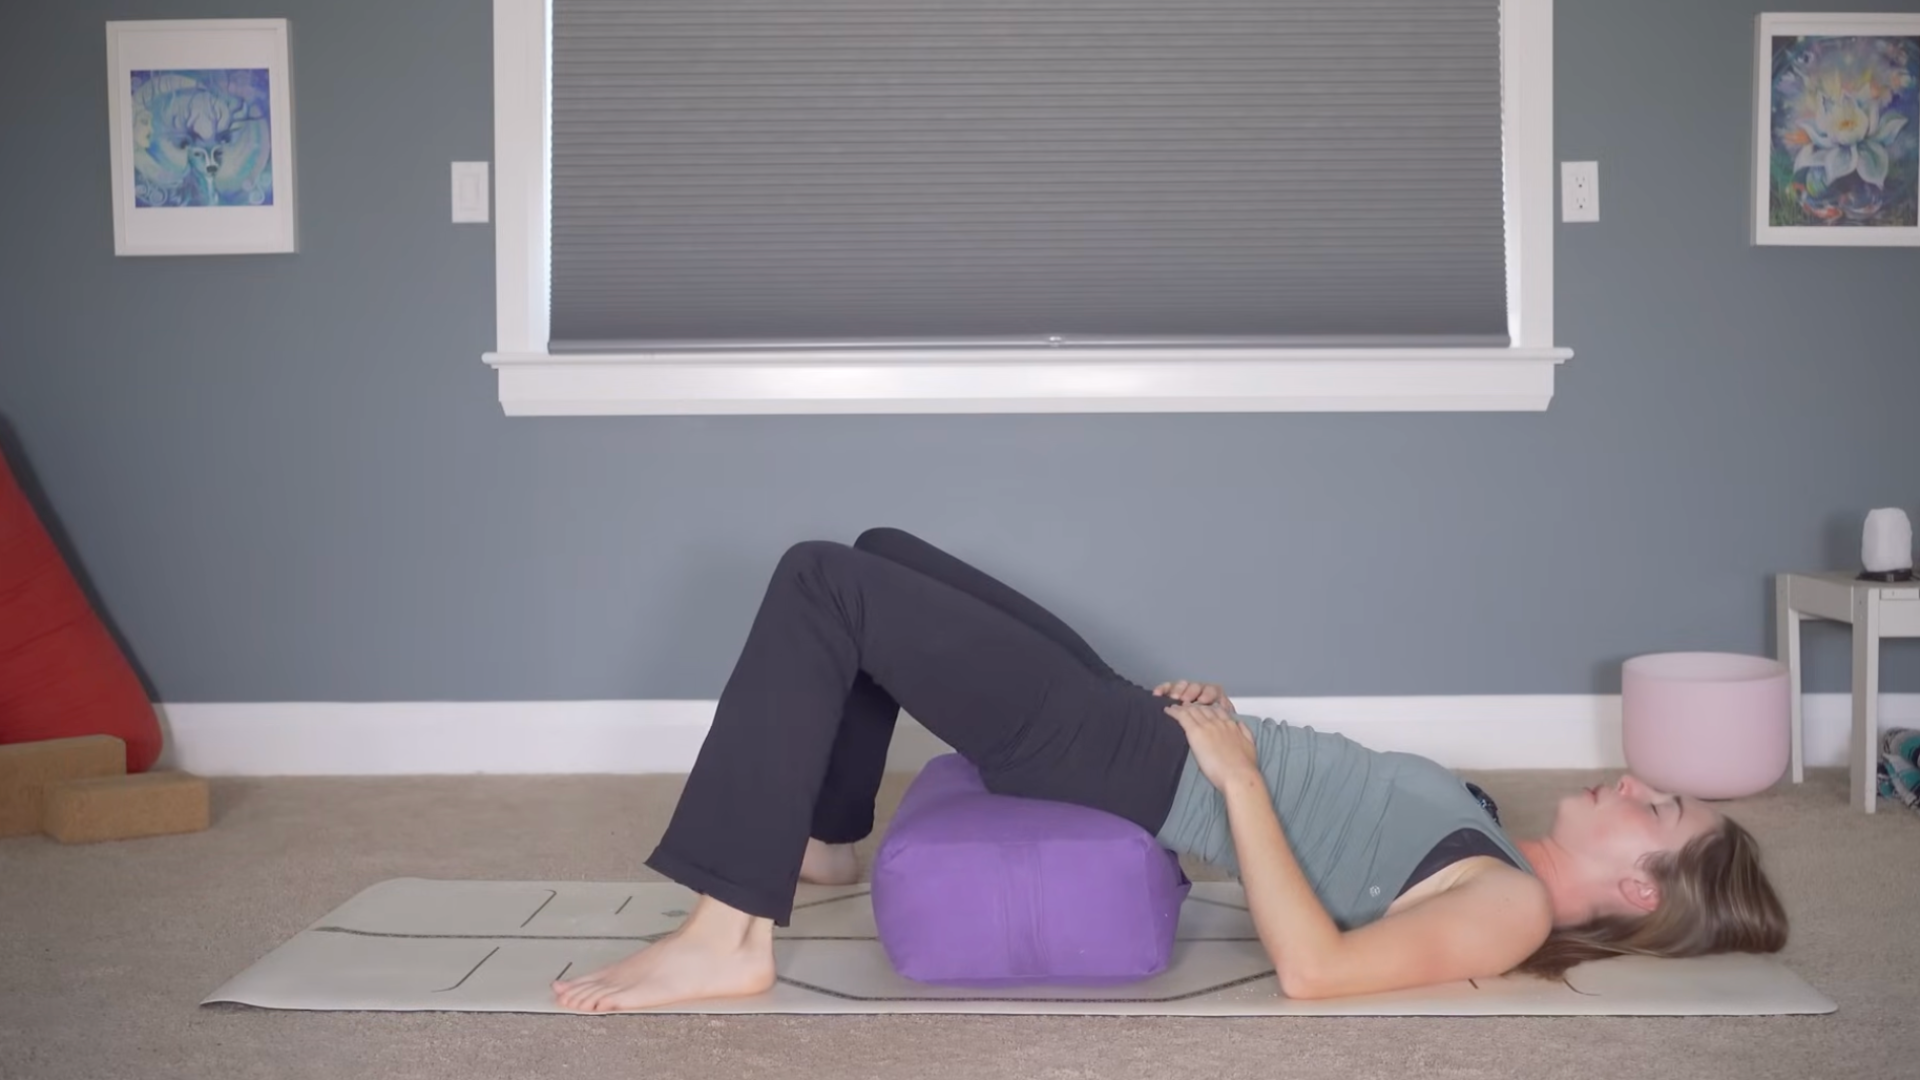
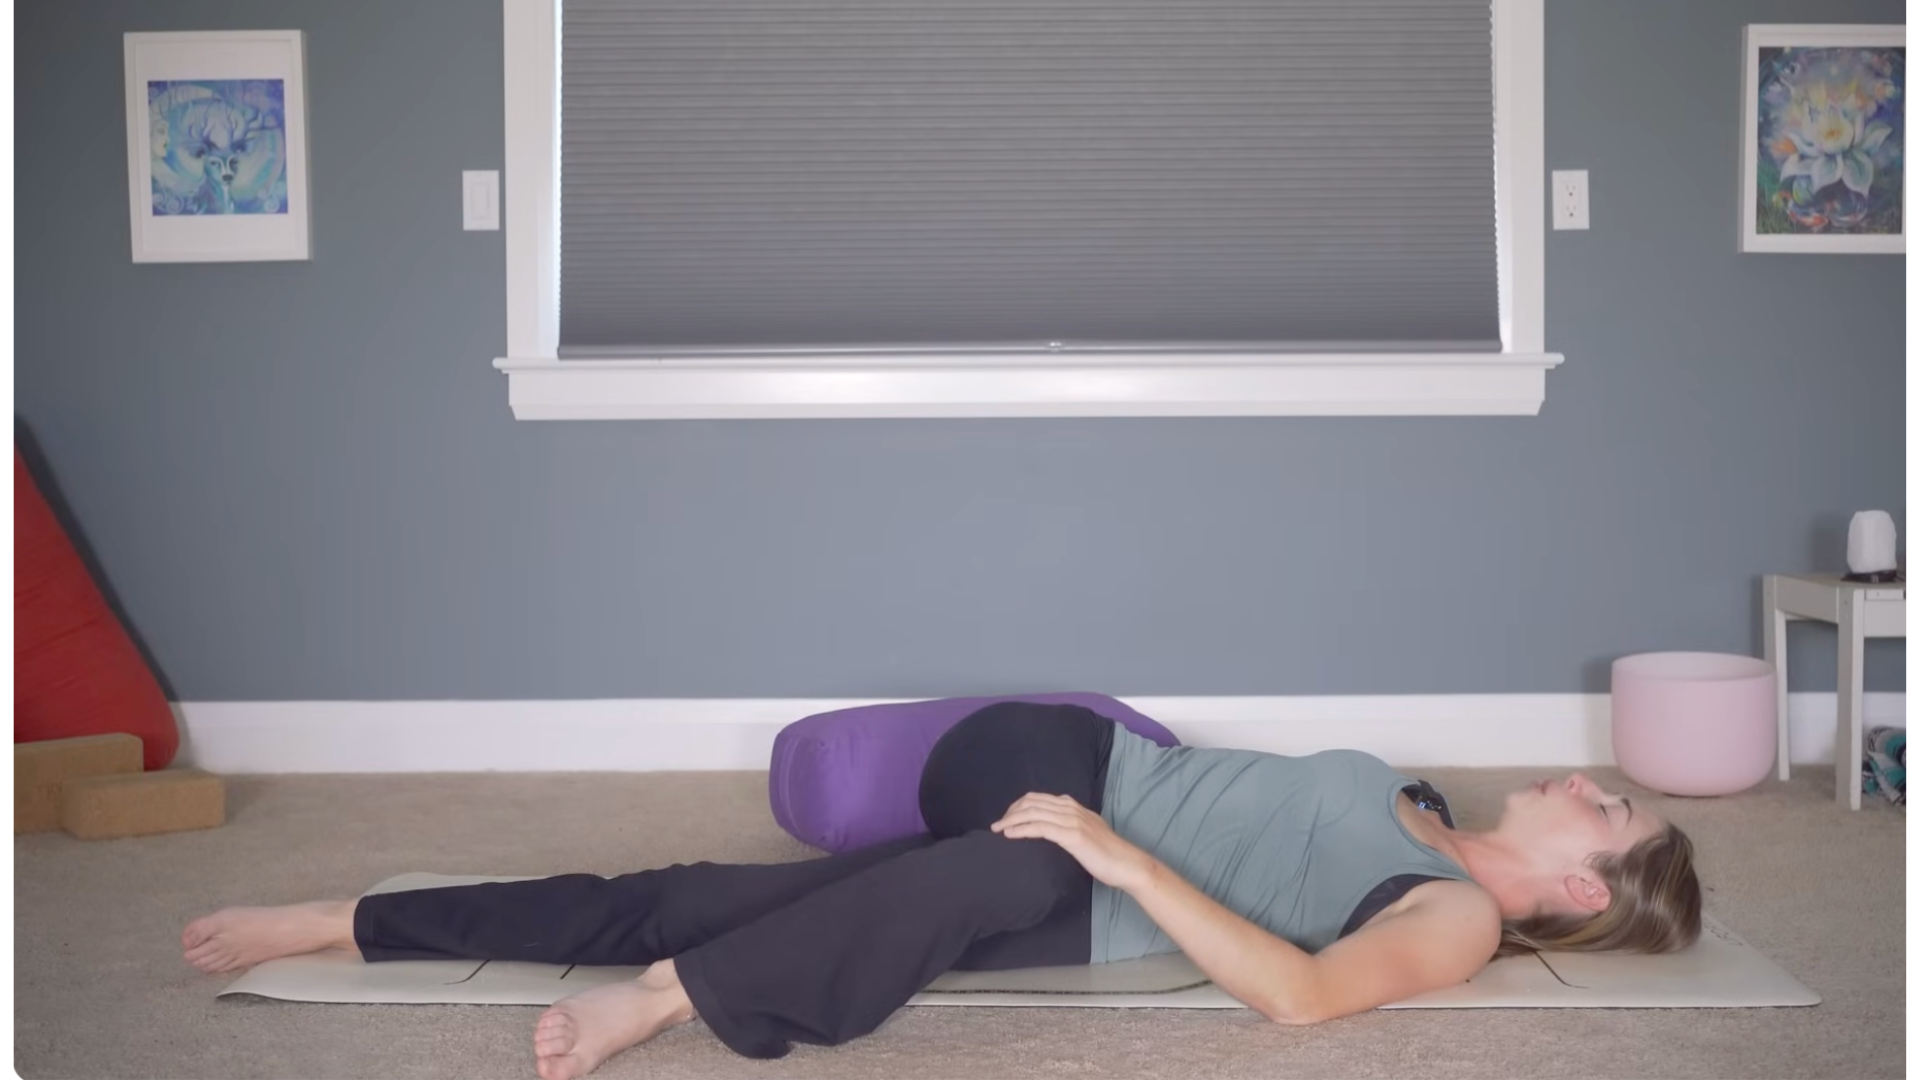
Supported bridge
Drop your feet back onto the mat, lift your hips, and slide your pillow under your chair. Then rest your hips on the support in the Supported Bridge. You can keep your knees bent with your feet flat on the mat, or you can straighten your legs any way you like. Let your day go here.
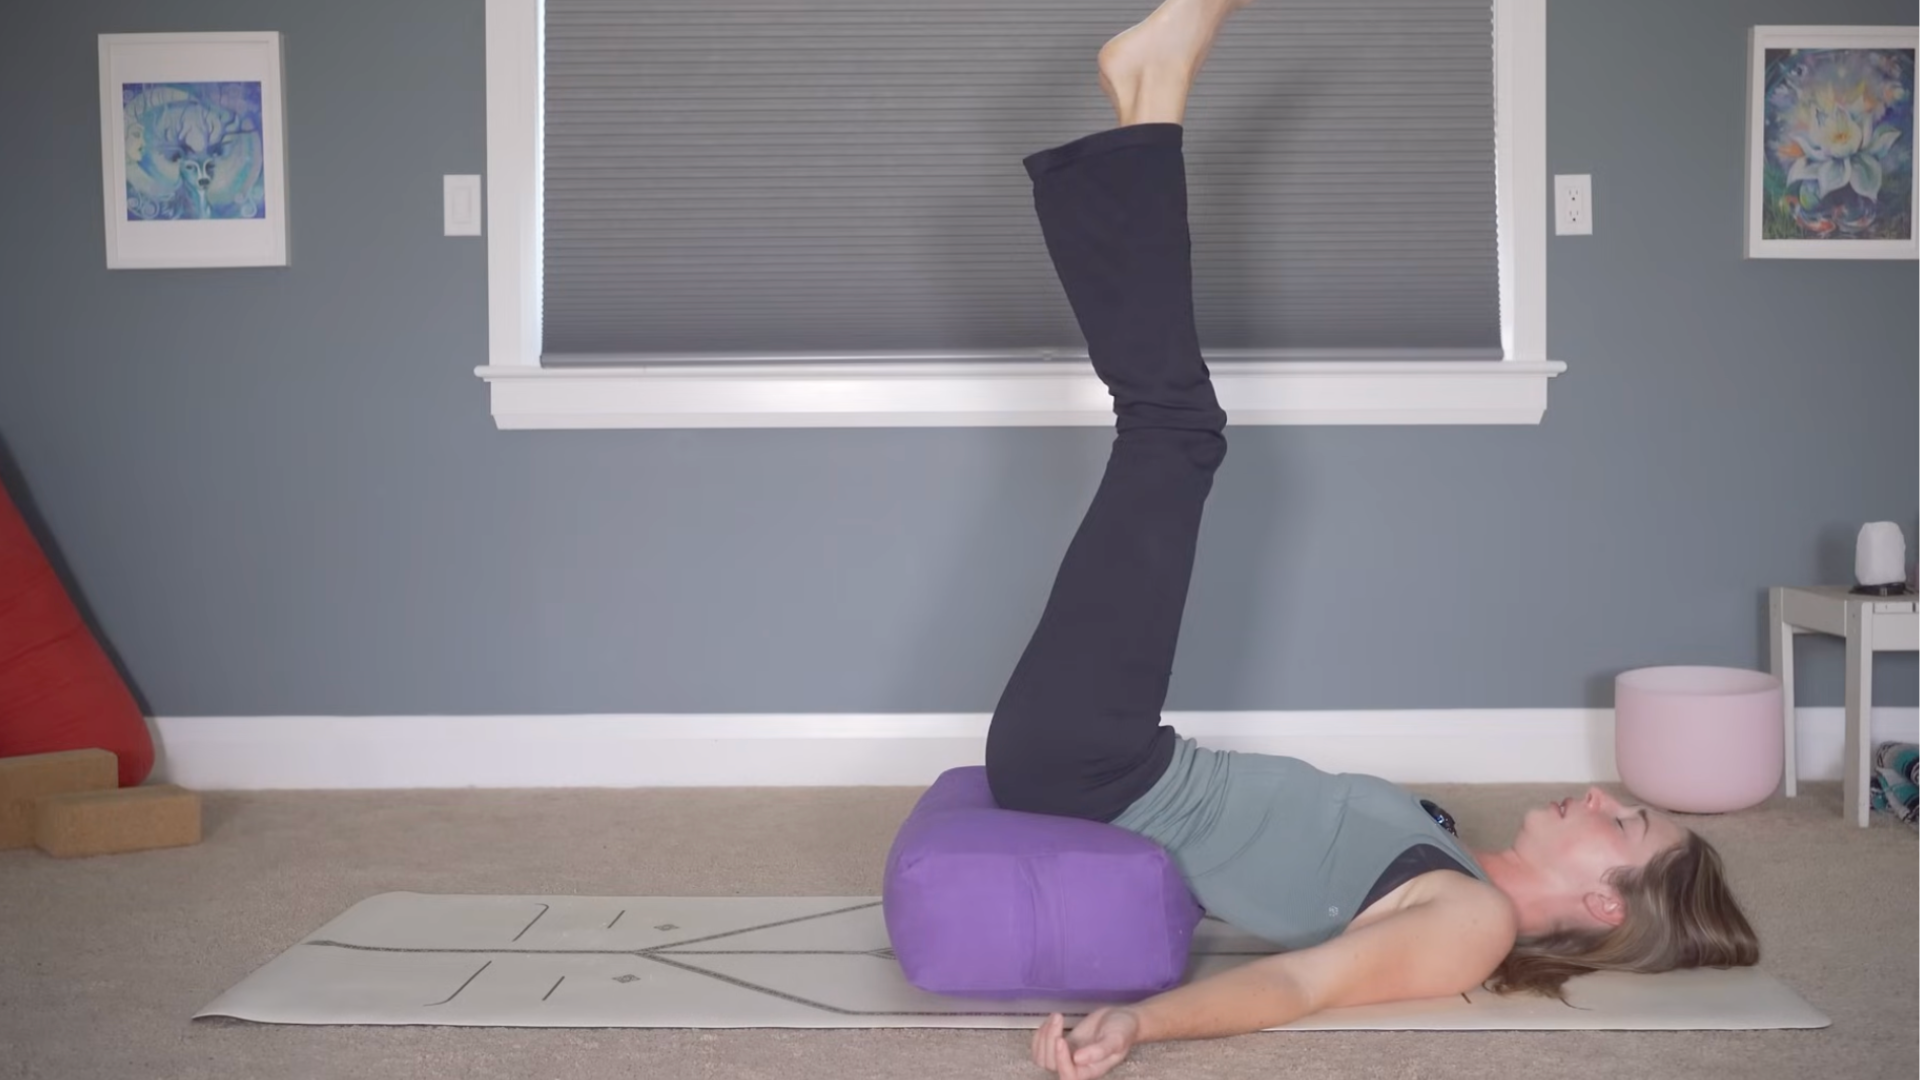
Waterfall
Keep your hips on the pillow and extend your legs straight toward the ceiling. Move your hips a little further back so that you can balance and rest a little easier. This is like Legs Up the Wall without the wall. Take a minute or two here. It can even feel good to move your ankles or flex and point your toes.
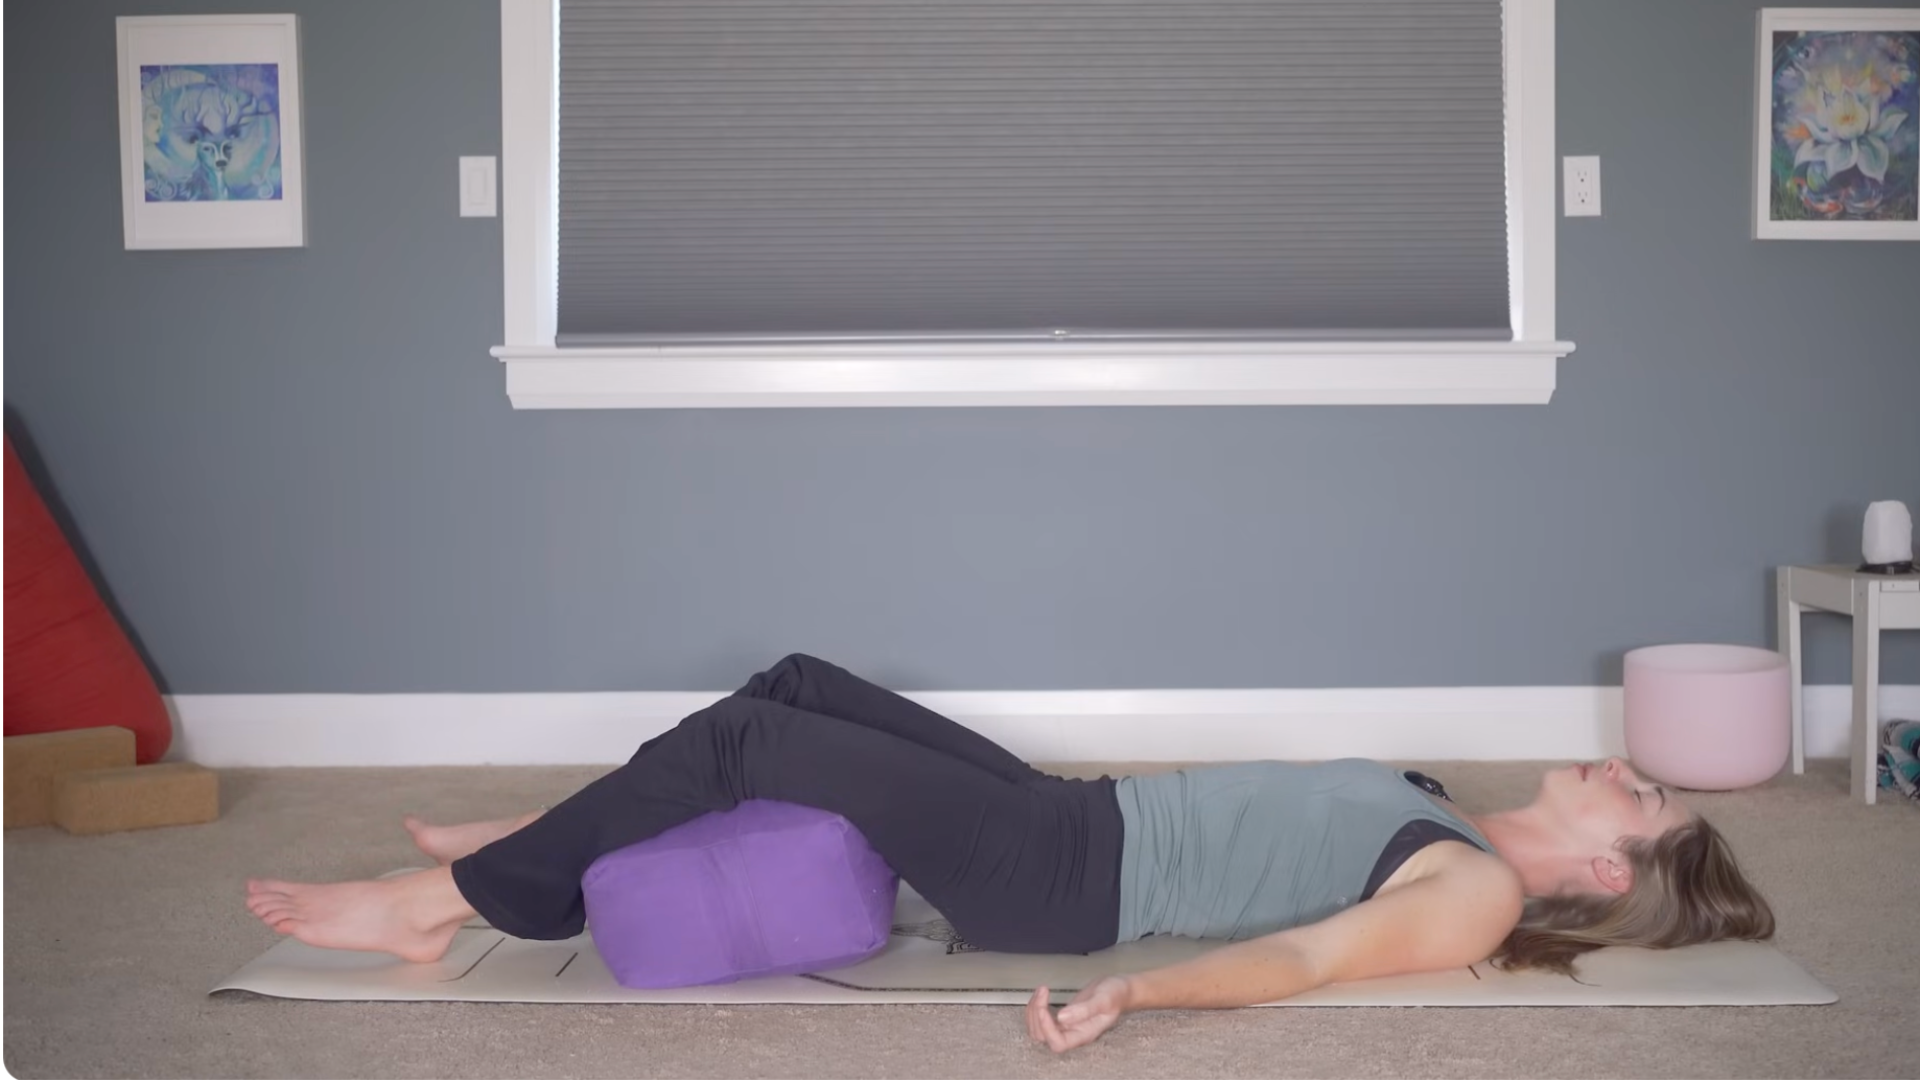
Savasana
Bend your knees and bring them to the mat, then find your Savasana. I like having the support under my knees, which can make this more comfortable in the lower back. Shrug your shoulders down and away from your ears, with palms facing the ceiling, and close your eyes. This is your real preparation for a good night’s sleep. Allow yourself to feel fully supported and held. You will stay here for the full 5 minutes.
When you’re done, if you’re already in bed, feel free to stay here. Otherwise, start deepening your breathing and moving your fingers and toes a little. You can stretch your arms above your head, maybe take the pillow out from under you and stretch out quite a bit. Then turn to the side before slowly lifting yourself onto a chair.
Once you find a comfortable sitting position, keep your eyes closed, rolling your shoulders down and away from your ears. Hopefully you will notice a sense of calm and relaxation as you take a break here.
Thank you for doing restorative and yin sleep yoga this evening excercise with me. I hope you feel good in your body and that you are ready for a wonderful night’s sleep.
#soothing #nighttime #yoga #exercise #bed